Category:TIG Welders and Do-All Vertical Bandsaw: Difference between pages

From Artisans Asylum Wiki
(Difference between pages)
No edit summary
 
No edit summary
 
Line 1: Line 1:
[[Category:Tools]][[Category:Welders]][[Category:Metal Shop]]
[[Category:Tools]][[Category:Vertical Band Saws -- Metal Cutting‏‎]]
 
Link to:[[:Category:Machine Shop | Machine Shop Main Page]]
 
{{Warning|text='''Extra precaution required for welders.''' Training / Tool Testing is essential. See [https://www.dropbox.com/scl/fi/vxp99od0h481geq45avrp/Welding-Safety.pdf?rlkey=gv6csj0p7o5n3c341w58v78vl&dl=0 Welding Safety] doc.}}


{{EyeWarning}}
{{EyeWarning}}


{{ToolBox|tool_title=TIG Welders|image=metal_shop_TIG_welder_nolabels.png|caption=TIG welder in  
{{ToolBox
the Metal Shop (Everlast 250 EX)|location=Metal Shop|training=[https://www.artisansasylum.com/class-
  |tool_title         = Do-All Vertical Band Saw
catalog Tool classes]|testing=[https://www.artisansasylum.com/tool-testing Tool  
  |tool_subtitle      = Do-All 15-inch
testing], or [[:Category:Metal Shop#Tool Testing Night|come to the shop on Tool
  |image             = Band_Saw_Do_All.png
Testing Night]]|restrictions=red|make=Various|model=Various|serial=Unknown|
  |caption           = The Do-All band saw in the Machine Shop
manufacturer_specs=n/a|manual=[[Category:MIG_Welders#Operation Notes]]|rubric=n/a|
  |make              = Do-All
tool_categories=}}
  |model              = 2013-10
  |serial            =
  |manufacturer_specs =  
  |manual            = [https://drive.google.com/file/d/1qBt49XPYsiW2hlNmfIKo9qQoE0dEjLP1/view?usp=drive_link Instruction Manual for a Similar Model]
  |location          = Machine Shop
  |rubric = N/A 
  |training          =
  |testing           = [https://www.artisansasylum.com/tool-testing Tool testing]
  |restrictions       = red
  |tool_categories    = [[:Category:Vertical Band Saws -- Metal Cutting‏‎  | See the Vertical Band Saws category for notes on using saws of this kind.]]
}}


'''Tools in this category are:'''
=Description=


[https://wiki.artisansasylum.com/wiki/Everlast_Power_TIG_200DV_TIG_Welder Everlast_Power_TIG_200DV_TIG_Welder "Artemis"]
This machine is a treasured antique.


[https://wiki.artisansasylum.com/wiki/Everlast_Power_TIG_250EX_TIG_Welder Everlast_Power_TIG_250EX_TIG_Welder "Athena"]
=Safety=


[https://wiki.artisansasylum.com/wiki/Square_Wave_TIG_175_Pro_TIG_Welder Lincoln Electric Square Wave TIG 175 Pro]
Link to:  [[:Category:Vertical_Band Saws_--_Metal_Cutting#Safety | Safety notes on the Metal-Cutting  Vertical Band Saws category page]]


[https://wiki.artisansasylum.com/wiki/Synchrowave_200_TIG_Welder Miller Syncrowave 200]
{| class="infobox" cellspacing="5" style="width: 12em; text-align: left; font-size: 100%; line-height: 1.5em;"
 
! colspan="2" class="infobox-image" | [[File:Band_Saw_Do_All_self_docu.jpg|180px| Do-all_self_docu]]
'''Equipment Manuals are available for these tools:'''
|-
 
| colspan="2" | This machine is largely self-documenting.
Link to: [https://drive.google.com/file/d/13Jkc7Ye9_a6WHaaFbaToUt9ko2UGP0Lv/view?usp=drive_link TIG 200DV Manual]
|-
 
|}
Link to: [https://drive.google.com/file/d/1xQA9Iqqm45rfG4BD2cN5b5ezIWicYxtQ/view?usp=drive_link 250EX Manual]
=Operation=
 
Link to: [https://drive.google.com/file/d/1FnM4Hc6KAvR8e_cYMpZThZ90LaucveyI/view?usp=drive_link Square Wave 175 Pro Manual]
 
Link to: [https://drive.google.com/file/d/1xvyn7y0exuV-A-n6i5LjVQ48Nj77KT52/view?usp=drive_link Synchrowave 200 Manual]
 
==Use for:==
 
* Most metals: Steel, stainless, aluminum, titanium, etc.
 
*  '''The shop provides consumables for mild steel''' (filler wire, 2% thoriated tungsten). Users provide consumables for other metals.
 
* See corresponding manufacture manual for each welder’s stick welding capabilities.


==Do Not Use for:==
The Do-All is extravagantly decorated with hipster stickers and reminders that instruct the operator what to do.


* Galvanized, plated, painted, oiled, rusted, or powder coated metals.
==Power==


== Safety Hazards ==
To start the saw, find the power buttons on the back of the machine.


{| class="infobox" cellspacing="0" style="width: 2em; text-align: left; font-size: 125%; line-height: 1.5em;"
{| class="infobox" cellspacing="5" style="width: 12em; text-align: left; font-size: 100%; line-height: 1.5em;"
! colspan="2" class="infobox-image" | [[File:Helmet_gloves.png|60px| ]]
! colspan="2" class="infobox-image" | [[File:Band_Saw_Do_All_power_switch.png|180px| Do-all_ power switch]]
|-
|-
| colspan="2" |   
| colspan="2" |  The power switch is around back.
|-
|-
|}
|}
==Speed Selection==


1.  '''UV damage to eyes.''' Welding Helmet with shade 10 protection or darker is required.  Darker for heavier applications.
The machine is usually set to cut mild steel, for other materials it may be necessary to change the blade speed.
 
2.  '''UV burns on exposed skin.''' The rays from the arc can cause severe radiation burn (worse than sunburn.) Cover exposed skin.


3.  '''Burns''' from flame, sparks, hot workpieces. Wear welding gloves, cotton clothing (no synthetics) and closed toe shoes.
{| class="infobox" cellspacing="5" style="width: 12em; text-align: left; font-size: 100%; line-height: 1.5em;"
 
! colspan="2" class="infobox-image" | [[File:Band_Saw_Do_All_All_Human_Knowledge.jpg|200px| Do-all speed calculator]]
4.  '''Poisoning''' from breathing gases produced by welding. Use ventilation. ''Do not stick head in fumes.''  Respirator recommended.
 
5.  Keep workplace '''clear of flammable materials''' including grease, oil, solvents, paper.
 
6.  '''Electrocution''' if welder is mishandled. Do not weld near puddles of water on floor or work area, especially when using AC output.
 
'''* Various safety links to keep you awake at night:'''
 
[https://www.ccohs.ca/oshanswers/safety_haz/welding/fumes.html Welding Fumes]
 
[https://drive.google.com/file/d/1JhZD70dLc5An9kkOP-_mw2djQo7XmOMj/view?usp=drive_link Metal Fume Fever]
 
[https://drive.google.com/file/d/18Zx1zASVo6tKrjcym8Dba0d35DM5OXW8/view?usp=drive_link Hexavalent Chromium]
 
[https://drive.google.com/file/d/1WoYK1vVHJLuaoRHqeJEC6zsi2RgVmj4I/view?usp=drive_link ANSI - General Safety in Welding and Cutting]
 
==Operation Notes==
 
* '''Solvent based metal cleaning should be done with Simple Green or other low-intensity cleaners.'''
 
* '''No brake cleaner.''' Brake cleaner contains chlorinated hydrocarbons that create '''phosgene gas''' when combined with UV light.  ''Ventilation will not prevent poisoning.''
 
* Abrasive cleaning methods are also appropriate.
 
{| class="infobox" cellspacing="5" style="width: 22em; text-align: left; font-size: 100%; line-height: 1.5em;"
! colspan="2" class="infobox-image" | [[File:Metal_shop_TIG_welder_labels.png|300px|TIG welder]]
|-
|-
| colspan="2" | TIG welder in the Metal Shop
| colspan="2" | This tool was bequeathed to us by our ancestors.  May it serve you well.
|-
|-
|}
|}


* The Shop supplies TIG welding consumables intended for use on mild steel. Users are responsible for providing consumables for other metals.
* The first step is to find what speed is needed.  
 
* Shop’s TIG welders use 100% Argon Gas.
 
* Beware of mild shock from work table or workpiece if Ground Clamp not attached.
 
==Set-Up Procedure==
 
'''1.  Safety First'''
 
* Turn on welding bay ventilation.
 
* Remove flammable materials and water from welding area.


* Protect bystanders from the arc-flash, If you can’t depend on the protective vinyl flaps on the welding bays, use welding screens.
Blade speed data may be found from a wide variety of sources.  Although it isn't as clear as others, the Do-All has a mechanism on its side panel that is well worth examining.  It shows how your great-grandparents did these things.  Devices like this are as rare as they are baffling.


* Make sure the workpiece is clean before welding. Flammable substances such as grease and oil can ignite.
* Next the operator checks the current blade speed. An indicator on the lower left side of the machine reads in feet per minute.


'''2.  Attach the ground clamp''' to bare metal on the work table. If the workpiece is too large for the work table, clamp the workpiece.
This indicator only registers while the machine is running.


'''3.  Outfit your work space'''
{| class="infobox" cellspacing="5" style="width: 12em; text-align: left; font-size: 100%; line-height: 1.5em;"
{| class="infobox" cellspacing="5" style="width: 22em; text-align: left; font-size: 100%; line-height: 1.5em;"
! colspan="2" class="infobox-image" | [[File:Band_Saw_Do_All_speed_adjustment.png|140px| Do-all speed adjust]]
! colspan="2" class="infobox-image" | [[File:Metal_shop_TIG_welder_torch_exploded.png|300px|TIG torch]]
|-
|-
| colspan="2" | Exploded view of the TIG torch assembly
| colspan="2" | The crank is almost invisible around the back of the machine.
|-
|-
|}
|}


* '''Filler wire''' is available in the rack on the middle toolbar, outside the two large welding bays.
{| class="infobox" cellspacing="5" style="width: 12em; text-align: left; font-size: 100%; line-height: 1.5em;"
 
! colspan="2" class="infobox-image" | [[File:Band_Saw_Do_All_speed_indicator.png|220px| Do-all speed indicator]]
* '''Check the torch head.'''
 
Spare torch parts are kept in the Shop’s supply cabinet.
 
If necessary, insert a fresh tungsten electrode. Tungstens are sharpened on a dedicated pedestal grinder. '''Remember to remove gloves when using the grinder.'''
 
* Assemble other accessories as needed (clamps, magnets, wood TIG blocks, receptacle for hot trash, emergency water bottle (for burn first aid).
 
'''4.Check to see if the welder has been shut down properly.'''
 
* Is the power shut off?
 
* Is the gas shut off at the cylinder valve?
 
'''5.  Plug the machine in and turn on.'''
 
'''6.  Turn the gas on.'' If needed, adjust the pressure.
 
* '''SLOWLY crack the tank valve counterclockwise.''' Watch the regulator needle jump, and check that the needle has stopped moving before opening the valve (about half a turn). This procedure lessens the impact of the initial jump in pressure on the regulator, reducing wear and tear.
 
* Check the regulator dial to make sure the working gas pressure matches the recommendation listed on the shop tag attached to the regulator. Adjust if needed.
 
Note: if the welder has not been shut down properly by the previous user and the working pressure needs to be lowered, hold the Torch Head away from the workbench (more than 12 inches) and step on the foot control to lower the line pressure and receive an accurate pressure reading.
 
'''7.  Adjust the machine’s settings as necessary for the welding project.'''
 
* '''For welding steel, set to DC negative.'''
 
*  '''Set Amperage.''' This setting determines the maximum Amperage when the Foot Petal is fully depressed. (User provides Amperage control through Foot Petal use.)
 
* When welding steel on the Lincoln Electric Square Wave 175 Pro (red machine), make sure the switch on the front panel is flipped to “TIG,” and the large lever is on “DC —” (or DC Negative). AC polarity is recommended for TIG welding aluminum.
 
'''8.  Test the settings on a piece of scrap metal before proceeding to your project.'''
 
==Shut-Down Procedure==
 
'''1.  Shut the gas off at the source.''' Turn the cylinder valve clockwise.
 
'''2.  No need to bleed the lines.''' The Shop’s TIG welders use 100% Argon gas, which is non-corrosive.
 
'''3.  Flip the machine’s power switch to “off.” '''
 
'''4.  If no one is using the nearby bays, turn the ventilation off.'''
 
{| class="infobox" cellspacing="5" style="width: 22em; text-align: left; font-size: 100%; line-height: 1.5em;"
! colspan="2" class="infobox-image" | [[File:Metal_shop_TIG_welder_tungsten_grinding.png|500px|Tungsten grinding]]
|-
|-
| colspan="2" | Incorrect and correct grinding of Tungsten electrodes.
| colspan="2" | Feet per minute.  Note only the '''LOW''' speed range is available.
|-
|-
|}
|}
'''5.  Return any unusual settings to for the next user.''' (Make sure on DC Neg., and “Pulse” turned off.)
'''6.  Loosely Coil the torch cord and store on the work table’s torch hook.'''
'''7.  Sharpen used Tungsten.''' Put away all tools and workplace accessories. Clean the work area.
1 - Use the shop’s dedicated pedestal grinder to sharpen / clean end of the tungsten electrode prior to welding.
2 - Grind longitudinally, not tangentially.
3 - Flat tip. Diameter of this flat determines amperage capacity.


==Videos==
* To change the speed the operator must reach around the left side of the machine and find a crank down near the bottom.


[https://www.youtube.com/watch?v=CWoam95PVCE Destruction caused by a broken cylinder valve]
This crank must '''ONLY''' be turned when the machine is running. It uses a similar linkage to the spindle transmissions in a vertical milling machine.


[https://www.youtube.com/watch?v=ejEJGNLTo84 Mythbusters episode on gas cylinder rocketry]
* Another crank located behind the machine is clamped down because it is no longer used. This was formerly a lever to change the speed range from "LOW" to "HIGH."  On this machine the "HIGH" speed range has been disabled.

Revision as of 21:17, 16 March 2024

Link to: Machine Shop Main Page

Warning Safety glasses Eye protection required!


Do-All Vertical Band Saw
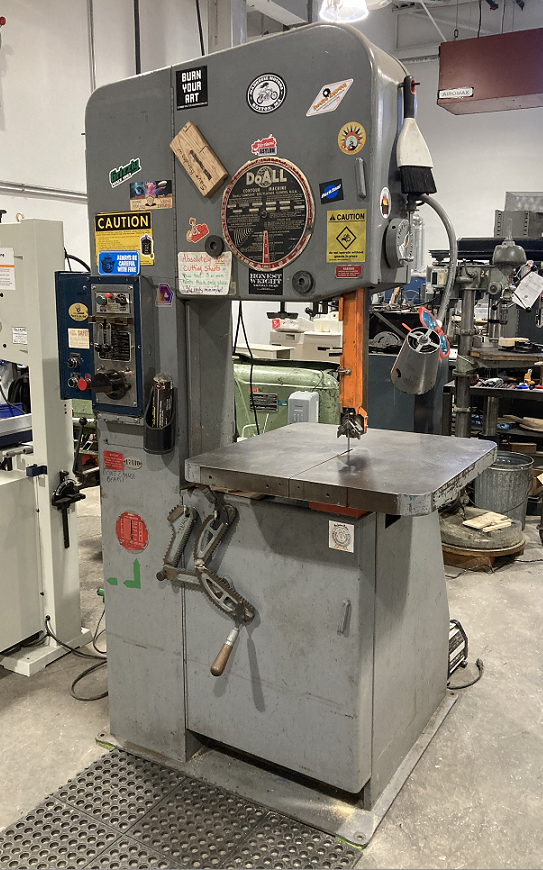
The Do-All band saw in the Machine Shop
General Info
Make Do-All
Model 2013-10
Serial
Specs
Manual Instruction Manual for a Similar Model
Asylum Info
Location Machine Shop
Rubric N/A
Training
Testing Tool testing
Restrictions red

See the Vertical Band Saws category for notes on using saws of this kind.


Description

This machine is a treasured antique.

Safety

Link to: Safety notes on the Metal-Cutting Vertical Band Saws category page
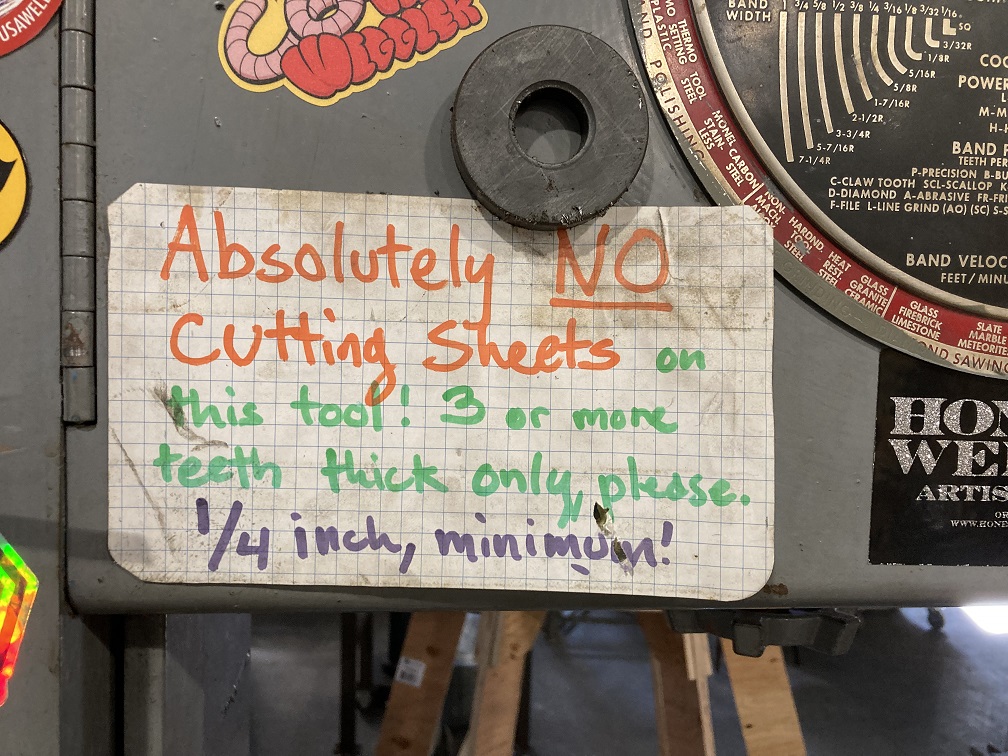
Do-all_self_docu
This machine is largely self-documenting.

Operation

The Do-All is extravagantly decorated with hipster stickers and reminders that instruct the operator what to do.

Power

To start the saw, find the power buttons on the back of the machine.
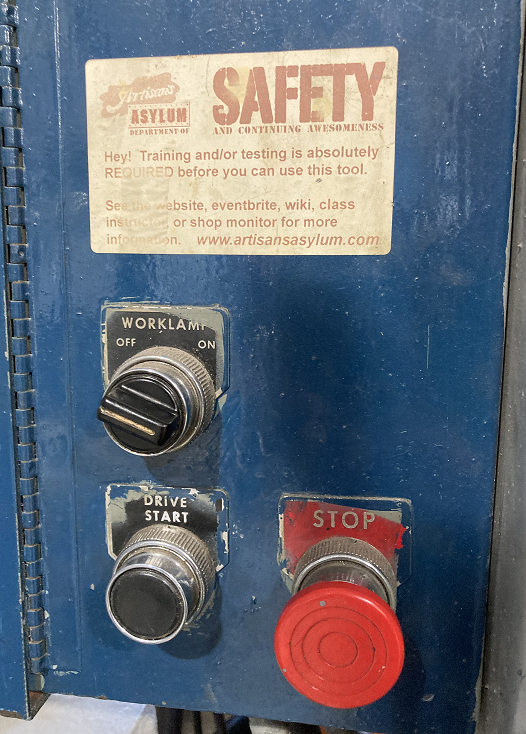
Do-all_ power switch
The power switch is around back.

Speed Selection

The machine is usually set to cut mild steel, for other materials it may be necessary to change the blade speed.
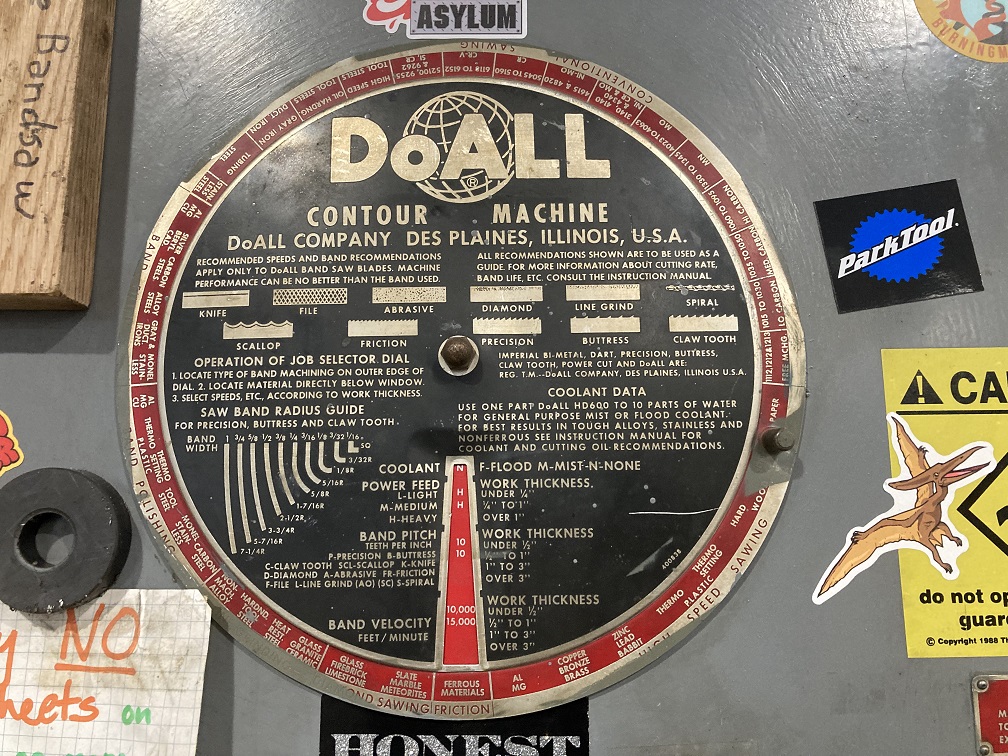
Do-all speed calculator
This tool was bequeathed to us by our ancestors. May it serve you well.
  • The first step is to find what speed is needed.

Blade speed data may be found from a wide variety of sources. Although it isn't as clear as others, the Do-All has a mechanism on its side panel that is well worth examining. It shows how your great-grandparents did these things. Devices like this are as rare as they are baffling.

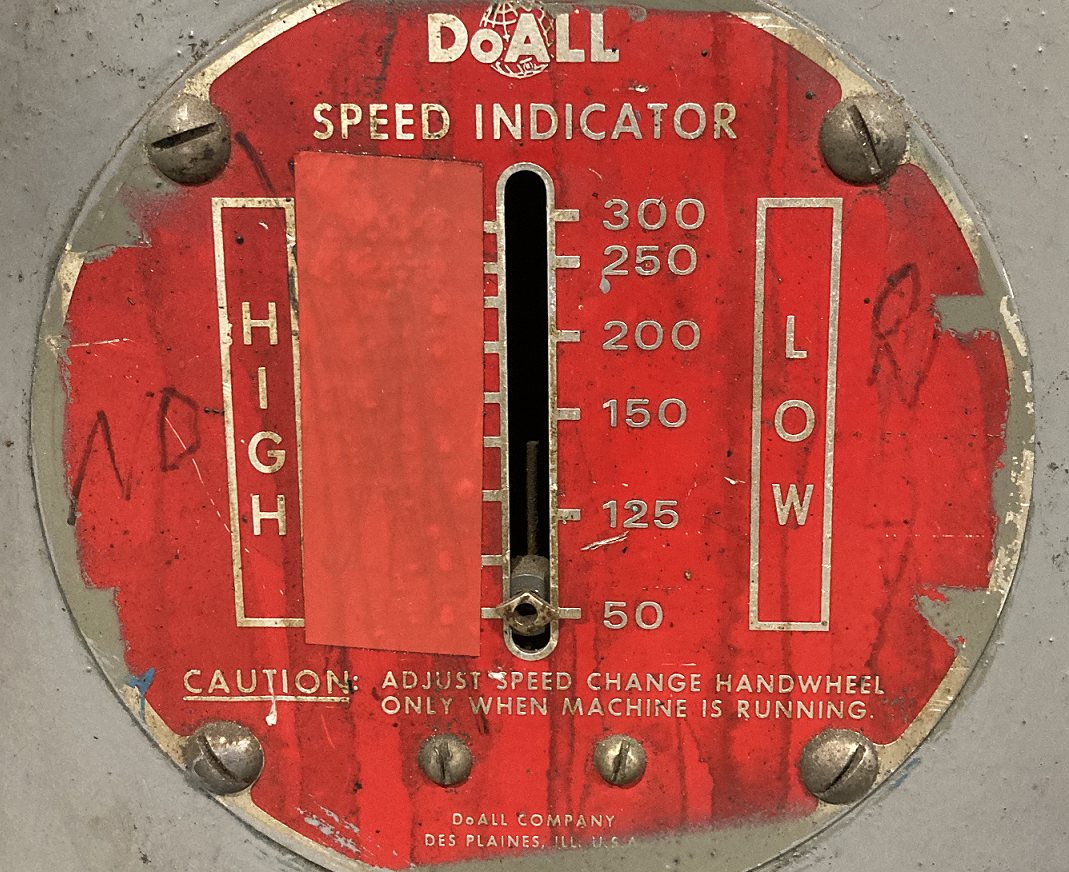
  • Next the operator checks the current blade speed. An indicator on the lower left side of the machine reads in feet per minute.

This indicator only registers while the machine is running.
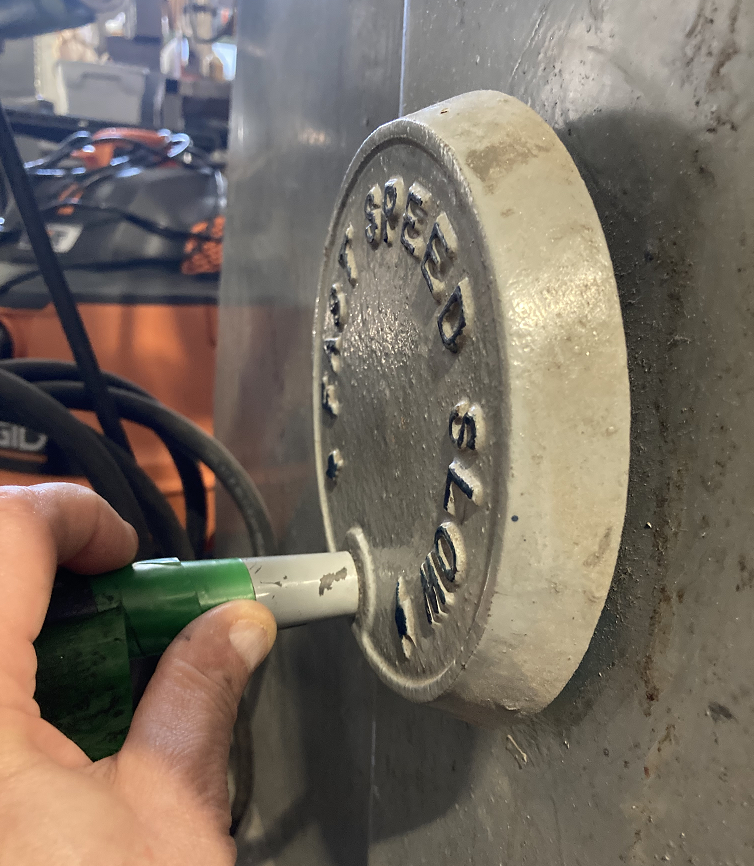
Do-all speed adjust
The crank is almost invisible around the back of the machine.
Do-all speed indicator
Feet per minute. Note only the LOW speed range is available.
  • To change the speed the operator must reach around the left side of the machine and find a crank down near the bottom.

This crank must ONLY be turned when the machine is running. It uses a similar linkage to the spindle transmissions in a vertical milling machine.

  • Another crank located behind the machine is clamped down because it is no longer used. This was formerly a lever to change the speed range from "LOW" to "HIGH." On this machine the "HIGH" speed range has been disabled.

Subcategories

This category has only the following subcategory.

Pages in category "TIG Welders"

The following 4 pages are in this category, out of 4 total.