Brackets Tutorial 1: Solidworks From Zero: Difference between revisions
From Artisans Asylum Wiki
No edit summary |
No edit summary |
||
| Line 4: | Line 4: | ||
{| class="infobox" cellspacing="5" style="width: 2em; text-align: left; font-size: 100%; line-height: 1.5em;" | {| class="infobox" cellspacing="5" style="width: 2em; text-align: left; font-size: 100%; line-height: 1.5em;" | ||
! colspan="2" class="infobox-image" | [[File:SW_fromzero_1_new_part.png|700px|new part window]] | ! colspan="2" class="infobox-image" | [[File:SW_fromzero_1_new_part.png|700px|center|new part window]] | ||
|- | |- | ||
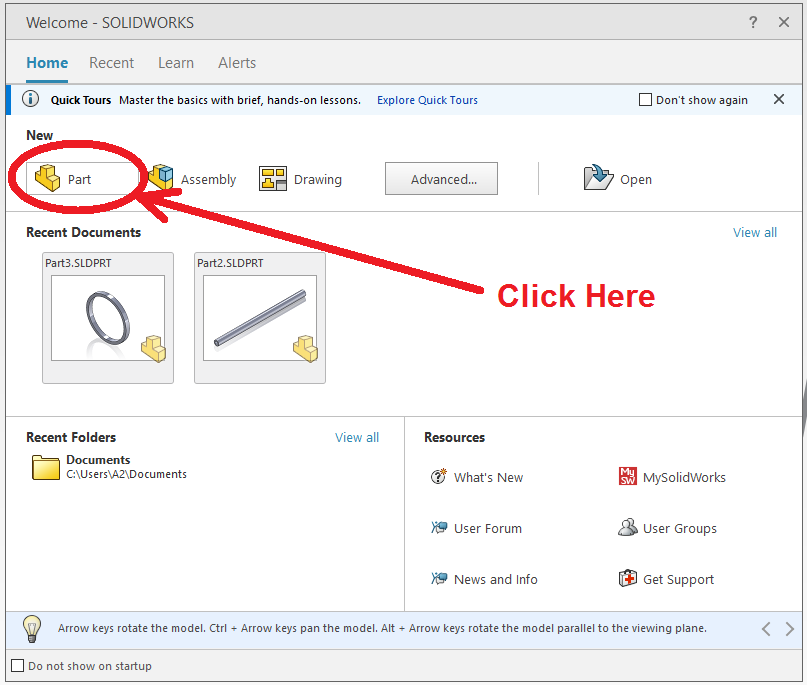
| colspan="2" | The Start Window in Solidworks. | | colspan="2" | The Start Window in Solidworks. | ||
|- | |- | ||
|} | |} | ||
When you load Solidworks, the first screen you see is shown here. Select "Part" to create a new design for a part. | When you load Solidworks, the first screen you see is shown here. Select "Part" to create a new design for a part. | ||
Revision as of 18:23, 6 June 2024
Link to: Bracketage Main Page
This tutorial assumes no prior experience with Solidworks.
| The Start Window in Solidworks. |
When you load Solidworks, the first screen you see is shown here. Select "Part" to create a new design for a part.

| |
|---|---|
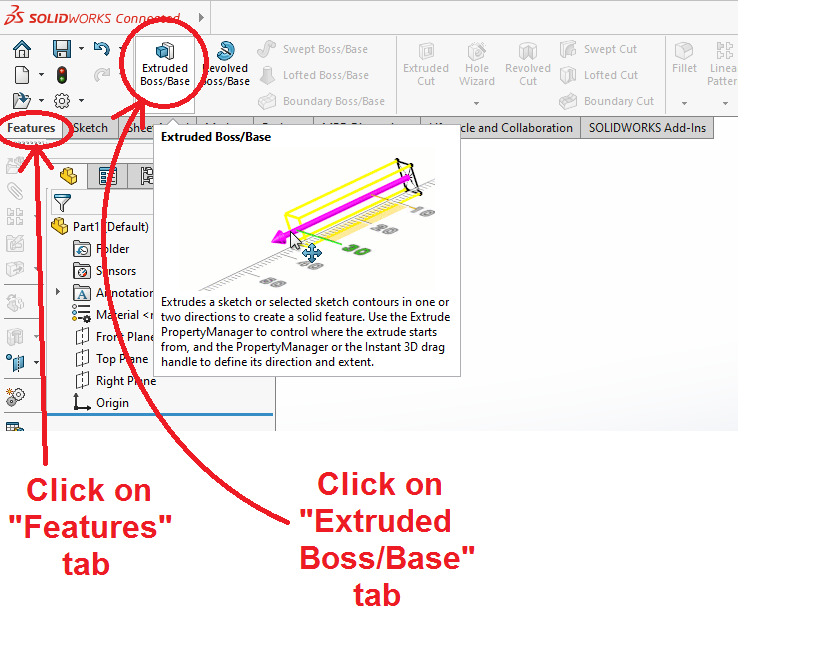
| The Extrusion Feature |
