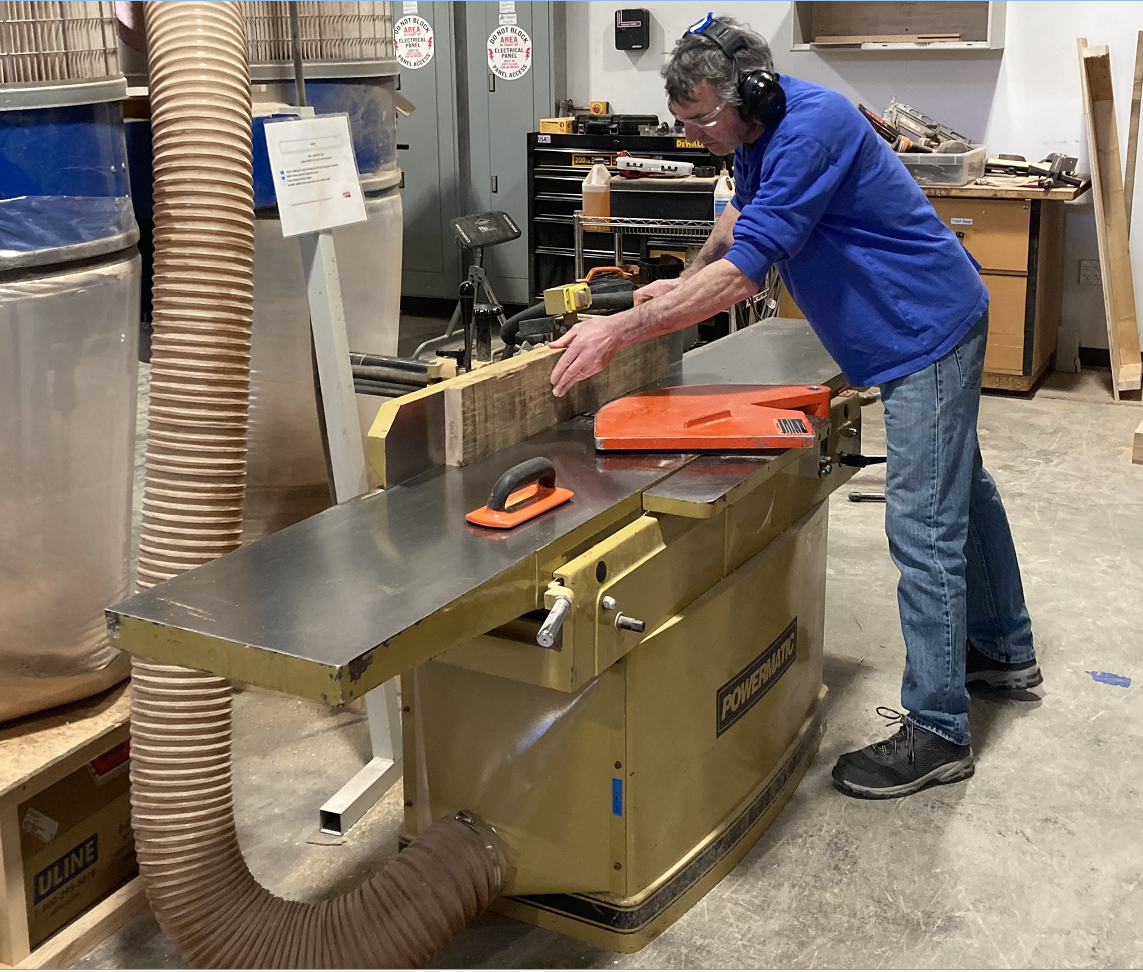
Powermatic PJ1696 Jointer: Difference between revisions
No edit summary |
No edit summary |
||
| (8 intermediate revisions by the same user not shown) | |||
| Line 1: | Line 1: | ||
[[Category:Tools]][[Category:Wood Shop]] | [[Category:Tools]] | ||
Link to: [[:Category:Wood Shop | Wood Shop main page]] | |||
{{ToolBox | {{ToolBox | ||
| Line 10: | Line 11: | ||
|serial = Unknown | |serial = Unknown | ||
|manufacturer_specs = | |manufacturer_specs = | ||
|manual = [ | |manual = [[media: Jointer_Powermatic_PJ1696_16_inch_Manual.pdf | Jointer User Manual]] | ||
|location = Wood Shop | |location = Wood Shop | ||
|rubric = | |rubric = | ||
| Line 22: | Line 23: | ||
{{EyeWarning}} | {{EyeWarning}} | ||
==Description== | |||
A jointer has a similar architecture to a table saw. Workpieces are fed by hand on a flat table and a rotating cutter projects through the table top. Unlike a table saw, the jointer cutter is cylindrical and mills the bottom surface of the workpiece to flatten it out. | |||
==Use For== | ==Use For== | ||
| Line 28: | Line 33: | ||
Length > 8 inches | Length > 8 inches | ||
{| class="infobox" cellspacing="5" style="width: 12em; text-align: left; font-size: 100%; line-height: 1.5em;" | {| class="infobox" cellspacing="5" style="width: 12em; text-align: left; font-size: 100%; line-height: 1.5em;" | ||
! colspan="2" class="infobox-image" | [[File:Jointer_nolabels.jpg| | ! colspan="2" class="infobox-image" | [[File:Jointer_nolabels.jpg|320px|Jointer nolabels]] | ||
|- | |- | ||
| colspan="2" | The | | colspan="2" | The Powermatic Jointer waiting to be used | ||
|- | |- | ||
|} | |} | ||
{| class="infobox" cellspacing="5" style="width: 12em; text-align: left; font-size: 100%; line-height: 1.5em;" | {| class="infobox" cellspacing="5" style="width: 12em; text-align: left; font-size: 100%; line-height: 1.5em;" | ||
! colspan="2" class="infobox-image" | [[File:Jointer_knife_rotor.png| | ! colspan="2" class="infobox-image" | [[File:Jointer_knife_rotor.png|220px|Jointer knives]] | ||
|- | |- | ||
| colspan="2" | KNIVES | | colspan="2" | WHIRLING KNIVES! | ||
|- | |- | ||
|} | |} | ||
Width > 3/4" | |||
''Wood with uneven grain requires special care.'' | |||
==Do Not Use For== | |||
Fiberboard | |||
Plastics | Plastics | ||
| Line 118: | Line 123: | ||
2. Turn the cutter head until one row of knives is at its highest point. | 2. Turn the cutter head until one row of knives is at its highest point. | ||
3. Lower the outfeed table until the straight edge contacts a knife blade. Rock the head slightly to make sure the apex of the knife is contacting the straight edge. | |||
4. Lock the outfeed table at this setting. | |||
{| class=" | {| class="wikitable" | ||
|+ Jointer Outfeed Table Height | |||
|- | |- | ||
! Too high !! Just right !! Too low | |||
! | |||
|- | |- | ||
| | | Workpiece curved on bottom || Workpiece flat on bottom || Workpiece gouged at end | ||
|- | |- | ||
| [[File:Jointer_outfeed_high.png|350px]] || [[File:Jointer_outfeed_correct.png|350px]] || [[File:Jointer_outfeed_low.png|350px]] | |||
|} | |} | ||
Revision as of 11:54, 22 March 2024
Link to: Wood Shop main page
| Powermatic 16" Jointer | |
|---|---|
| General Info | |
| Make | Powermatic |
| Model | PJ1696 |
| Serial | Unknown |
| Specs | |
| Manual | Jointer User Manual |
| Asylum Info | |
| Location | Wood Shop |
| Rubric | |
| Training | |
| Testing | |
| Restrictions | red |
This is a RED tool. Training and tool-testing are required.
| Eye protection required! | ||
|---|---|---|
Description
A jointer has a similar architecture to a table saw. Workpieces are fed by hand on a flat table and a rotating cutter projects through the table top. Unlike a table saw, the jointer cutter is cylindrical and mills the bottom surface of the workpiece to flatten it out.
Use For
Wooden boards only
Length > 8 inches
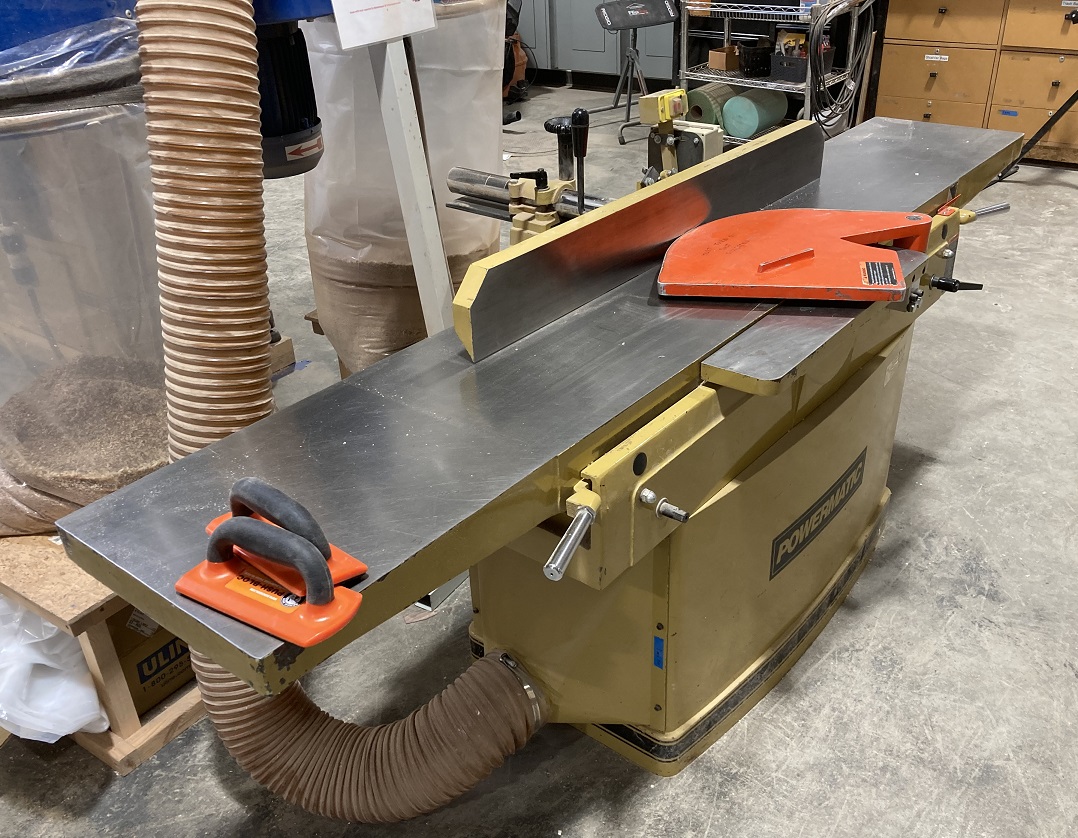
| |
|---|---|
| The Powermatic Jointer waiting to be used |
| |
|---|---|
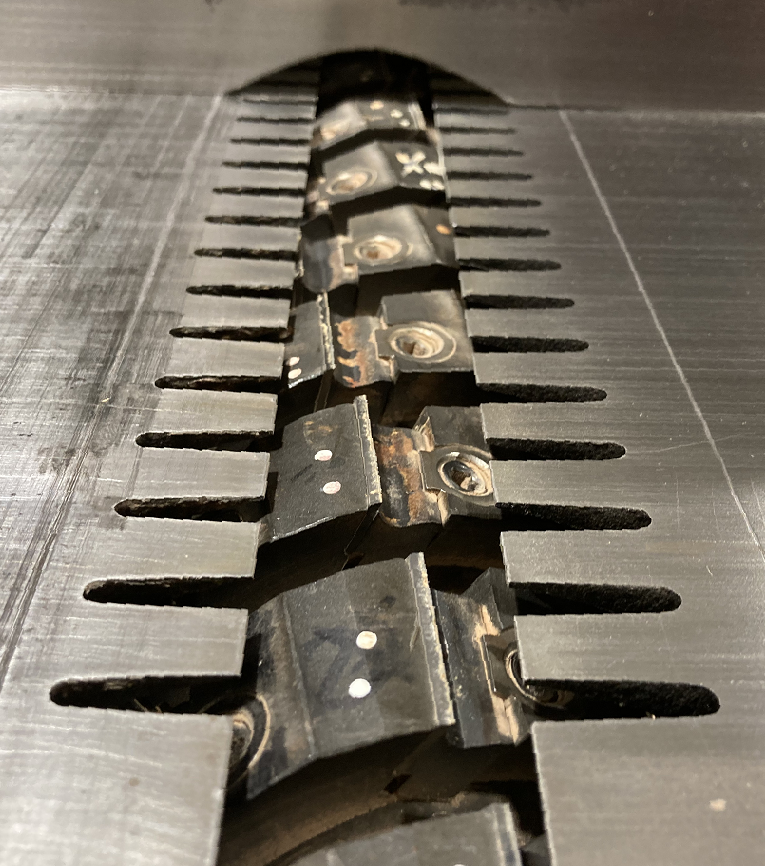
| WHIRLING KNIVES! |
Width > 3/4"
Wood with uneven grain requires special care.
Do Not Use For
Fiberboard
Plastics
Composites
Metals
Safety Notes
Personal:
| |
|---|---|
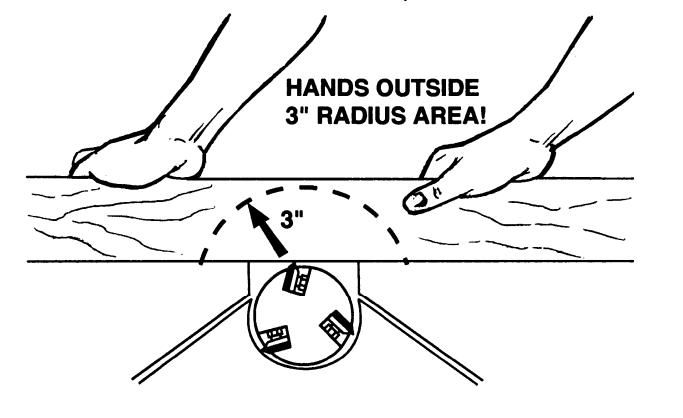
| Don't chop off your fingers! |
| |
|---|---|
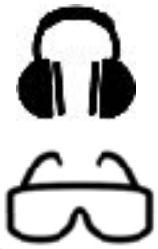
- Eye protection required
- Hearing protection recommended
- No loose clothing or jewelry, roll up sleeves above the elbows.
- Tie up or cover long hair
- Closed-toe shoes with good traction.
Tool:
- Make sure the guards are in place and working well.
- Switch on the Dust Collector: Coral AF/2C free-standing 2-filter between the 1696 Jointer and the 201 Planer ("The Beast".)
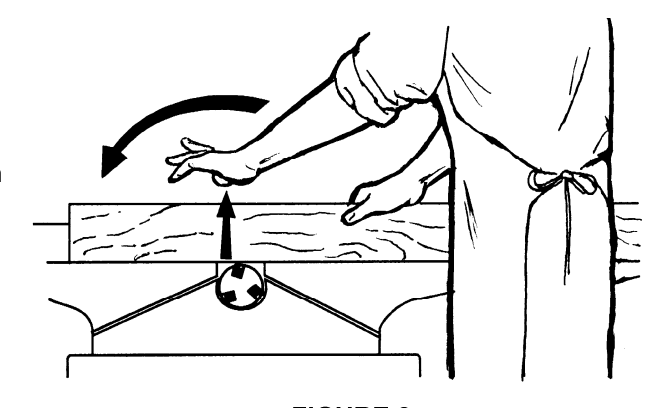
- Keep hands at least 3 inches away from the blades at all times.
| |
|---|---|
| Shift hands during cut. MAINTAIN PRESSURE ON THE WORKPIECE. |
- Don't cut wood less than 8" long, 3/4" wide or 1/4" thick.
- For wood less than 12" long, 3" wide and 3" thick, a hold-down or push block is required
- Never apply pressure to stock directly above the cutter head. This can lead to the stock tipping into the cutter.
- Wood grain must run in the direction of the cutting.
- Never make cuts greater then 1/8" deep
- Do NOT wear gloves
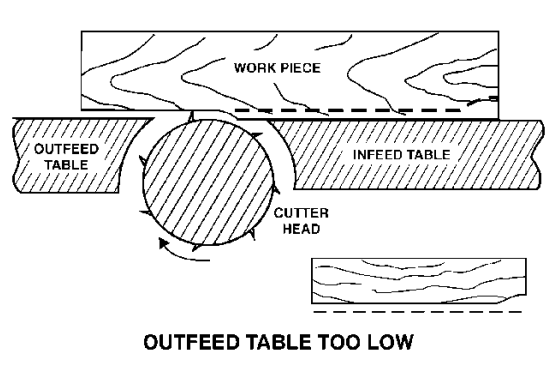
Setting the Outfeed Table Height
1. Raise the outfeed to its highest point and place a straight edge across the cutter.
2. Turn the cutter head until one row of knives is at its highest point.
3. Lower the outfeed table until the straight edge contacts a knife blade. Rock the head slightly to make sure the apex of the knife is contacting the straight edge.
4. Lock the outfeed table at this setting.
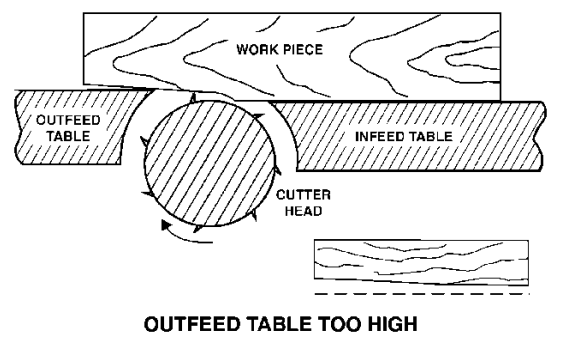
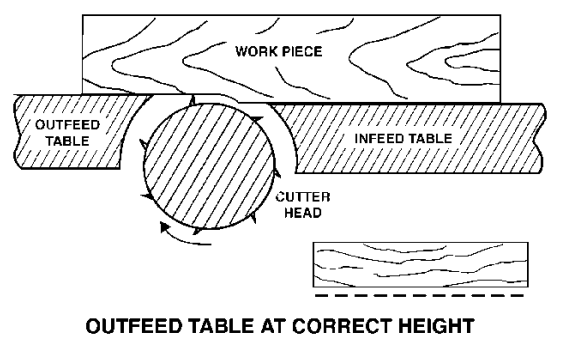
| Too high | Just right | Too low |
|---|---|---|
| Workpiece curved on bottom | Workpiece flat on bottom | Workpiece gouged at end |
 |
 |
|
