Category:Drill Presses: Difference between revisions
No edit summary |
Tag: Manual revert |
||
| (19 intermediate revisions by the same user not shown) | |||
| Line 47: | Line 47: | ||
Material that is unsuitable to the shop where the tool is located. | Material that is unsuitable to the shop where the tool is located. | ||
==Machines at | ==Machines at Artisans Asylum== | ||
Artisans Asylum has nine drill presses distributed in various shops around the Antwerp St. building. | Artisans Asylum has nine drill presses distributed in various shops around the Antwerp St. building. | ||
| Line 60: | Line 60: | ||
{| class="wikitable" | {| class="wikitable" | ||
|+ | |+ Drill Presses in Other Locations | ||
|- | |- | ||
! [[:Drill Press | ! [[:Dake Drill Press | Dake SB-32V (2 Units)]] !! [[Drill Press Morgan | Morgan MD-80A]] !! [[Drill Press Walker Turner | Walker-Turner]] !! [[Drill Press SKUL DP02 | SKUL DP02]] | ||
|- | |||
| Metal Shop and Machine Shop || Metal Shop || Machine Shop || Bike Shop | |||
|- | |- | ||
| [[File:Dake_drill_press_nolabels_cropped.png|200px]] || [[File: | | [[File:Dake_drill_press_nolabels_cropped.png|200px]] || [[File:drill_press_morgan_nolabels_wide.png|200px]] || [[File:drill_press_walker_turner_nolabels.png|200px]] || [[File:drill_press_skul_dp02_nolabels.png|200px]] | ||
|} | |} | ||
==Parts of a Drill Press== | ==Parts of a Drill Press== | ||
| Line 152: | Line 128: | ||
* Don't use damaged tools or tools with a shank diameter that exceeds the size of the chuck. | * Don't use damaged tools or tools with a shank diameter that exceeds the size of the chuck. | ||
* Be sure of the recommended cutting speeds. | {| class="infobox" cellspacing="5" style="width: 22em; text-align: left; font-size: 100%; line-height: 1.5em;" | ||
! colspan="2" class="infobox-image" | [[File:Drill_press_speed_chart.png|420px|Drill speed chart]] | |||
|- | |||
| colspan="2" | Recommended spindle speeds for various drill sizes and materials. From the Dake user manual. | |||
|- | |||
|} | |||
* '''Be sure of the recommended cutting speeds.''' | |||
- Cutting metal with the wrong speed can break tools or cause work-hardening in the workpiece. | - Cutting metal with the wrong speed can break tools or cause work-hardening in the workpiece. | ||
| Line 182: | Line 165: | ||
For drilling metal, mark the hole with a punch before drilling. Otherwise, the drill tip can walk around on the metal surface. | For drilling metal, mark the hole with a punch before drilling. Otherwise, the drill tip can walk around on the metal surface. | ||
{| class="infobox" cellspacing="5" style="width: 22em; text-align: left; font-size: 100%; line-height: 1.5em;" | {| class="infobox" cellspacing="5" style="width: 22em; text-align: left; font-size: 100%; line-height: 1.5em;" | ||
! colspan="2" class="infobox-image" | [[File:twist_drill_set.png|420px|Drill set]] | ! colspan="2" class="infobox-image" | [[File:twist_drill_set.png|420px|Drill set]] | ||
| Line 196: | Line 178: | ||
|- | |- | ||
|} | |} | ||
==Cleanup== | |||
* Remove drill bit from the chuck, wipe, and put away. | |||
* Remove fixturing from the table, clean, and put away. Vises can stay on the table. | |||
* Start from the highest dirty point on the machine and clean up wood or metal chips. On a drill press this will be the table. Wipe it off and clean metal chips from the slots | |||
* Clean wood or metal chips and spilled cutting oil from the base. | |||
* Sweep around the machine. | |||
==Tools to Use on a Drill Press== | |||
'''Twist Drills''' | '''Twist Drills''' | ||
| Line 208: | Line 205: | ||
|- | |- | ||
|} | |} | ||
'''Step Drills''' | '''Step Drills''' | ||
As mentioned above, | As mentioned above, these are primarily for cutting thin sheet metal, though thicker metal can be cut too. Wood is also possible but suboptimal. | ||
'''Wood-Cutting Bits''' | '''Wood-Cutting Bits''' | ||
Latest revision as of 12:15, 8 July 2024
| Drill Press | |
|---|---|
| General Info | |
| Make | various |
| Model | |
| Serial | |
| Specs | |
| Manual | |
| Asylum Info | |
| Location | Wood Shop |
| Rubric | |
| Training | |
| Testing | |
| Restrictions | red |
Description
A drill press is a free-standing power tool with a vertical sliding spindle that carries a chuck for drilling. The spindle, or "quill" is moved up and down manually by a wheel or handle to the side. The workpiece is supported by a horizontal table with adjustable height. Workpieces are clamped down to the table or held in a vise while they are drilled to varying diameters, generally ranging from 1/16" up to 3/4".
Use For (Depending on Location)
Wood
Metal
Plastic
Composites
Graphite
Regular and irregular shapes (as long as they can be clamped down)
Do Not Use For
Thin sheets (unless a step drill is used)
Parts too big to be lifted onto the table
Ceramics or other abrasive materials
Material that is unsuitable to the shop where the tool is located.
Machines at Artisans Asylum
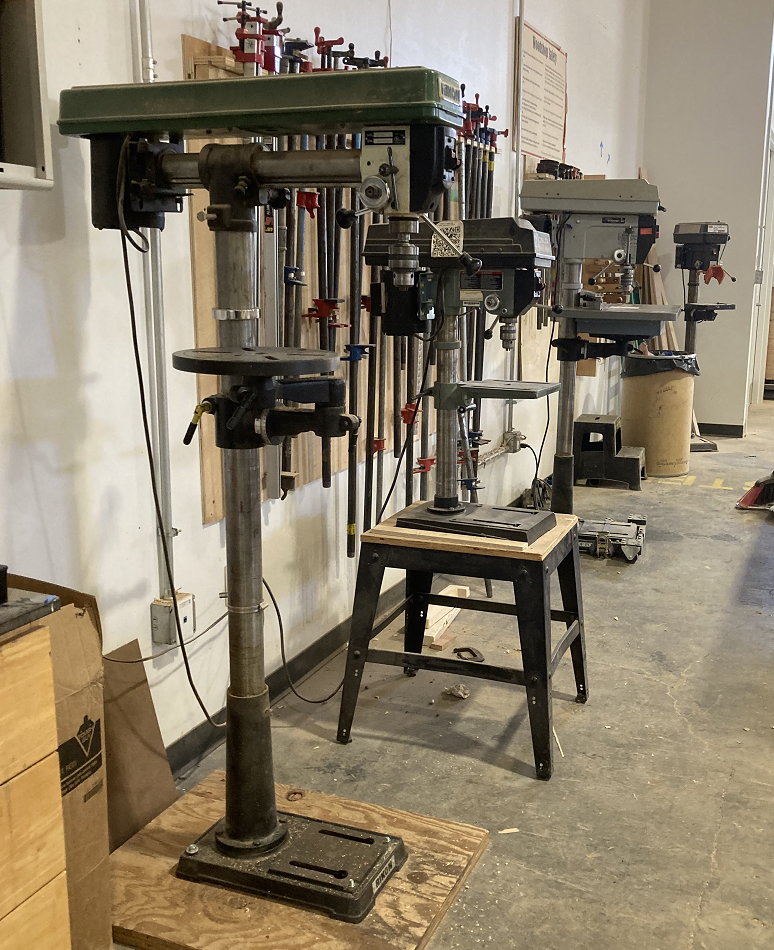
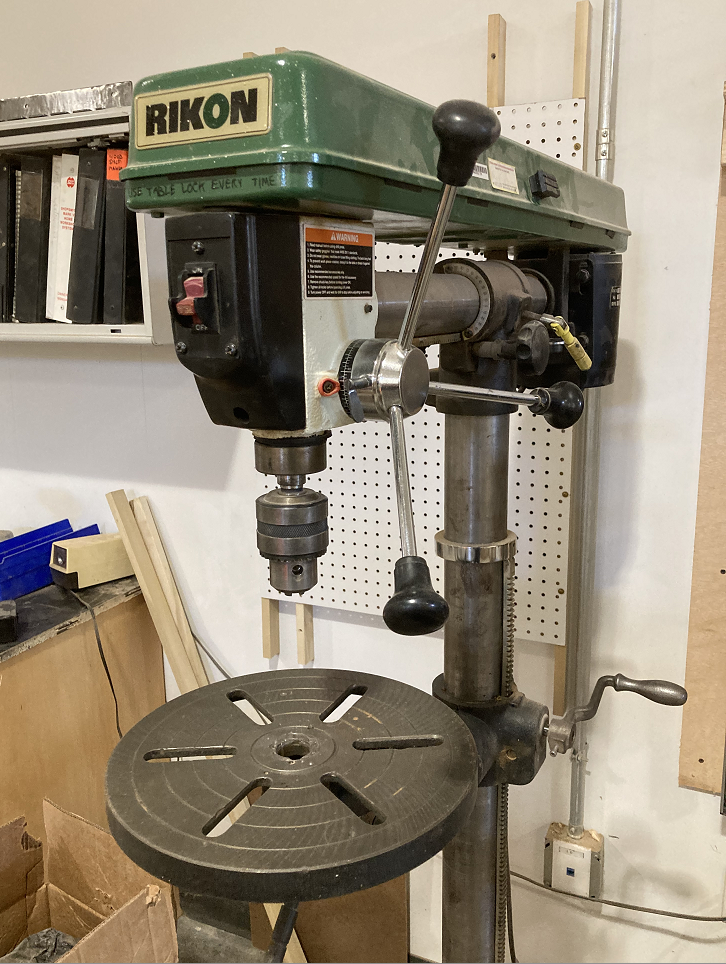
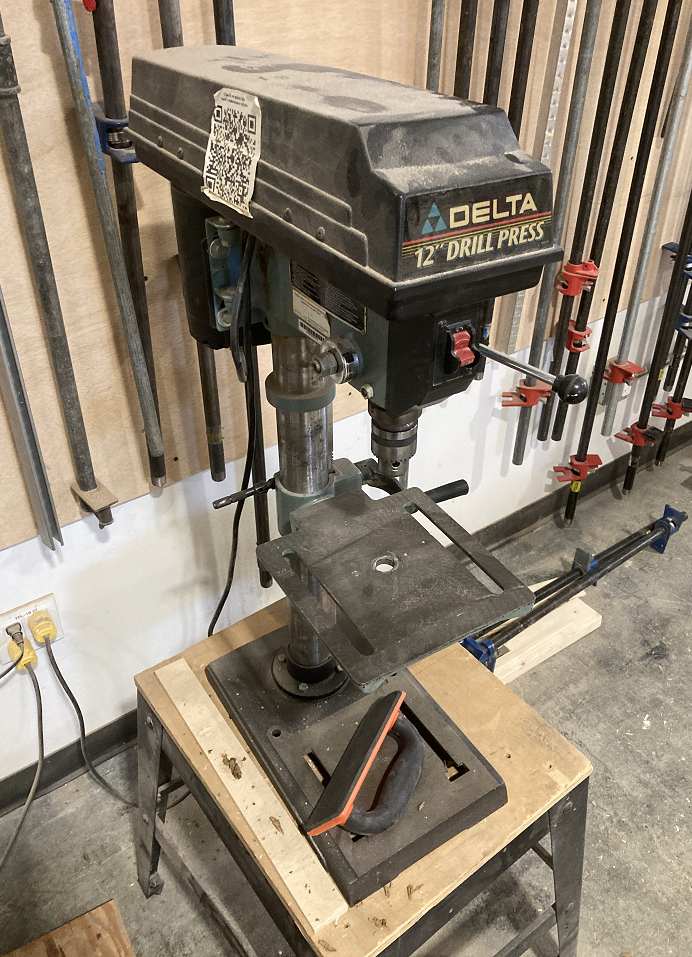
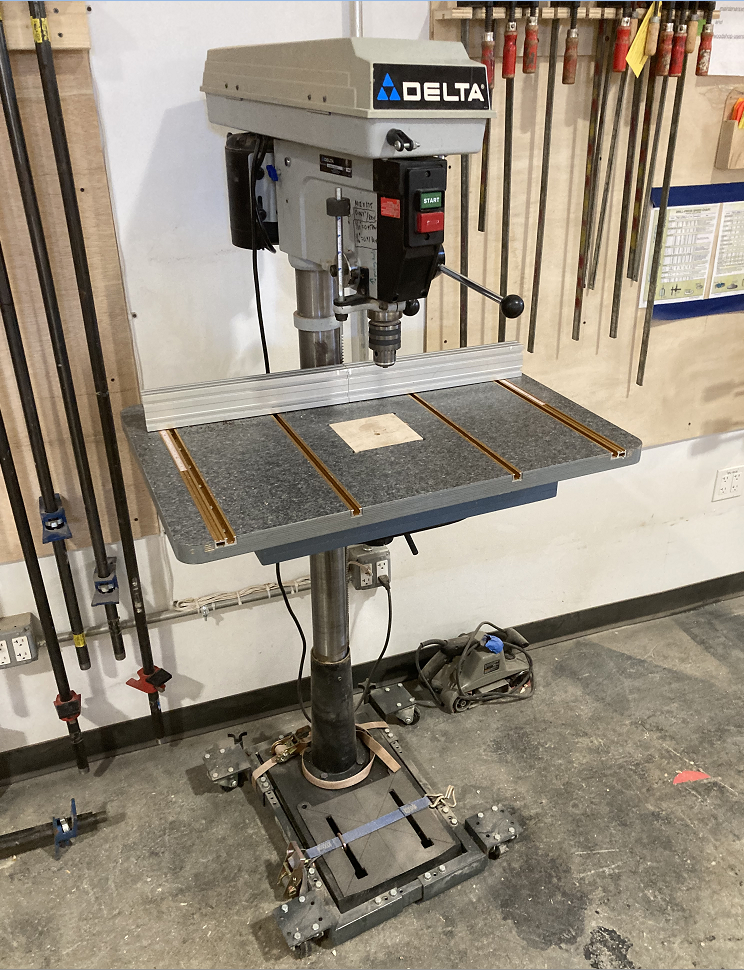
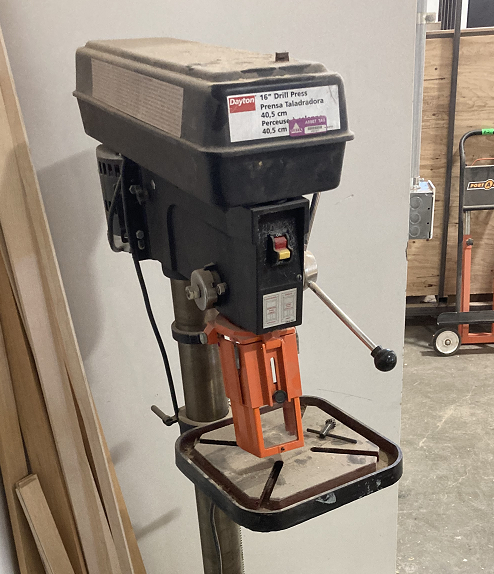
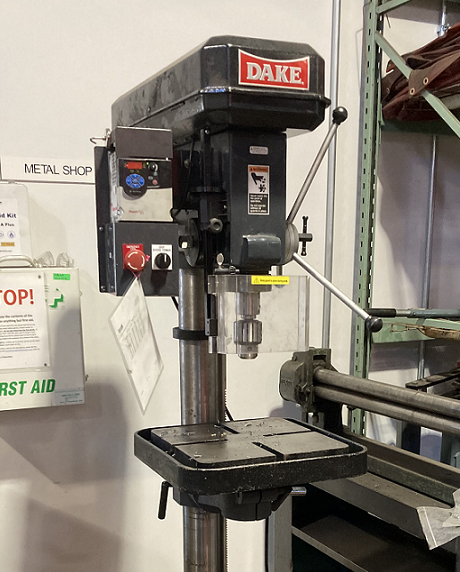
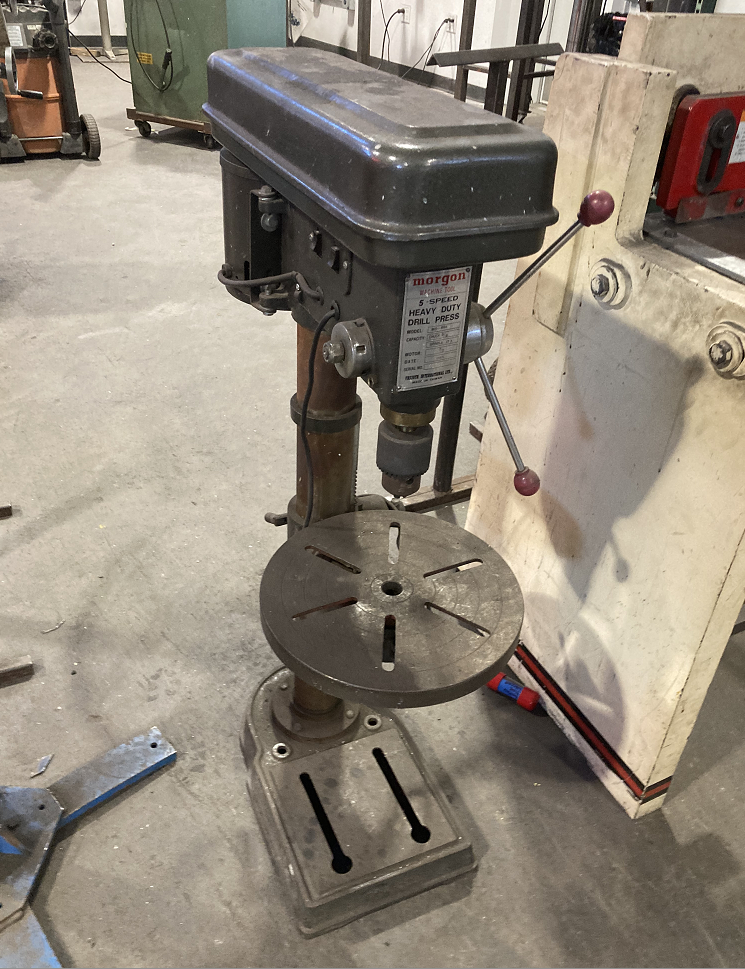
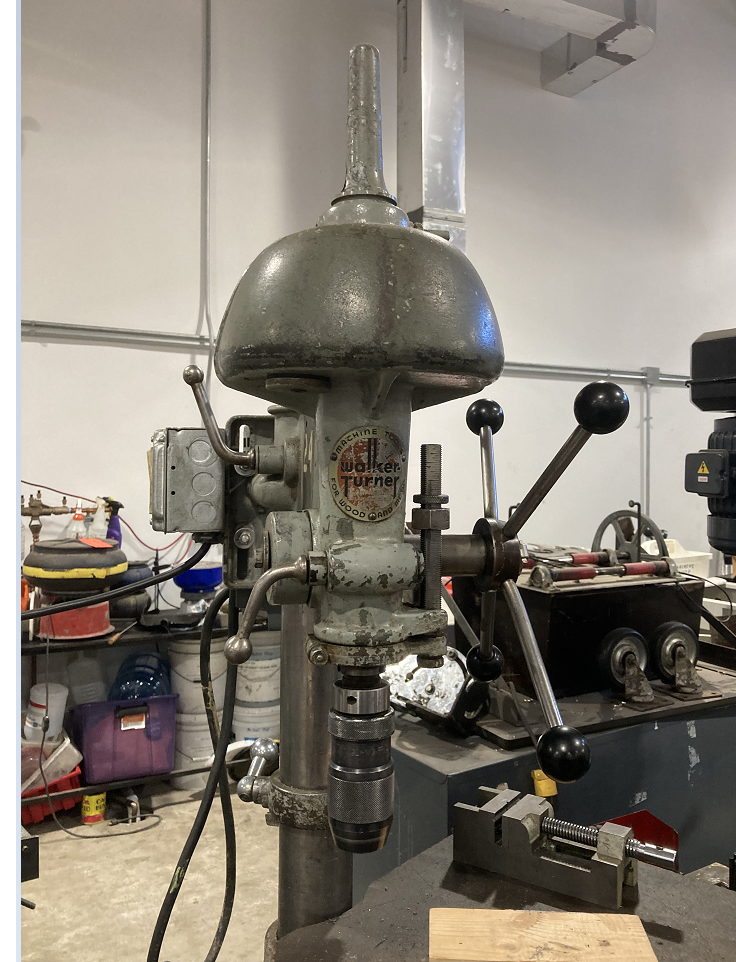
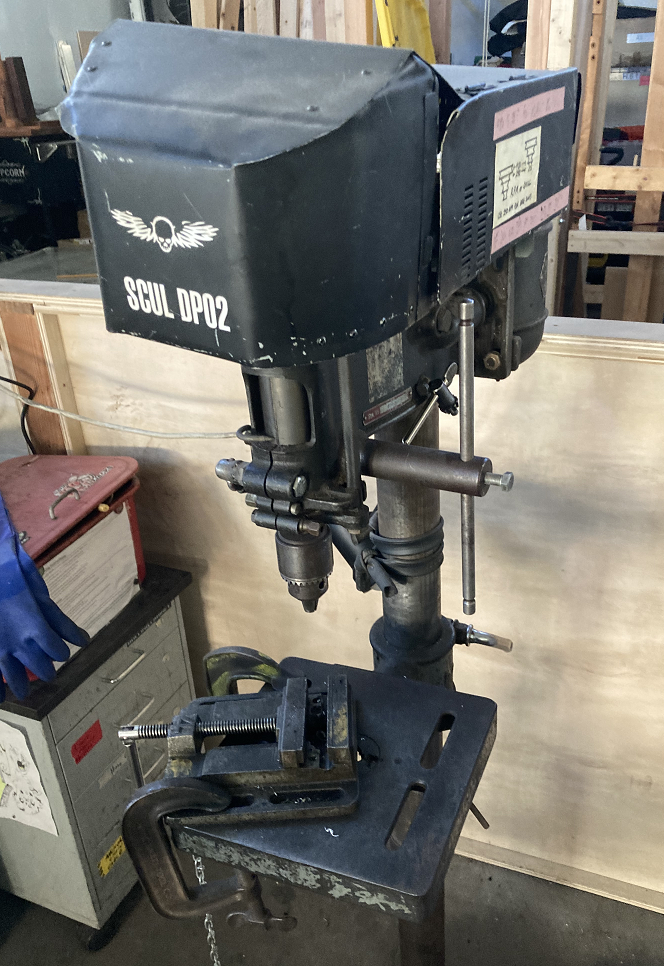
Artisans Asylum has nine drill presses distributed in various shops around the Antwerp St. building.
| Rikon 30-250 | Delta 11-990 | Delta 17-965 | Dayton 3Z918D |
|---|---|---|---|
 |
 |
 |
|
| Dake SB-32V (2 Units) | Morgan MD-80A | Walker-Turner | SKUL DP02 |
|---|---|---|---|
| Metal Shop and Machine Shop | Metal Shop | Machine Shop | Bike Shop |
 |
 |
 |
|
Parts of a Drill Press
Drive
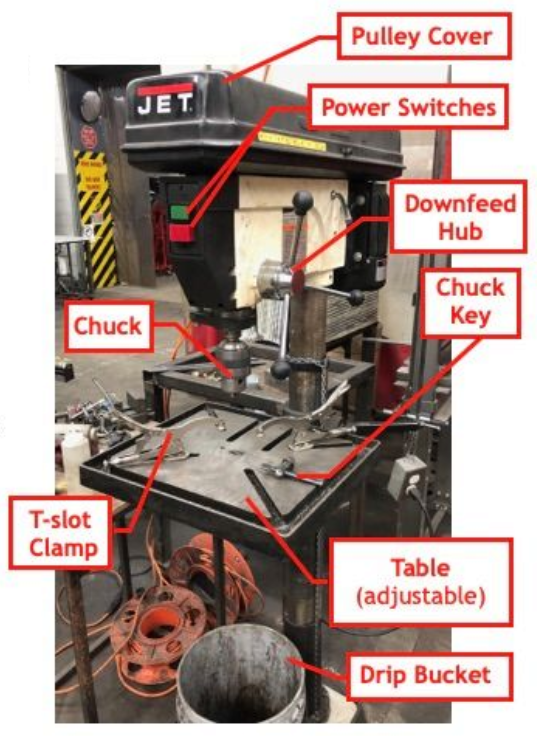
Drill-presses are invariably belt-driven, with a motor in the back. Speeds can be changed by moving the belt from one step to another on the multiple-step pulleys. The belt and pulley system poses a severe hazard to the user if the belt cover isn't in place.
Spindle and Chuck
| |
|---|---|
| Parts of a Drill Press |
The spindle is a spline shaft geared to the quill handle. The pulley at the top is able to rotate the spindle while the handle is free to raise and lower the chuck for drilling. The quill handle can also be locked in place, usually with a rotating handle.
The most common chuck is the "Jacobs" style, with three jaws and a characteristic chuck key with gear teeth on its nose. This is designed to hold a drill bit (or other rotary tool) on-center with a minimum of wobble during drilling. DO NOT USE A DRILL PRESS FOR SIDE-MILLING! The chuck and spindle aren't designed to handle the lateral forces and these can ruin the machine's accuracy for other users.
Table
The table is usually horizontal, though some drill presses allow for the table to be tilted. The height is adjustable, sometimes with a crank, and sometimes with a simple clamp. When the table is simply clamped to the vertical post, care must be taken to support the weight of the table when the handle is loosened.
The table usually has slots or key-ways for attaching clamps or vises to hold the workpiece in place. Drilling a workpiece that isn't clamped down is very risky: The drill can jam in the hole during the drilling and the workpiece can start whirling around. This is particularly dangerous with thin sheets or parts with sharp edges.
Base and Post
The tool is free-standing, either on the floor or on a bench-top. The base is usually a heavy iron casting and the post is ground steel to support the clamping of the table mechanism.
For safety, it is recommended that drill presses be bolted down at the base (either to the floor or bench-top.) As of this writing, NONE of the drill presses at Artisans Asylum are bolted down. Accordingly, users must be cautious about the tool tipping over and crashing to the floor.
Safety Notes
| Eye protection required! | ||
|---|---|---|
- Always wear safety goggles. Eyeglasses are NOT safety goggles.
- No loose clothing, untied long hair, jewelry that can get caught in moving tools. Do not wear gloves.
- Closed-toe, non-slip shoes. Keep a secure balance.
- Check for damaged or misaligned parts, especially the covers for the drive train.
- Remove the chuck key from the chuck before starting the machine. This can be thrown off at high speed.
- Secure the workpiece with clamps or a vise.
- Keep your balance. Don't over-reach.
- Never leave the machine running unattended.
- This tool can generate dust or smoke from the workpiece. All dust is hazardous, some particularly so. Wear a dust mask if necessary.
- Never start the machine with the tool resting against the workpiece.
- Tighten the chuck before starting the machine. Do not run it with a loose tool.
- Tighten all locking handles before starting the machine.
- Don't use damaged tools or tools with a shank diameter that exceeds the size of the chuck.
| |
|---|---|
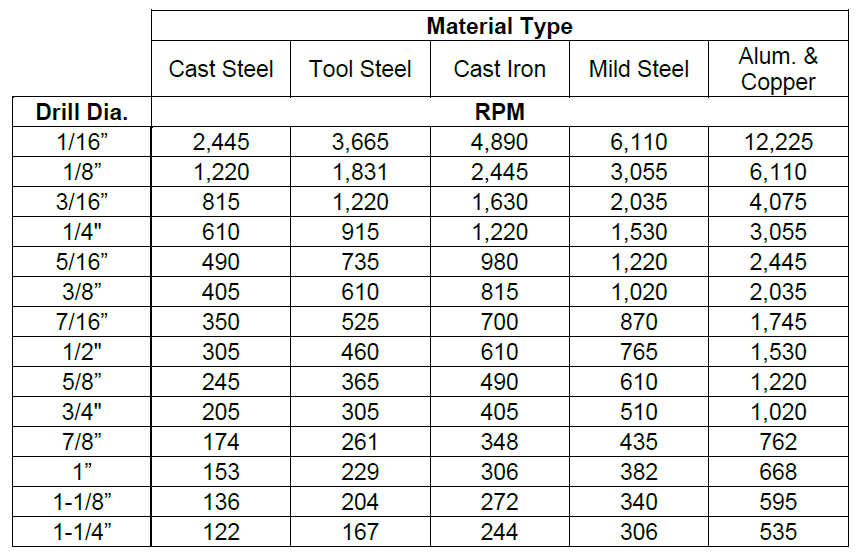
| Recommended spindle speeds for various drill sizes and materials. From the Dake user manual. |
- Be sure of the recommended cutting speeds.
- Cutting metal with the wrong speed can break tools or cause work-hardening in the workpiece.
- For wood, the wrong speed can cause excessive ripping or digging of fibers.
- Avoid awkward hand positions that can lead to loss of control.
- Keep arms, hands and fingers away from the bit.
- Hold the workpiece firmly against the table. Do not attempt to use "freehand."
- Support long and wide workpieces to avoid tipping or shifting during cutting.
- After turning the machine OFF, wait for the tool to stop moving.
Notes on Operation
- Avoid drilling into the table! If you drill through-holes, place a block of wood under the workpiece to drill into. You can also line up the hole to drill over the hole in the table.
- Beware of metal chips! Those twirly strips of metal coming out of the drilled hole may look cool, but they are razor-sharp and they can cut to the bone if they are snagged by a rotating chuck.
- Metal chips can fly off the workpiece, and they can be hot.
- Don't let the tool overheat in use. Lubricate with oil or "Simple Green" soap.
- The table on many machines can be tilted for angled holes. See the operator's manual for the particular tool.
For drilling metal, mark the hole with a punch before drilling. Otherwise, the drill tip can walk around on the metal surface.
| |
|---|---|
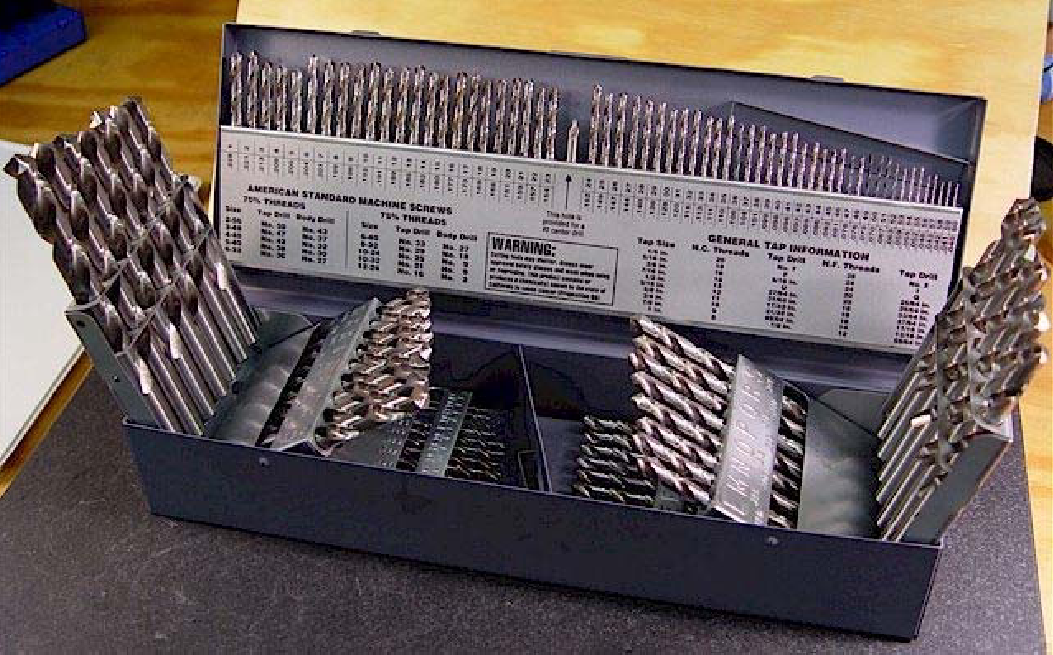
| A set of twist drills. |
| |
|---|---|
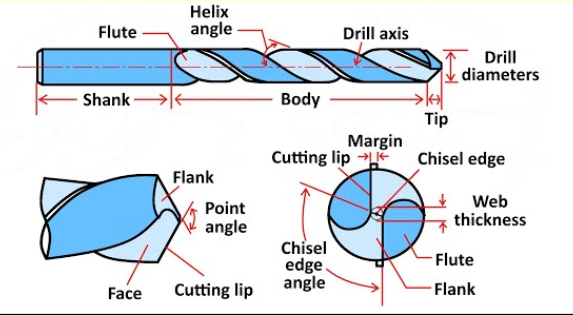
| Important dimensions on a twist drill |
Cleanup
- Remove drill bit from the chuck, wipe, and put away.
- Remove fixturing from the table, clean, and put away. Vises can stay on the table.
- Start from the highest dirty point on the machine and clean up wood or metal chips. On a drill press this will be the table. Wipe it off and clean metal chips from the slots
- Clean wood or metal chips and spilled cutting oil from the base.
- Sweep around the machine.
Tools to Use on a Drill Press
Twist Drills
This is by far the most common drill bit. Though they are designed for cutting metals, they can cut a wide variety of materials, including wood. Certain plastics can be problematic, and there are specially ground analogs to these drills especially for plastics.
The most common type of twist drill is made of "High-speed steel" and has a black finish. Sometimes these are coated with titanium nitride and are gold in color. Tungsten carbide twist drills can also be found.
| |
|---|---|
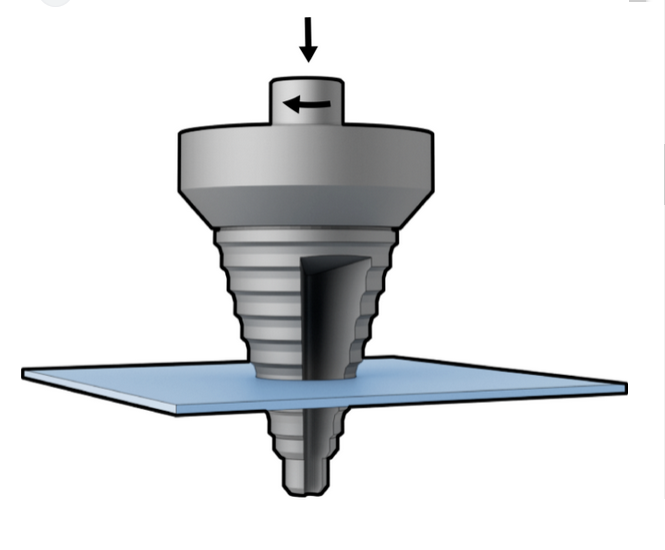
| Drawing of a step drill |
Step Drills
As mentioned above, these are primarily for cutting thin sheet metal, though thicker metal can be cut too. Wood is also possible but suboptimal.
Wood-Cutting Bits
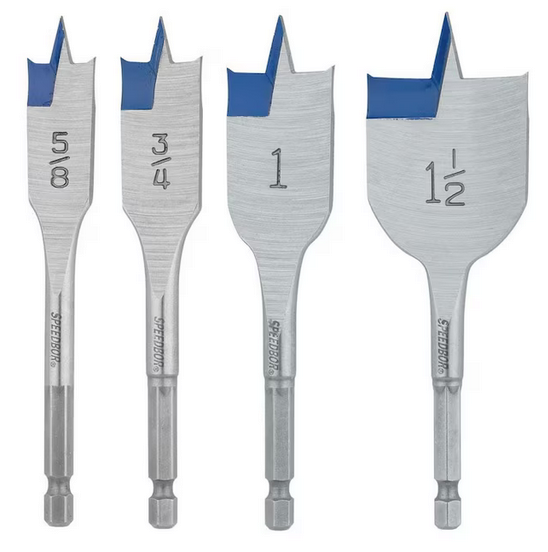
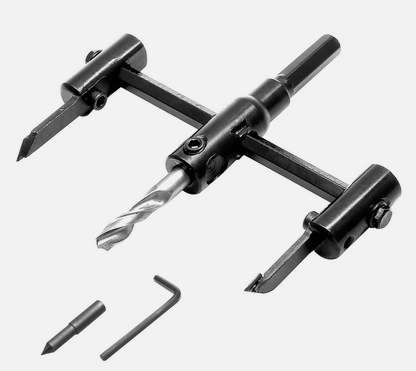
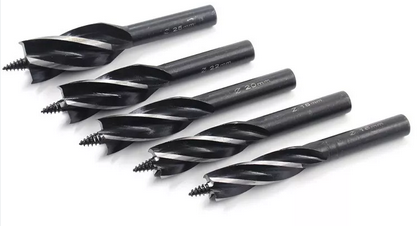
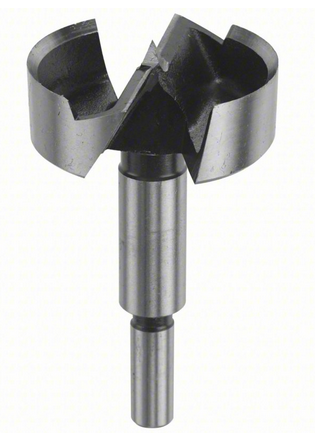
In general, drill bits for wood have two or three different parts. In the center there's a point to keep the bit tunring on center. On the outer edge there is usually a spur of some kind to cut the fibers around the circumference. Between the two there is often a chisel-type cutter that hogs out the bulk of the material. Bits without this chiseling region are for cutting through-holes.
 |
 |
 |
 |
|
Other Types
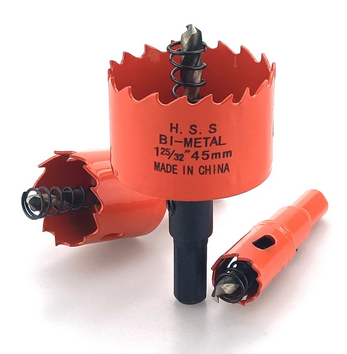
- Hole Saws
- Countersinks
- Center-drills
- Counterbores
- Hones
- Reamers
- In a pinch, an end-mill can be used as a counter-bore. DO NOT perform side-milling on the drill-press!
Pages in category "Drill Presses"
The following 7 pages are in this category, out of 7 total.
