Carbide Blade Chop Saw (Metal Devil): Difference between revisions
No edit summary |
|||
| Line 1: | Line 1: | ||
[[Category:Tools]] | [[Category:Tools]] [[Category:Metal Shop]] | ||
Link to: [[:Category:Metal Shop | Metal Shop main page]] | Link to: [[:Category:Metal Shop | Metal Shop main page]] | ||
Revision as of 13:08, 14 October 2024
Link to: Metal Shop main page
Link to: Metal Shop tool list
Use of this tool is taught in Metal Shop 101
| Carbide Blade Chop Saw | |
|---|---|
| General Info | |
| Make | Morse |
| Model | CSM14MB |
| Serial | Unknown |
| Specs | |
| Manual | Metal Devil Manual |
| Asylum Info | |
| Location | Metal Shop |
| Rubric | |
| Training | Metal Shop 101 |
| Testing | Tool testing, or come to the shop on Tool Testing Night |
| Restrictions | red |
Description
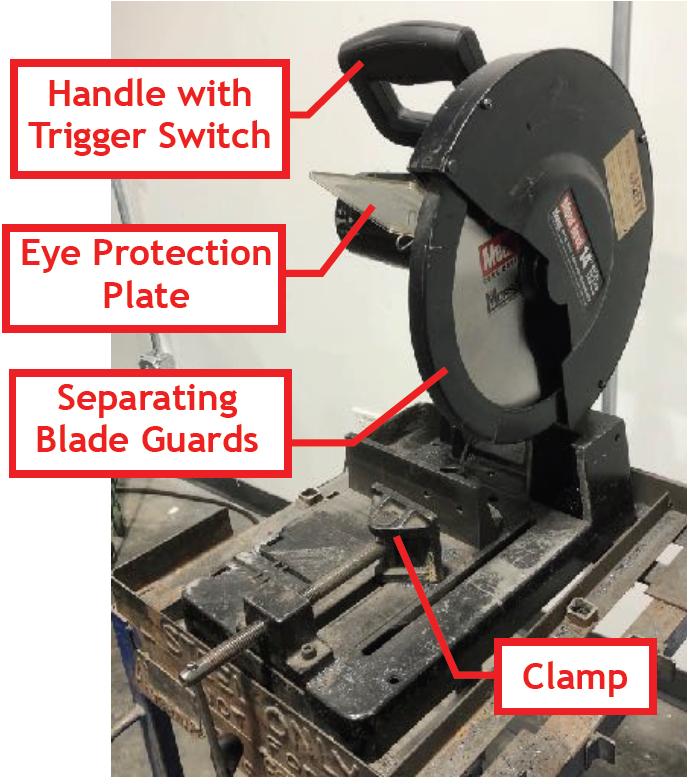
This tool is a circular saw mounted to a mechanical arm that allows it to travel smoothly in the plane of the cut. It can tilt up and down to cut a metal workpiece. The workpiece is clamped firmly against a fence in the back of the machine and the saw cuts when it is tilted down.
Superficially it resembles a wood-cutting miter saw but operates much differently. This machine has many fewer adjustments and degrees of freedom than the miter saw.
There are two saws back-to-back in the Metal Shop. One has a blade for steel and ferrous metals; the other has a blade for aluminum.
Use for:
- Cutting through steel and other tough metals; OR aluminum, depending on which blade is installed.
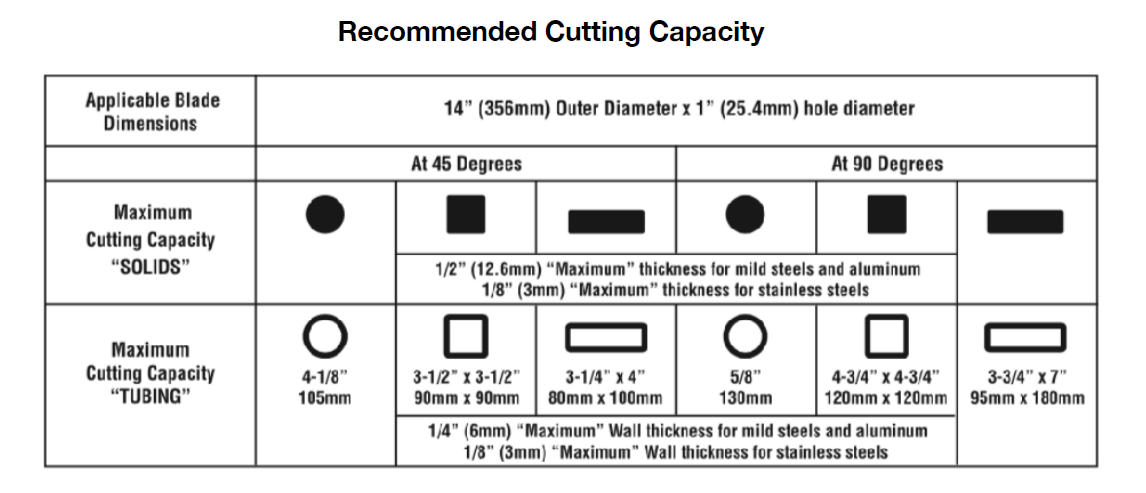
- See chart below for recommended cutting capacities.
Do Not Use for:
- Workpieces that exceed the saw’s limits or cannot be secured by the saw’s clamp.
- Never use in damp or wet conditions.
- Never use near flammable liquids or gases.
Hazard Analysis
| |
|---|---|
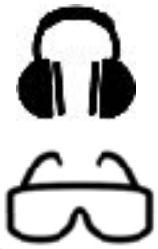
- Tool is very loud. Hearing protection required.
- Flying pieces from broken abrasive discs/ blades. Eye protection required.
- Prevent drawn-in injuries. No loose clothing or gloves.
- Cuts/ scrapes from sharp cut edges of work
- Burns from hot workpieces
- Breathing particulates thrown into the air. Respiratory protection recommended.
| Eye protection required! | ||
|---|---|---|
Basic Operation Instructions and Best Practices
| |
|---|---|
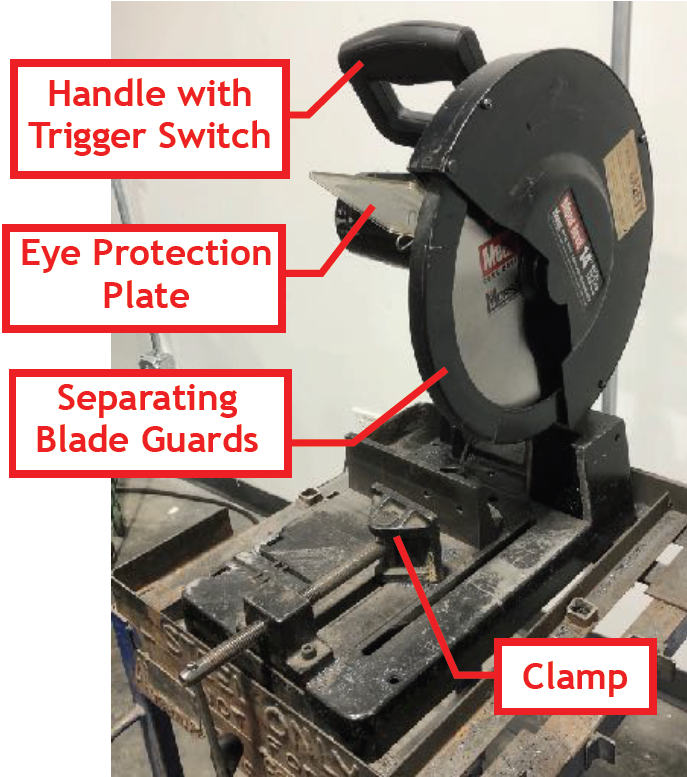
| The Metal Devil |
1. Before operation, perform a quick safety check:
- No moving parts that bind or look misaligned?
- No damaged or broken parts? No cracks or other damage to the blade? Arbor Screw tight?
- Do not use if the saw is unusually noisy or vibrates.
- Make sure all guards are in place and operational.
- This tool is equipped with Separating Blade Guards that move to expose the blade as the handle is lowered to perform the cut. Check that they do not stick or jam.
2. Secure the workpiece in the saw’s clamp.
Plan cuts to prevent the workpiece from slipping and pinching the blade, or from being thrown.
- ALWAYS SECURE WORKPIECE. Straighten the workpiece and firmly clamp to avoid movement and pinching as the cut nears completion. Never cut anything freehand.
- Use a different tool for any workpiece that can’t be held in a solidly braced, fixed position.
- Ensure the piece to be cut off is free to move sideways once cut. Do not let it wedge against the blade, possibly getting thrown.
- Use outboard supports when cutting long or heavy pieces to prevent them from tipping the saw or falling after the cut is completed.
- Protect your arms and body. Never reach behind, beneath, or over blade with any hand for any reason.
| |
|---|---|
| Carbide Saw stock capacity |
3. Perform the cut.
- Watch where you stand - avoid line of cutting wheel. Small pieces and sparks can kick back toward wall, but can fly in any direction. Don’t overreach — keep good footing and balance.
- Press the Trigger Switch to start the blade, bring to full speed, then lower the blade. Never start with the cutting wheel inserted into or touching the workpiece.
- Perform the cut with an even, smooth stroke. Cut with maximum force without overloading the motor. Do not force the blade. The faster a cut is made the less heat is created in the workpiece, preventing discoloring and prolonging blade life. Do not bump or slam the blade into the workpiece.
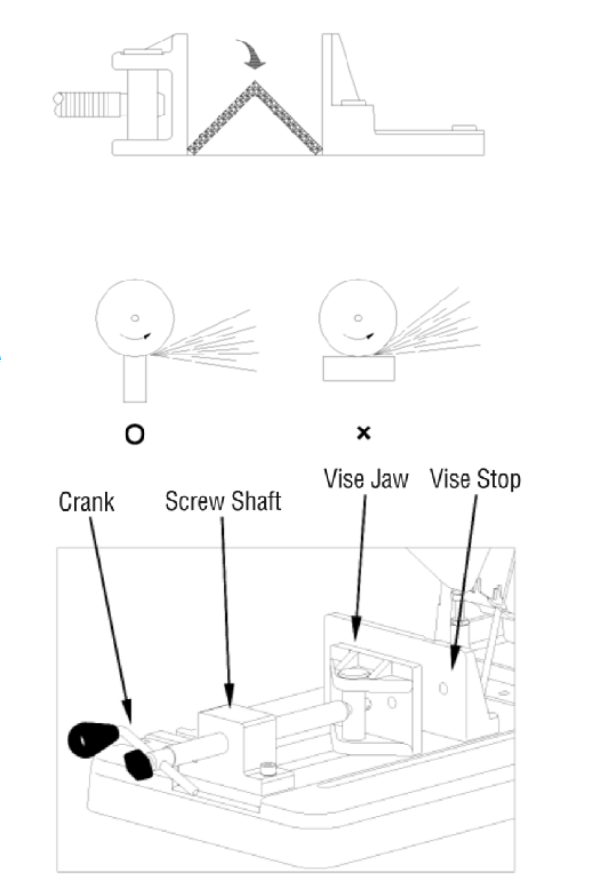
| |
|---|---|
| Clamping a steel angle in the vise. |
4. Release the trigger switch and let blade come to a complete stop before lifting it out of the workpiece.
Clamping Tips
To view full-size renderings of the illustrations, click on the image.
Avoid jamming. Position the workpiece so that the blade will not bind or eject the piece from the clamp.
- Angle bar should be clamped as shown.
- The saw generally cuts most efficiently if the blade is cutting through the thinnest section of the workpiece.
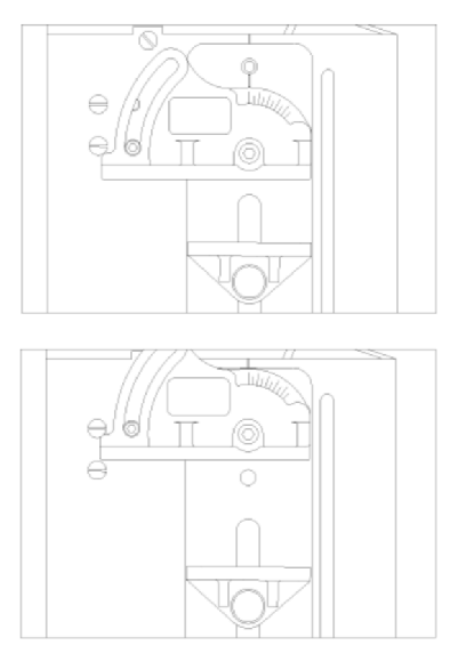
| |
|---|---|
| Setting the vise for cutting at an angle |
The Stationary Vise has a max width capacity of about:
7-1/2” at 90°
5” at 45°
The Cutting Angle can be adjusted from 0° to 45° right, using the arbor wrench and the two bolts.
The Dust Tank needs periodic cleaning.
Loosen screw A, remove the dust tank, empty, and reassemble.
This tool has commutator brushes that need periodic replacement.
Replace both brushes when either brush is worn to 1/4” in length or if either spring or shunt wire is burned or otherwise damaged.
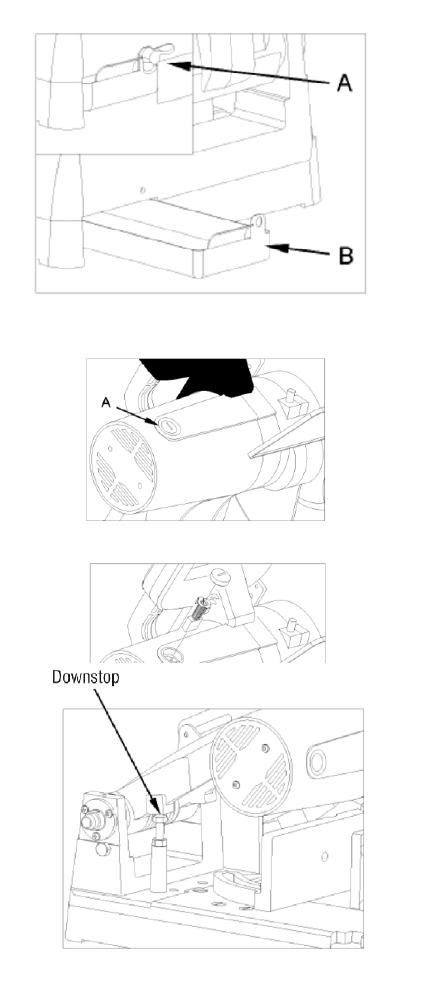
| |
|---|---|
| Dust tank and commutator replacement |
This saw is equipped with a Downstop that prevents the cutting blade from hitting the surface on which the saw is mounted or placed.
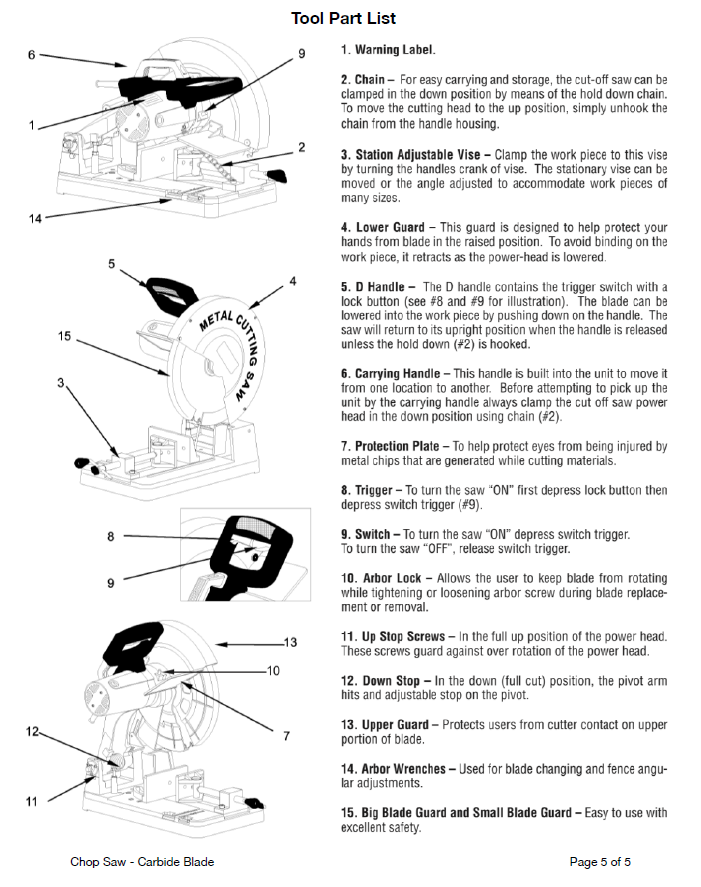
| |
|---|---|
| Parts of the Metal Devil |
