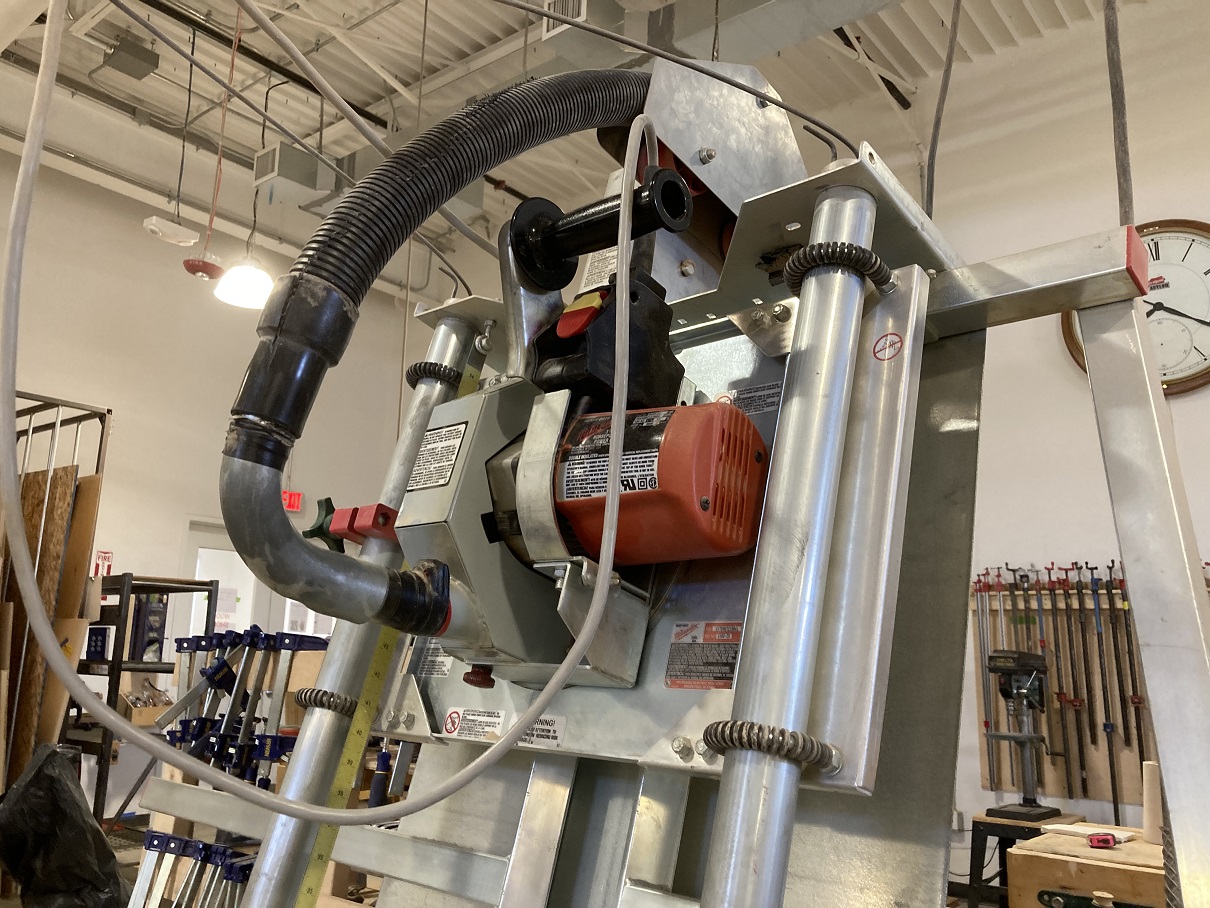
Milwaukee 6480-20 Panel Saw
| Milwaukee Panel Saw | |
|---|---|
| General Info | |
| Make | Milwaukee |
| Model | 6480-20 |
| Serial | Unknown |
| Specs | |
| Manual | Panel Saw User Manual |
| Asylum Info | |
| Location | Wood Shop |
| Rubric | |
| Training | |
| Testing | |
| Restrictions | red |
This is a RED tool. Training and tool-testing are required.
Description
| |
|---|---|
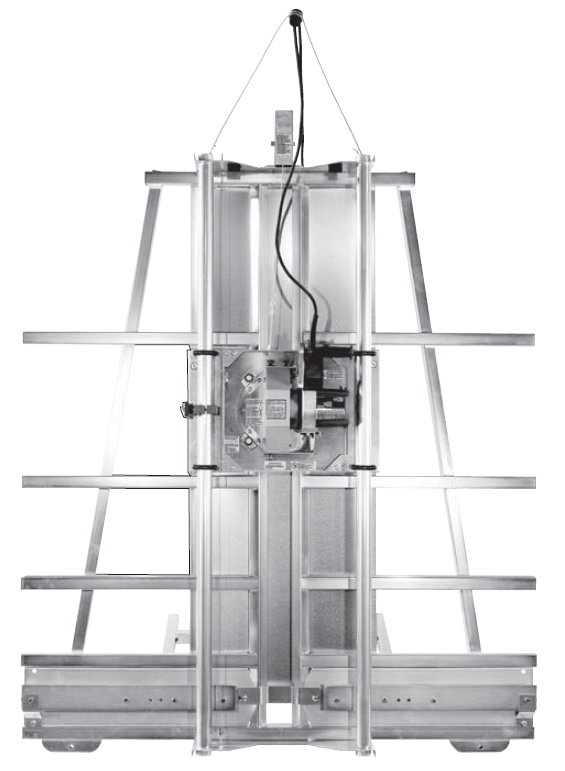
The panel saw is a circular saw mounted to a mechanical gantry allows it to travel smoothly in a vertical path over a frame designed to hold large flat sheets. Sheets are held in the frame while the saw is drawn down to make a cross cut. Alternatively, the saw can be rotated to make a horizontal, or "rip" cut. For rip cutting, the saw is fixed in place and sheets are fed through the machine, supported on rollers.
Use For
- Sheet lumber
- Plywood
- Fiberboard
Do Not Use For
| |
|---|---|
| A diagram of the panel saw. |
- Boards or scraps narrower than the carriage.
- Logs, carvings, or other irregular lumber
- Pressure-treated
- Wet lumber
- Plastic (not permitted in the Wood Shop)
- Metal or metal-coated
Safety
| Eye protection required! | ||
|---|---|---|
Personal:
- No loose clothing, neckties, rings, bracelets, or other jewelry. Non-slip footwear. Tie back or cover long hair.
- Dust: All forms of dust are hazardous. Always use the dust control system, and it is recommended that you also wear a dust mask.
- Do not over-reach. Keep proper footing and balance at all times
- Do not place hands on or under the saw carriage or in the path of the blade.
Tool:
- Keep the guards in place.
- Remove wrenches and adjusting keys before switching on the saw.
- Unplug the saw before changing the blade or servicing.
- Use clamps or other practical way to support the workpiece.
- Do not force the tool.
- Do not leave the saw running unattended.
- Do not use push sticks on this tool.
- Vertical cutting must always be done from top to bottom.
- Horizontal cutting must follow the direction of the arrow on the saw motor.
- Never cut workpieces narrower than the carriage for the saw.
- Always wait for the saw blade to stop completely before changing positions.
Perform a safety check:
- Alignment of moving parts
- No binding or rubbing
- Make sure accessories are mounted properly
- Repair or replace damaged guards or other parts
| |
|---|---|
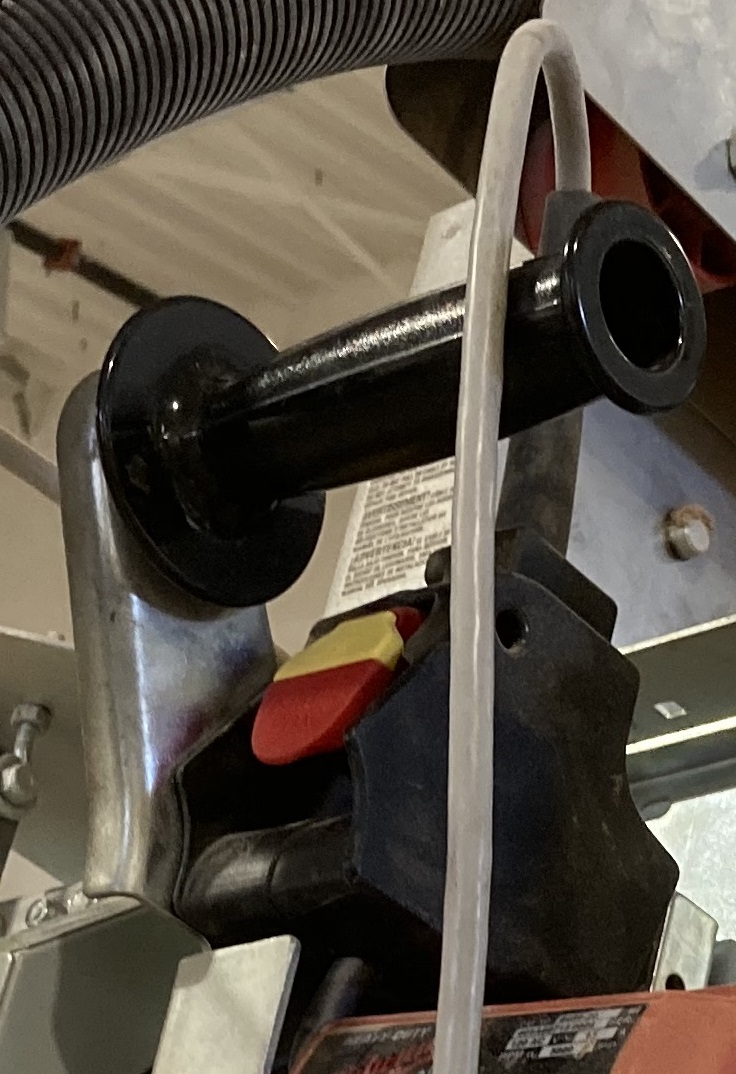
| Detail of the power switch directly under the saw handle. |
Starting and Stopping the Tool
- To start the motor, pull the switch paddle up. The saw will stay on until the paddle is pushed down.
- To stop the motor, push the switch paddle down. Wait until the blade has stopped spinning.
Causes of Kick-Back:
Kick-back is a sudden reaction to binding of the saw blade during cutting, causing an uncontrolled saw to lift out of the workpiece and kick towards the operator.
- If the kerf closes up on the blade and pinches it
- If the blade becomes twisted or misaligned in the cut
If the saw binds or if a cut needs to be interrupted for any reason, Turn the switch off and hold the saw motionless until the blade stops turning. Moving the blade while it is spinning down can cause kick-back.
Cutting Configurations
Note: Milwaukee recommends clamping the sheets on the machine. In addition thin sheets ~1/4" may be bowed and require additional hardware to hold them down against the plane of the cutting frame.
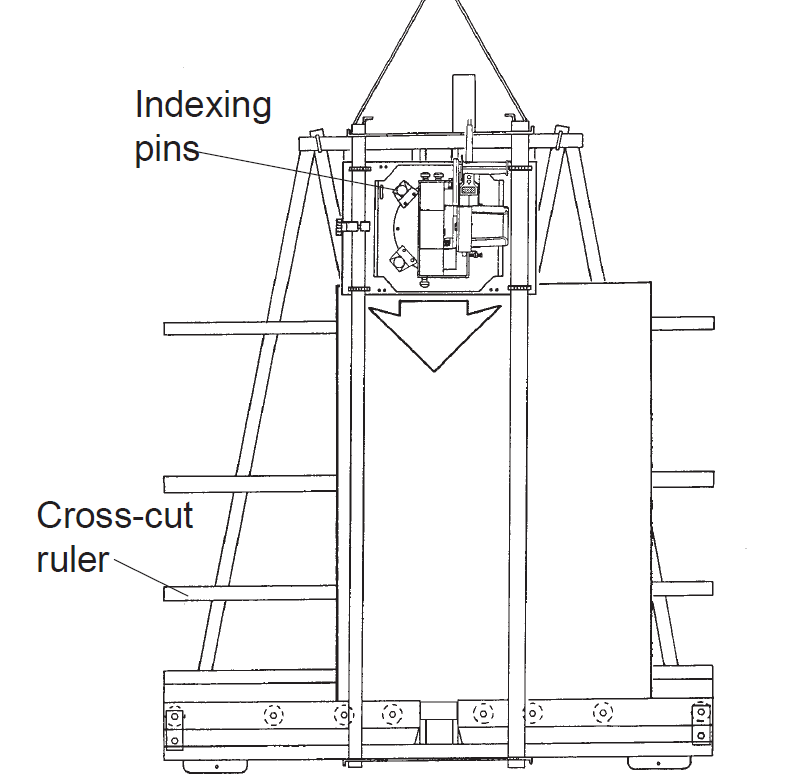
| |
|---|---|
| Diagram of cross-cutting on the panel saw. |
Cross-Cutting
A cross-cut is a vertical cut done from the top to the bottom of a workpiece.
A workpiece must always be supported by a minimum of two rollers.
1. Rotate the saw motor to the cross-cutting position with the blade oriented in a vertical plane.
- Pull out the indexing pins
- Rotate the saw and motor until the indexing pins snap into place.
2. Loosen the carriage lock and raise the saw carriage to the top of its travel.
3. Place the workpiece on rollers along the bottom edge of the frame.
4. Slide the workpiece to the desired position.
5. If there is a pencil mark along the top edge of the sheet, it can be sighted with respect to the blade through the dust exhaust hole. Pull the hose off the sleeve and sight through it. Replace the hose prior to cutting.
6. Start the motor and wait until the blade comes up to speed.
7. Grasp the handle and slowly pull the carriage down through the workpiece all the way to the bottom.
8. Turn off the tool and allow the blade to come to a full stop.
9. Raise the saw carriage back to the top of its travel and tighten the carriage lock.
Rip Cutting
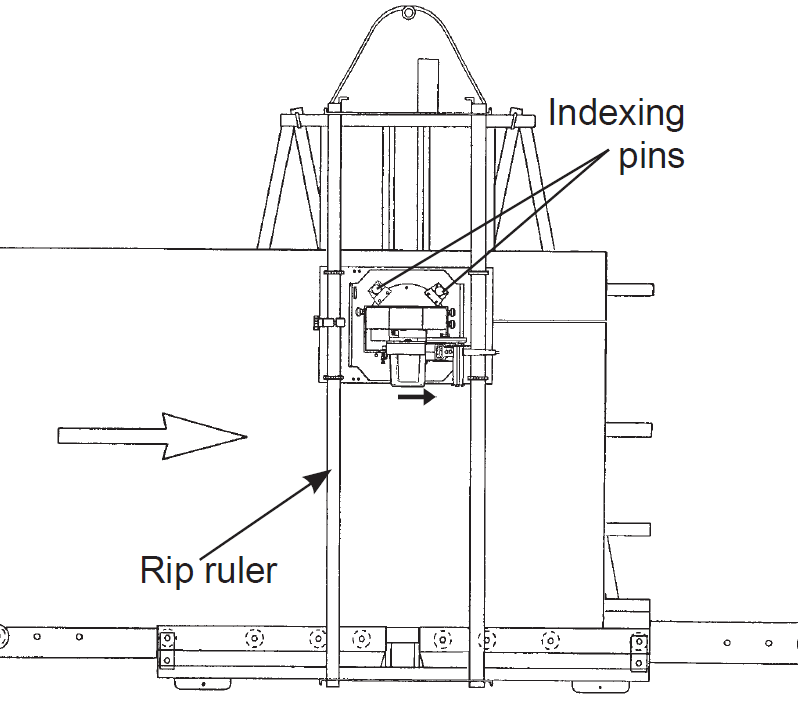
| |
|---|---|
| Diagram of rip-cutting on the panel saw. |
A rip cut is a horizontal cut made with the saw locked stationary and the sheet fed through the machine. The saw can be oriented to face in either direction, so rip cuts can be made in either direction. Take care that the workpiece only travels in the direction indicated by the arrow on the carriage adjacent to the blade.
1. Decide on the rip-cut travel direction.
2. Rotate the saw to a horizontal orientation with the arrow pointing in the direction the workpiece will move through the machine
- Pull out the indexing pins
- Rotate the saw until the indexing pins snap into the preset holes.
3. Move the saw carriage to the correct height for the cut.
4. Tighten the carriage lock.
5. Start the motor and allow it to come up to speed.
6. Place the workpiece on the rollers, making sure that it is oriented correctly to travel through the machine without rocking.
7. Slowly move the workpiece through the machine in the direction indicated by the arrow on the carriage. Keep hands, clothing, etc away from the space under the carriage. Keep face away from the flying debris from the saw blade. Do not use a push stick
8. After the cut is completed, turn off the motor and wait for the saw blade to come to a complete stop.
