Brackets Tutorial 2b: Fabricating a Bracket from a Solidworks Design
Link to: Bracketage Main Page
Solidworks and Metal Shop tutorial by Jim Bredt 20240609
Introduction
This tutorial is a continuation of the earlier tutorial where a metal bracket was reverse-engineered in Solidworks.
Here we will show how to export the Solidworks data to the Torchmate CNC plasma cutter located in the Metal Shop at Artisans Asylum. After cutting the flat piece from steel sheet, it is bent into shape, welded, and finished by powder coating.
Load the Solidworks Design
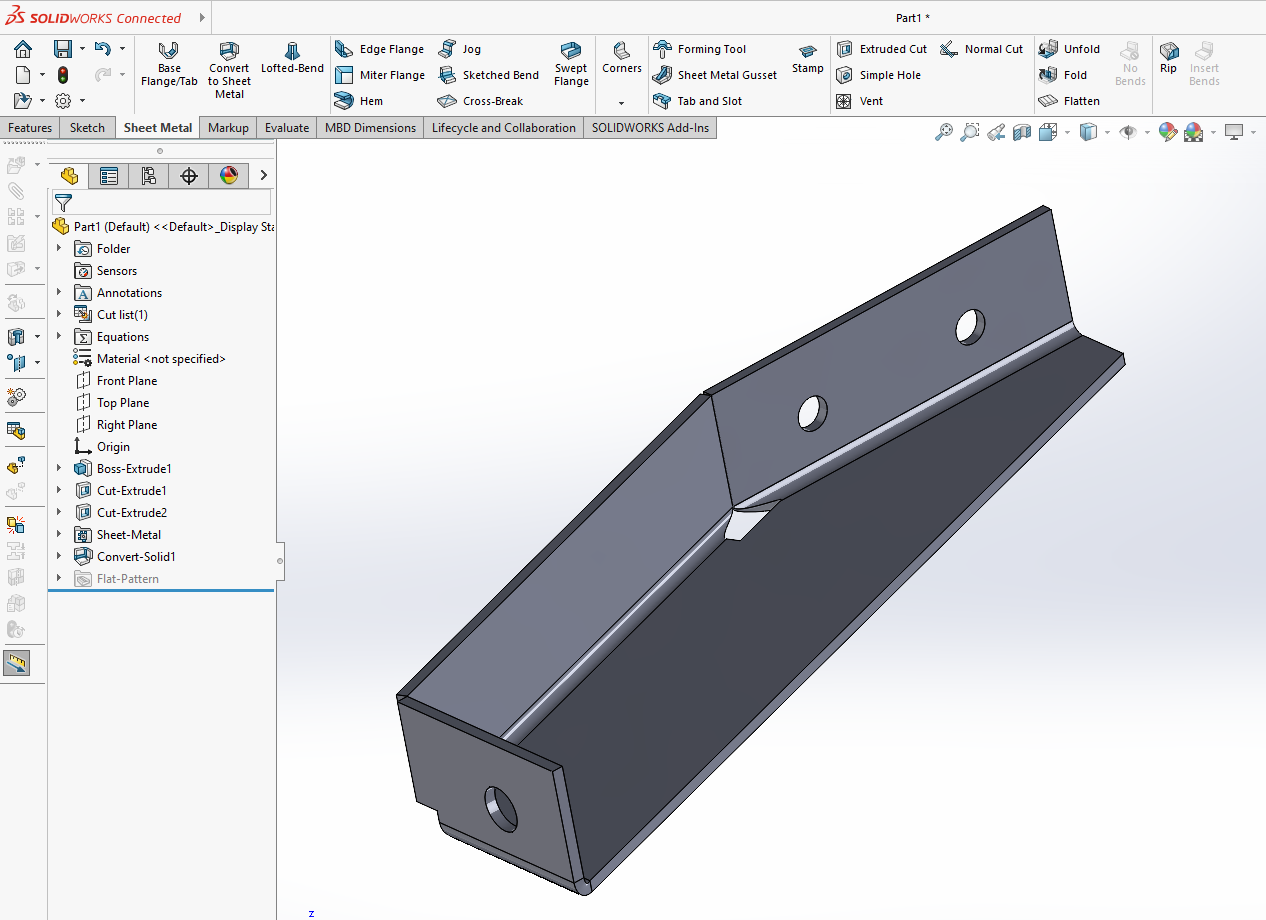
In the previous Solidworks tutorial a design was created for a sheet metal bracket. Load this design into Solidworks now.
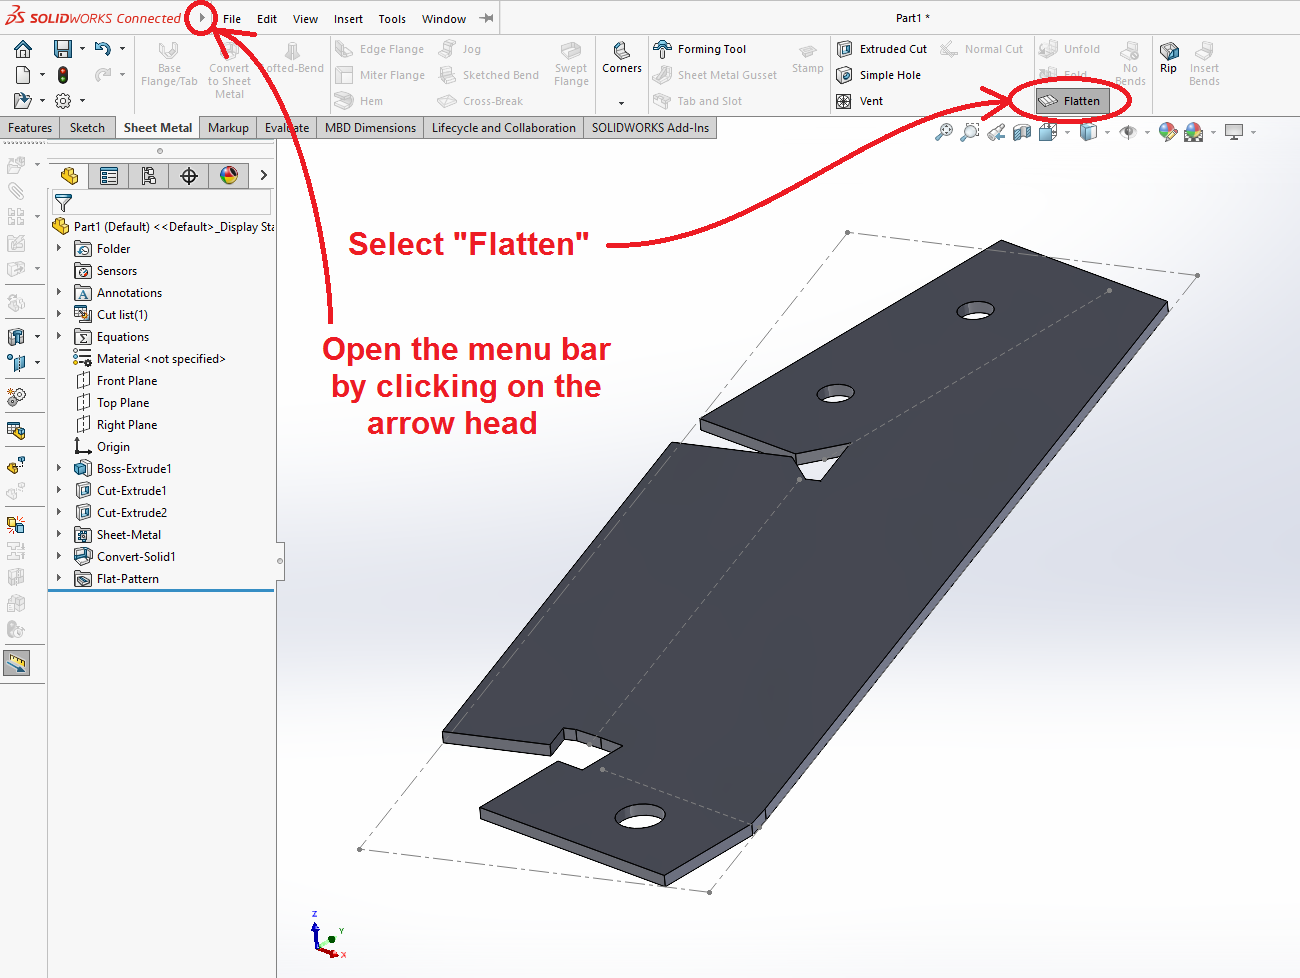
Click on the "Flatten" tool to render the design without the bends.
Save the Part in DXF Format
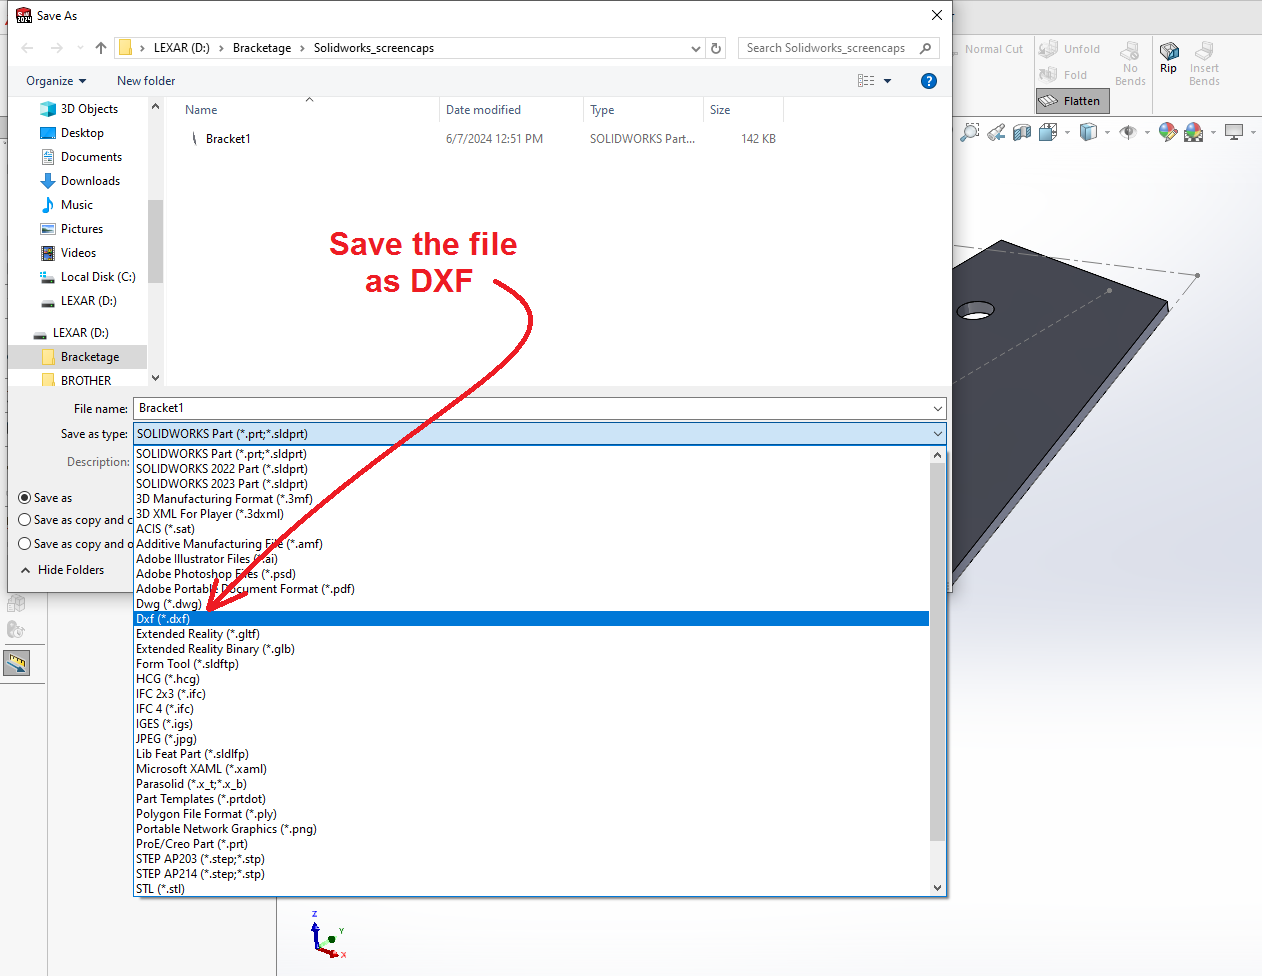
Next we save the file. Click on the (![]() ) small arrowhead next to the Solidworks logo at the top left corner of the window. This will open up a conventional menu bar. Select "File" and then "Save As New". Browse to the desired location (such as your USB thumb drive) and choose a file name.
) small arrowhead next to the Solidworks logo at the top left corner of the window. This will open up a conventional menu bar. Select "File" and then "Save As New". Browse to the desired location (such as your USB thumb drive) and choose a file name.
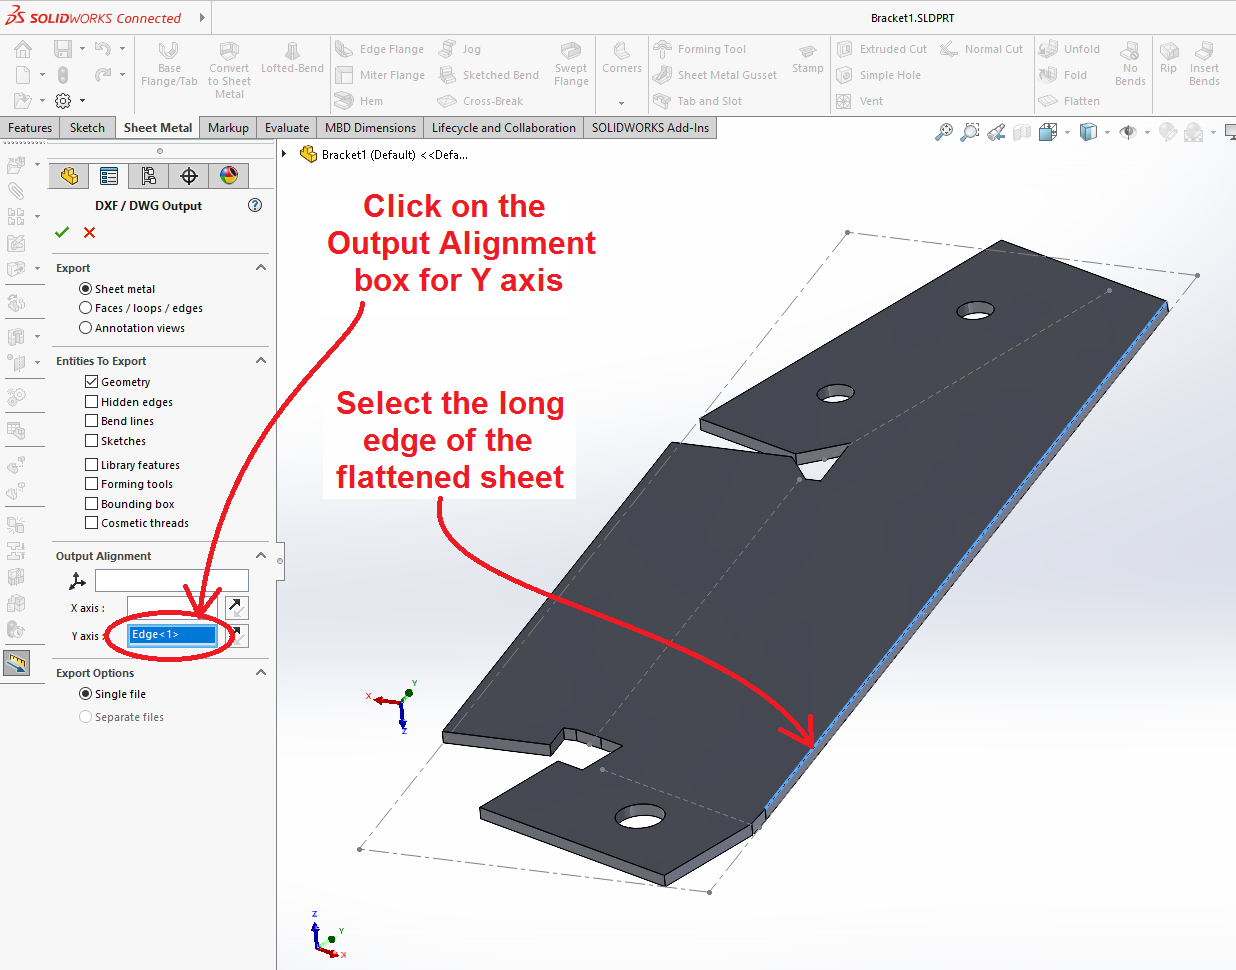
A listing opens in the left margin of the window that allows you to select an edge in the design and make it parallel to one of the axes on the CNC machine.
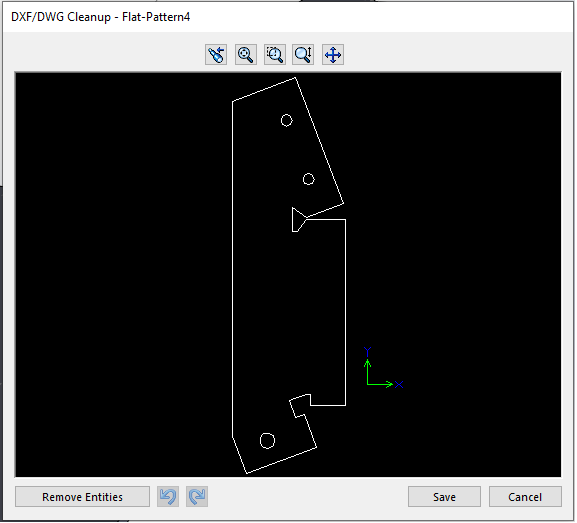
Click on the (![]() ) green check mark and another window opens that shows the contour of the cut in the DXF file. This window allows you to select erroneous features and exclude them from the saved file. Click on "Save".
) green check mark and another window opens that shows the contour of the cut in the DXF file. This window allows you to select erroneous features and exclude them from the saved file. Click on "Save".
