SolidWorks Tutorial 1d: Design of an Electronic Box, Continued
Link to: CAD Main Page
Link to: Tutorial 1c (prev)
Introduction
This tutorial concludes the basic introduction to SolidWorks, using an electronics box (E-Box) as an example. In the previous tutorials, we designed a simple box, starting from zero ; followed by adding mounting lugs, with attention to geometric relations and continuing with other mounting features, using feature copying and pasting.
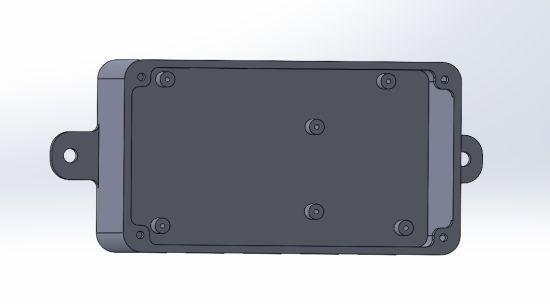
There are still a few features to be designed to complete the box. An important feature that is frequently forgotten is a pass-through for the wires needed to activate the circuit board. After that, we will place a label in raised lettering on the box. To finish, we will design a close-fitting lid to cover the box.
Because this tutorial has been preceded by several others, many of the operations used here have already been presented. To keep the pace up, we will assume the reader is familiar with these details.
Create the Pass-Through
Select one of the long walls of the box and open a sketch on it. If this process is unfamiliar, please review Tutorial 1b.
Sketch a circle on this plane, centered on a line somewhat above the center of the side of the box. The diameter should be about 0.2 inches larger than the girth of the bundle of wires and connectors that will plug into the circuit board. In this example, we make this circle 3/4 of an inch in diameter.
Exit the sketch and with it selected, click on the "Features" tab and select "Extruded Boss/Base."
Extrude this sketch to a height of one inch and hit the (![]() ) green check-mark to accept.
) green check-mark to accept.
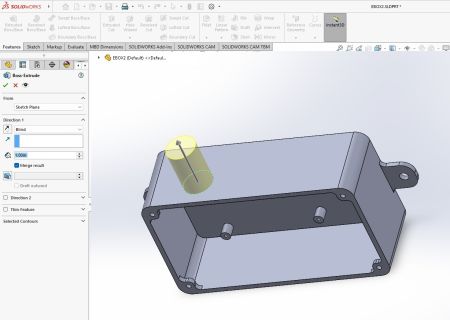
Select the top surface of the extruded cylinder and open a sketch. Draw a circle centered on the face with a diameter equal to the girth of the wire bundle passing into the box.
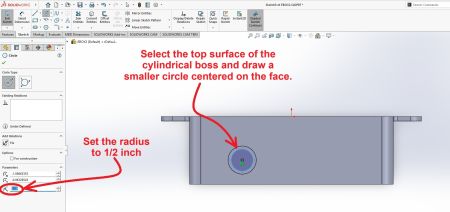
Exit the sketch and select "Extruded Cut" from the "Features" tab. In the pull-down menu under "Direction 1" select "Up To Surface." The yellow preview of the cut should pierce through to the box interior.
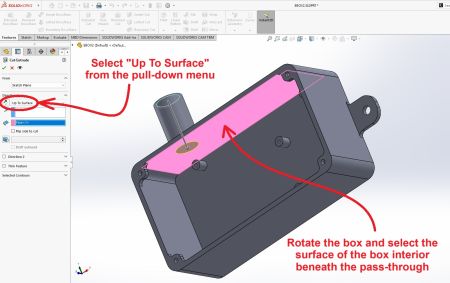
Select the (![]() ) green check-mark to accept.
) green check-mark to accept.
Label the Box
This section shows how to put raised text on a planar surface.
Select the long face opposite the pass-through and open a new sketch. The first feature to add to the sketch is a line that directs the text. Draw a line lengthwise across the face and select "For Construction."
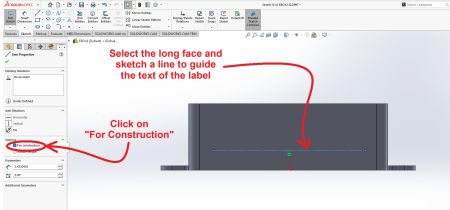
Once the guide line is placed, select the (File:SW text tool icon.png) "Text" tool under the "Sketch" tab.