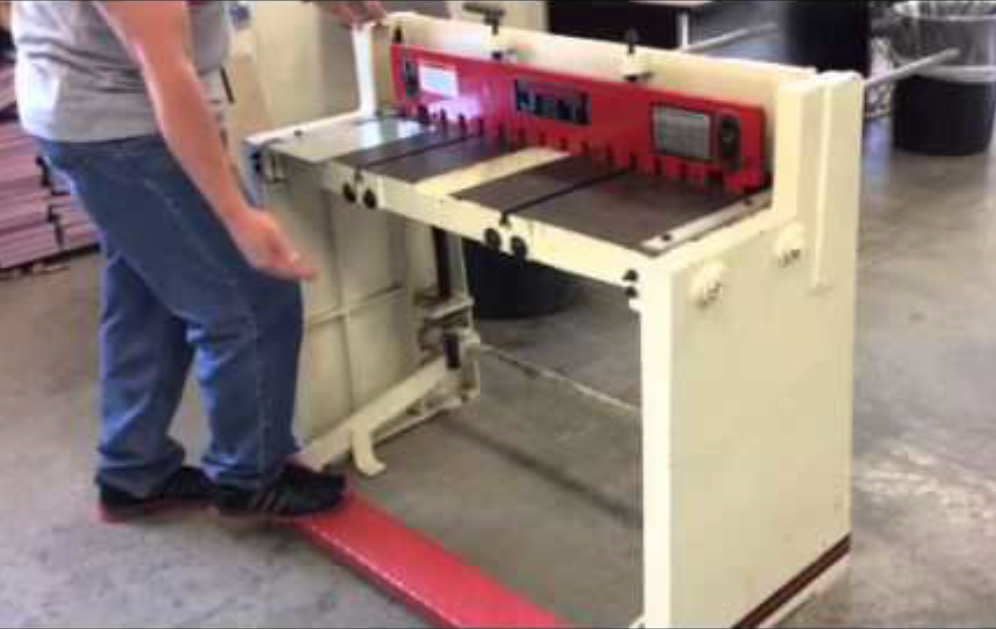
36-inch Jump Shear: Difference between revisions
From Artisans Asylum Wiki
Acharlwood (talk | contribs) m (→Video: Fixed broken link) |
No edit summary |
||
| Line 15: | Line 15: | ||
|rubric = [[Metal Shear Rubric]] | |rubric = [[Metal Shear Rubric]] | ||
|training =[https://www.artisansasylum.com/class-catalog Tool classes] | |training =[https://www.artisansasylum.com/class-catalog Tool classes] | ||
|testing = [https://www.artisansasylum.com/tool-testing Tool testing], or [[:Category:Metal Shop#Tool Testing | |testing = [https://www.artisansasylum.com/tool-testing Tool testing], or [[:Category:Metal Shop#Tool Testing Night|come to the shop on Tool Testing Night]] | ||
Night|come to the shop on Tool Testing Night]] | |||
|restrictions = green | |restrictions = green | ||
|tool_categories = | |tool_categories = | ||
Revision as of 18:59, 5 September 2024
Link to: Metal Shop main page
| 36-inch Jump Shear | |
|---|---|
| General Info | |
| Make | JET |
| Model | FS-1652H |
| Serial | Unknown |
| Specs | n/a |
| Manual | Manual |
| Asylum Info | |
| Location | Metal Shop |
| Rubric | Metal Shear Rubric |
| Training | Tool classes |
| Testing | Tool testing, or come to the shop on Tool Testing Night |
| Restrictions | green |
Description
This tool brings a hardened steel blade through a thin sheet of metal, shearing it off. The mechanical force is provided by a foot pedal.
Use for:
- Up to 16 ga (0.0625") sheet metal, any metal is okay
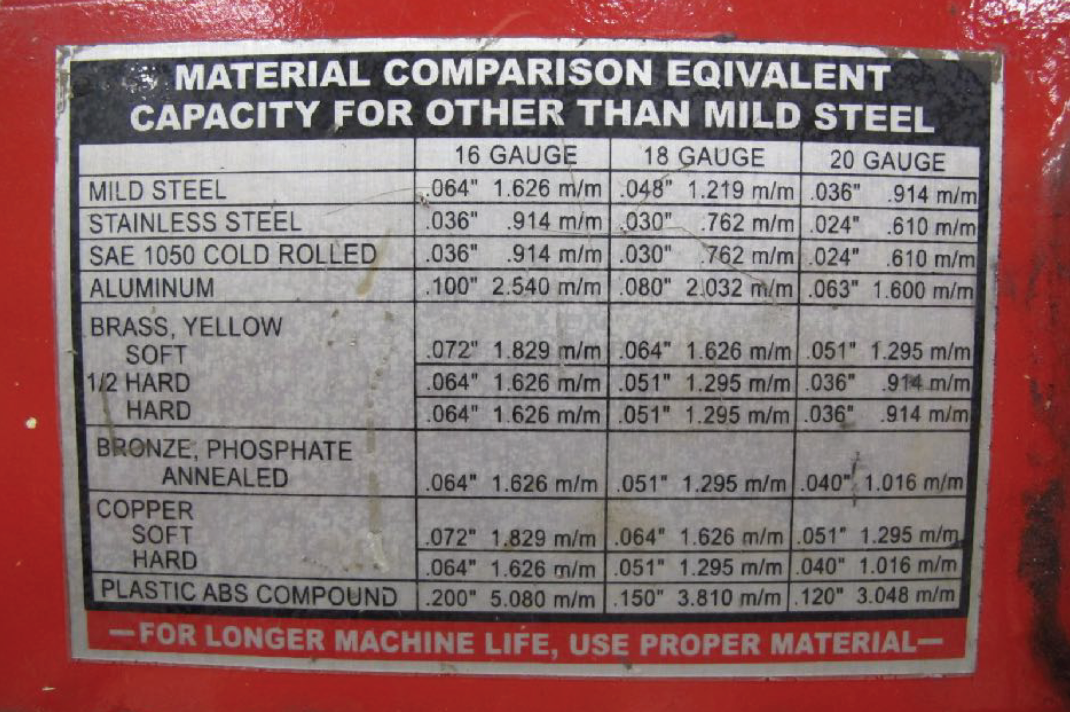
- Note that different metals have different thickness limits.
Do Not Use for:
- Any sheet metal exceeding max thickness
Hazard Analysis
- The workpiece can snap unexpectedly or break. Eye Protection Required
- Caught-between injuries when cutting
- Don’t pinch hands in the machine’s moving parts
- Don’t smash a foot under the foot petal
- Shin injuries from slipping off the foot pedal
- Cuts/ scrapes from sharp cut edges of work
| Eye protection required! | ||
|---|---|---|
| |
|---|---|
| Equivalent thickness for shearing different metals relative to mild steel. |
Operation Notes
- To perform multiple cuts of the same length, use the backstop and front stop attachments (stored under the pan and box brake).
- Thickness limits are different for different metals.
Refer to the chart on the machine
Basic Operation Instructions
Test before use - make sure blades are not interfering with each other.
| |
|---|---|
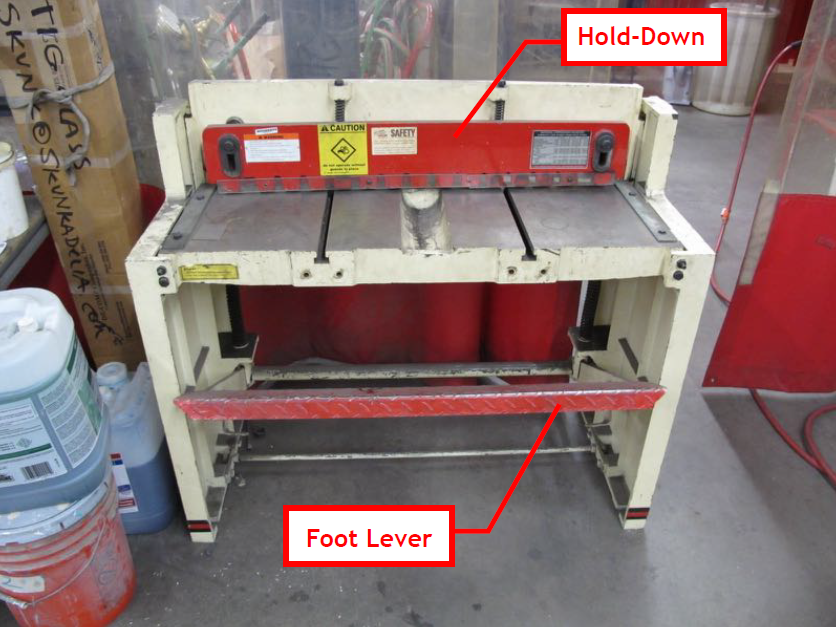
| The foot lever and hold down on the jump shear. |
1. Step on Foot Lever
2. As the foot lever travels downward, the Hold Down will press against the work piece at about half way. The Foot Lever will stop at this point.
3. To engage the cutting blade and perform the cut, use both feet to “jump" on the Foot Lever and press it to the floor.
Test with Craft Paper A paper grocery bag works well.
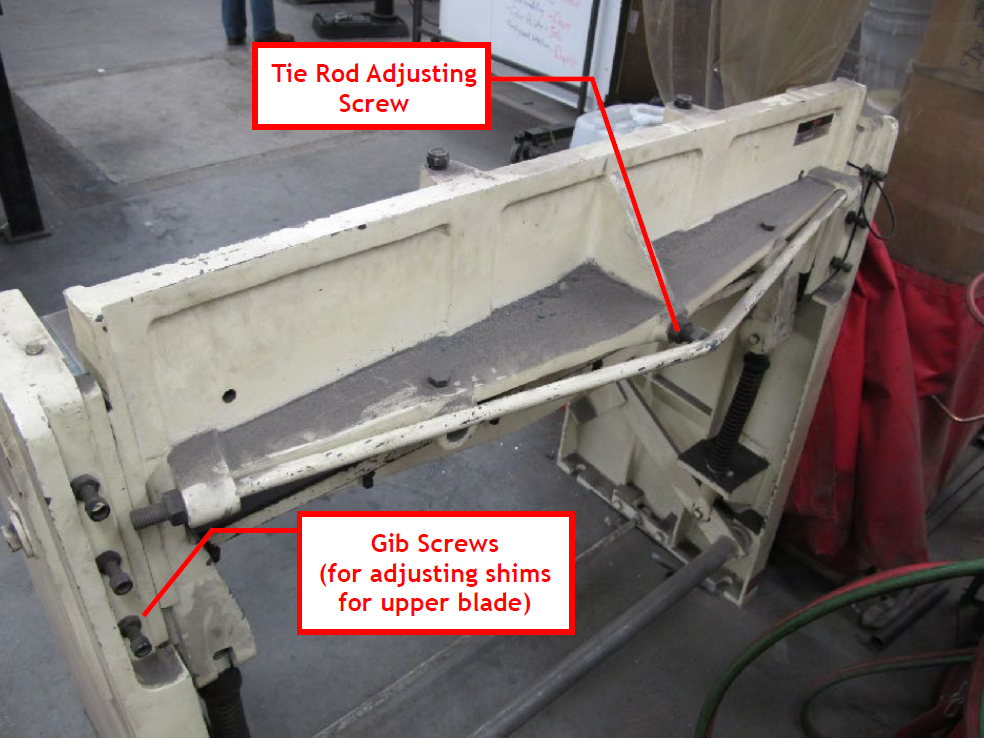
- If the shear cuts paper on the ends but not the center, loosen the hex nut and turn the tie-rod adjusting screw clockwise, as viewed from back, until paper is cut the entire length.
- If the shear cuts paper in the center but not the ends, loosen the hex nut and turn the tie-rod adjusting screw counter-clockwise until the paper is cut the entire length.
- Retighten the hex nut against the frame.
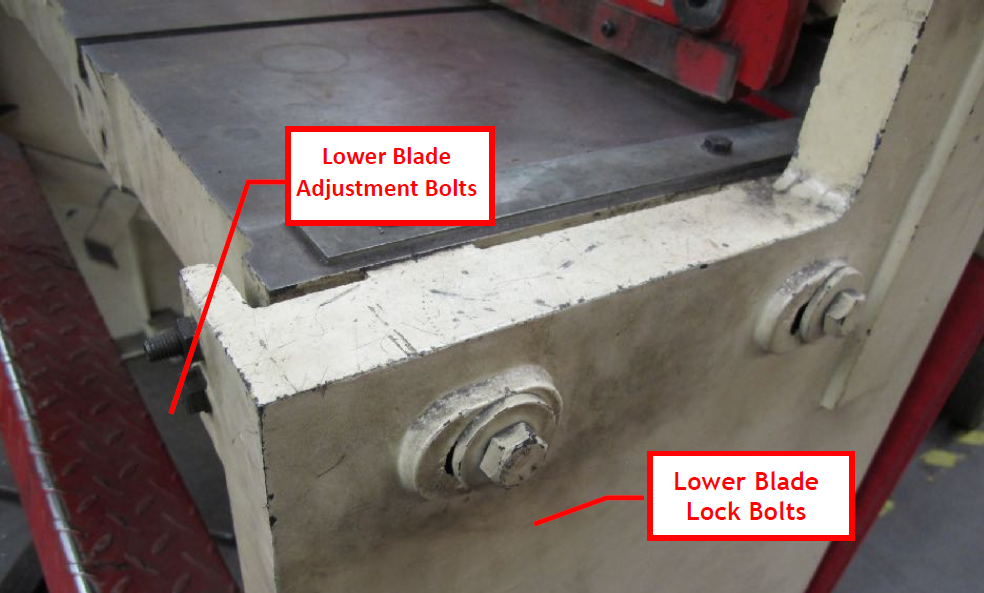
- To adjust the bottom blade, loosen the large bolts on the sides and adjust with bolts on the front.
| |
|---|---|
| Adjustment screws on the rear of the jump shear, for the upper blade. |
| |
|---|---|
| Adjustment screws on the front and sides of the jump shear, for the lower blade. |
