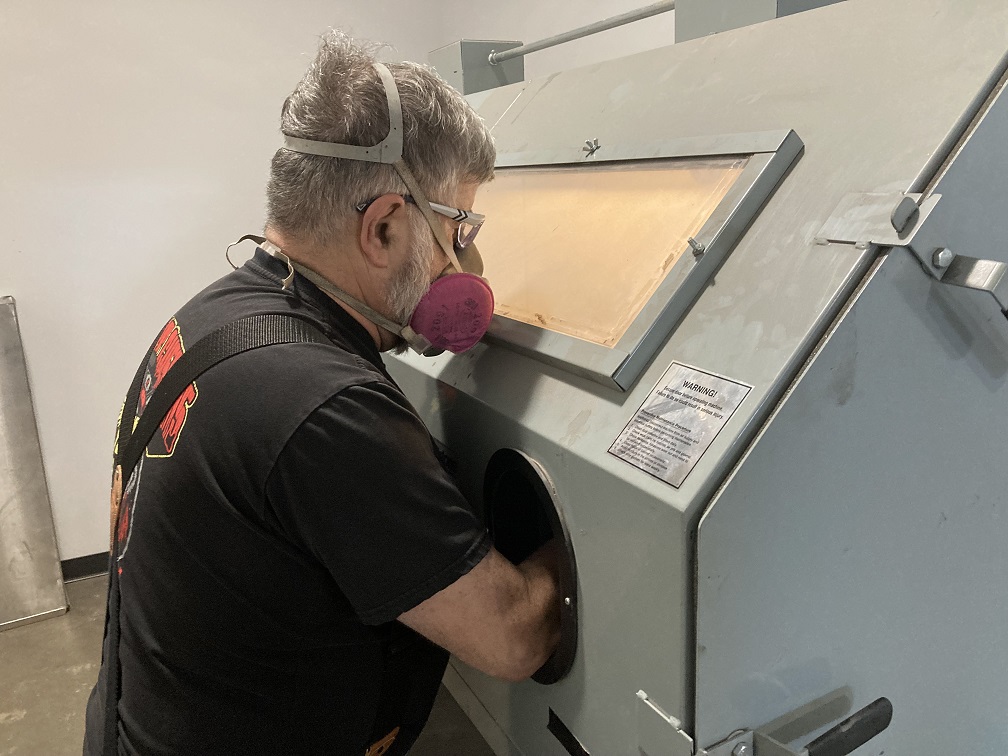
Cyclone Sand Blaster
Link to: Metal Shop main page
| Sand Blaster | |
|---|---|
| General Info | |
| Make | Cyclone Manufacturing |
| Model | DW-7335 (obsolete) |
| Serial | Unknown |
| Specs | |
| Manual | link= Manual for a similar model |
| Asylum Info | |
| Location | Metal Shop |
| Rubric | |
| Training | Tool classes |
| Testing | Tool testing, or [[:Category:Metal Shop#Tool Testing
Night|come to the shop on Tool Testing Night]] |
| Restrictions | green |

| |
|---|---|
| |
|---|---|

| |
|---|---|
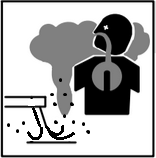
| Eye protection required! | ||
|---|---|---|
Description
A sand blaster is a machine that mixes abrasive grains with a jet of compressed air and allows the user to abrade the surface of a part, usually metal. This results in a clean though roughened part free of paint, rust, and other forms of dirt. For smaller parts the blast gun is contained in a glovebox cabinet sealed off from the outside. The user manipulates the tool with thick rubber gloves that pass through the wall of the cabinet.
The sand blaster cabinet at Artisans Asylum is located in a small room within the Metal Shop on the south wall adjacent to the fenced-in outdoor porch.
- Please Note: For best visibility inside the blast cabinet, turn on the inside light and dim the room lights. The light switch for the blasting room is located on the wall between the cabinet and the door.
Use For
- Steel
- Stainless Steel
- Zinc-coated steel (Galvanized)
- Aluminum, Titanium, Brass
- Painted metal
- Lightly Rusted Parts
Do Not Use For
- Lead-based paints
- Asbestos
- Greasy or Oily Parts
- Massively Rusty Parts
Use a lead-test swab to verify that paint if NOT lead-based!
If the sandblaster becomes contaminated with lead the media must be disposed as TOXIC WASTE and the cabinet must be thoroughly cleaned out!
Safety Notes
Personal

| |
|---|---|
- Wear safety goggles. Eyeglasses don't protect against abrasive dust.
- Wear a dust mask or respirator when using the machine or working in the room when the machine is being used. All dust is hazardous to breathe.
- Glove-box gloves are at a fixed height above the floor. If they are too high, a stand should be provided. Use care when stepping on and off the stand.
- If the blast gun is not properly grounded to the cabinet, static electricity can cause shocks to the operator. If static shocks are encountered, check the ground connection to the gun.
- Do not use silica sand as an abrasive media. The preferred sand blasting media is aluminum oxide.
- Use caution when lifting heavy parts into the sandblaster cabinet.
- If a part is too large to allow the hatch to close and seal, do not operate the sandblaster.
- Use caution with the foot pedal and hoses. They are a trip hazard.
Machine
- Test paints and coatings for LEAD using the test swabs provided. The swabs change from yellow to red when lead is present. If lead is detected do not clean with the sand blaster.
- Do not abrade greasy or oily parts in the sandblaster. These will case the media to clump and clog the flow lines. If it happens, the media must be replaced.
- Place the workpiece in the blast cabinet and close the hatch tightly to avoid dust escaping from the cabinet. When removing workpieces, some dust will unavoidably mix with the room air. Wear a dust mask at all times.
- Do not attempt to move the blast cabinet when it is full of abrasive media.
- Do not point the blast gun at the rubber gloves or the cabinet window or the cabinet ceiling light.
How to Prepare Metal Workpieces for Blasting
* TEST FOR LEAD.

| |
|---|---|
| Color if lead is present |

| |
|---|---|
| Color for no lead |
| |
|---|---|
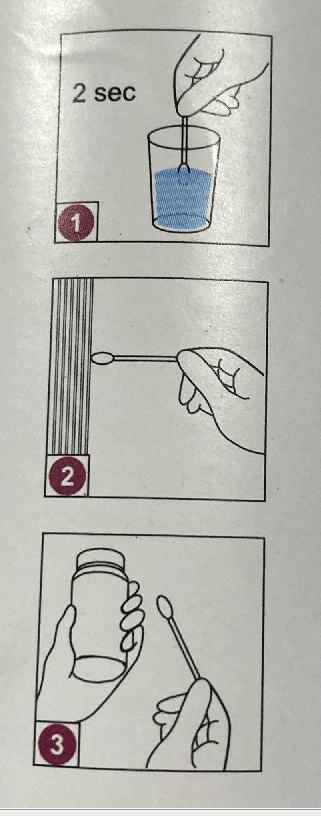
| How to Swab |
| |
|---|---|
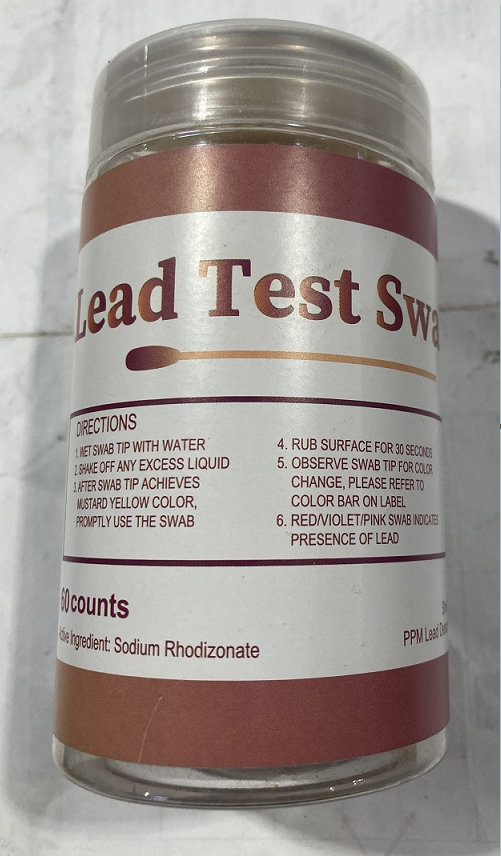
| Lead test swabs |
Lead and lead paint are forbidden on this machine. Use a lead test swab to verify that there is no lead on the surface of your workpiece.
Moisten the tip with water, wait 2 seconds for the reagent to dissolve, then rub the surface.
If no lead is present the swab stays yellow-orange. It turns crimson if lead is present.
If the machine becomes contaminated with lead, tell the facilities manager so that the media can be safely disposed. It is toxic waste. It is not legal to throw the media away yourself. The blast cabinet must be scrubbed to remove toxic dust.
* Clean off any massive rust with a grinder before placing the workpiece in the sandblaster.
Large flakes of rust can mix with the blasting media and clog the flow lines leading to the gun.
* Degrease the workpiece
If greasy or oily, clean the workpiece with a solvent or a water-base cleaner such as Simple Green. Make sure it is dry before placing it in the blast cabinet.
Parts of the Sandblaster
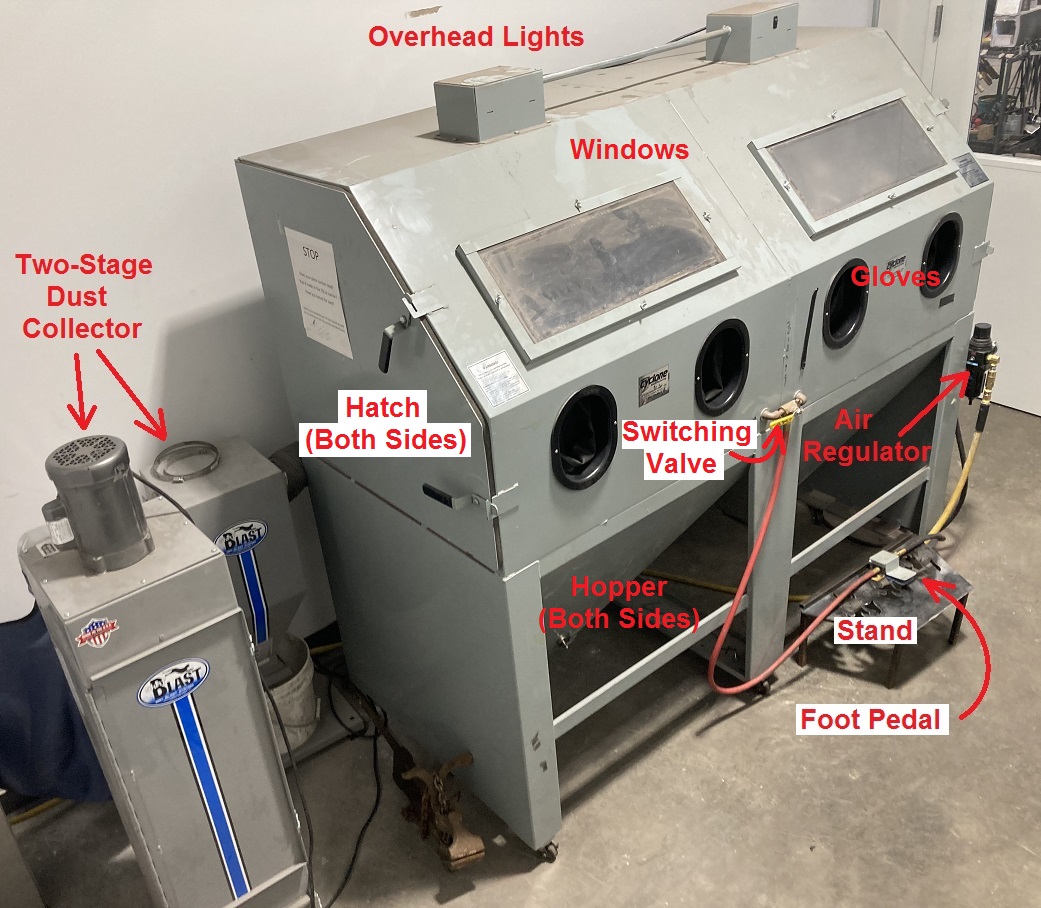
| |
|---|---|
| The Sandblaster and dust collector installation |
The sandblaster has three free-standing components: The cabinet is the largest, and the others are a two-stage dust collector to the left of the cabinet.
Presently only the right-hand glovebox station is working.
Turn on the dust collector by plugging it in to the left.
Turn on the overhead lights with the small switch on the right-hand box.
The switching valve should be in the up-down position.
Blast media is contained in the hoppers below each station.
The sandblasting action is controlled with the foot pedal on the floor on the right side of the cabinet.
The room has ventilation to the outside. The switch is located on the wall next to the CNC plasma cutter.
Operation Notes
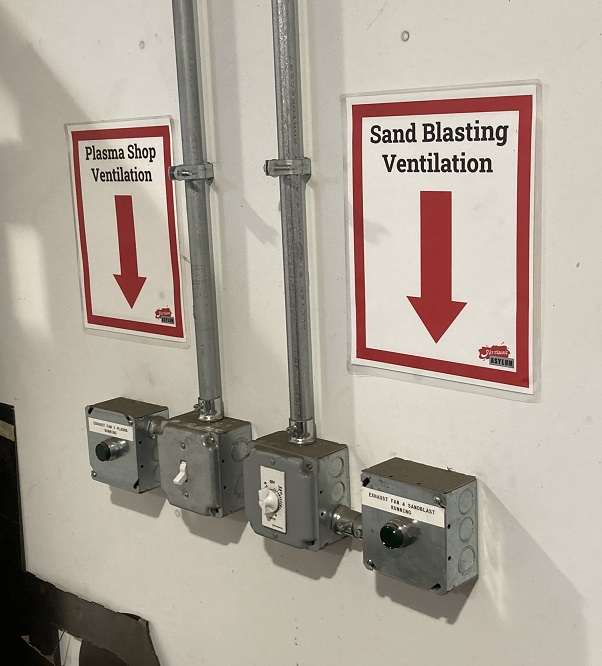
| |
|---|---|
| The power switch for the sanblast room ventilator is located around the corner on the back wall adjacent to the CNC plasma cutter. |
1. Ensure that the air compressor is on. It is located in a closet in the loading dock area.
2. Turn on the room ventilator. Switch located in the plasmatron corral.
3. Put on goggles and a dust mask or respirator.
4. Place the workpiece in the cabinet and close the hatch tightly.
5. Make sure there is media in the hopper. The depth should be about 6 inches in the bottom, no more.
6. Arrange the stand as needed and place the foot pedal in a convenient spot.
7. Plug in the two-stage dust collector located to the left of the cabinet.
8. Turn on the overhead light. Switch on top right of the cabinet.
9. Step on the foot pedal and BLAST!!!
- The user needs two hands and one foot to operate the machine. This leaves one foot to stand on. Be careful to maintain balance while you are working, especially if you are standing on a stand.
- While the air is flowing, it may be necessary to wiggle the dip tube that reaches down into the hopper where the media is located.
- If you experience static shocks, wear a ground strap or tie a ground wire from the gun to the grill inside the cabinet.
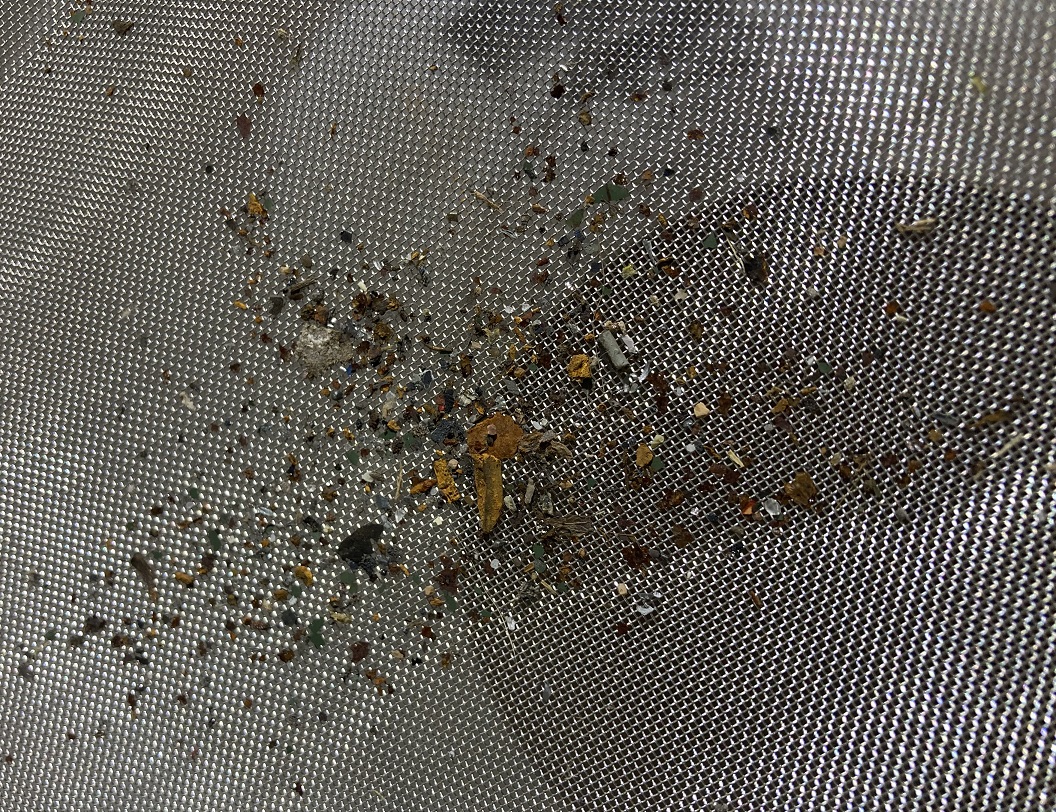
| |
|---|---|
| Flakes can block the gun and damage the hoses. |
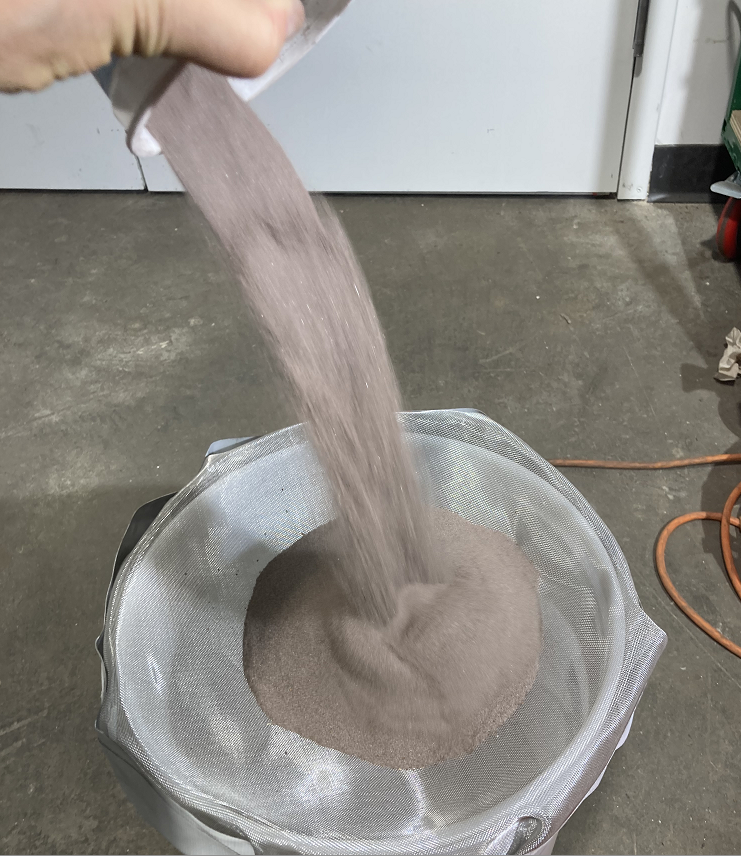
| |
|---|---|
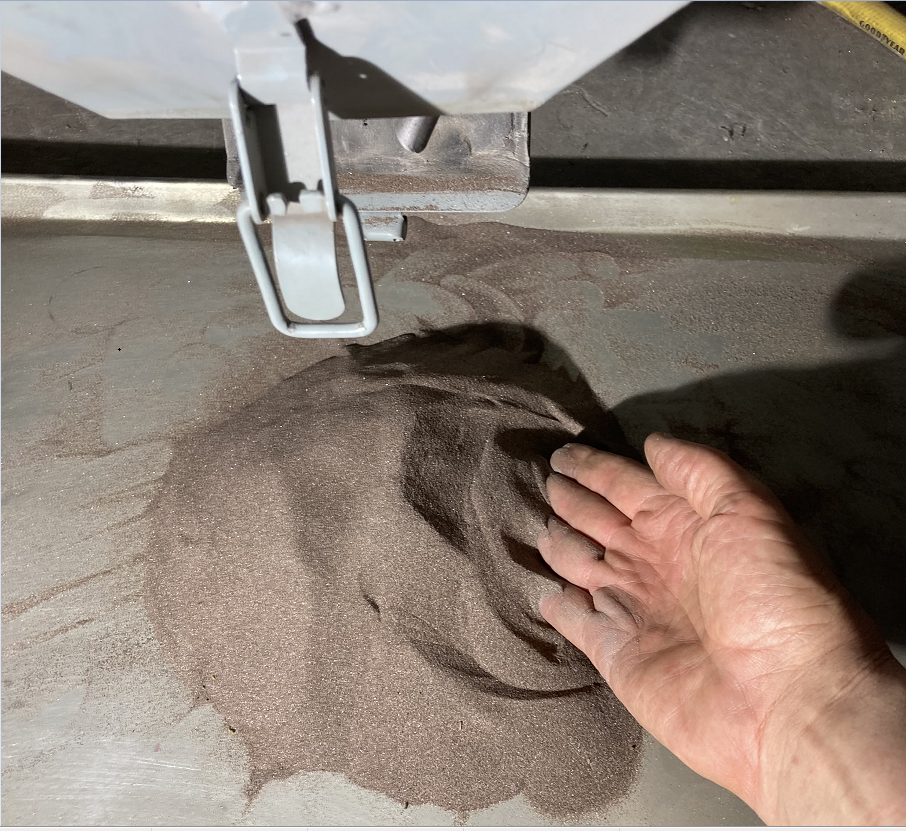
| Pour the media through the screen provided to remove flakes. |
| |
|---|---|
| The total quantity of media in the hopper should be 1-2 quarts in volume. |
- Open the cabinet and inspect your work periodically. Wait a minute or two for the dust to settle before opening the hatch.
10. When finished, drain the media out of the machine and sift it.
- If the volume of media exceeds two quarts, it will become compressed in the bottom of the hopper and won't flow into the dip tube.
- Flakes of paint and rust should be disposed of. If lead paint is present, DO NOT REUSE THE MEDIA. It must be packed up and disposed as toxic waste.
How it Works
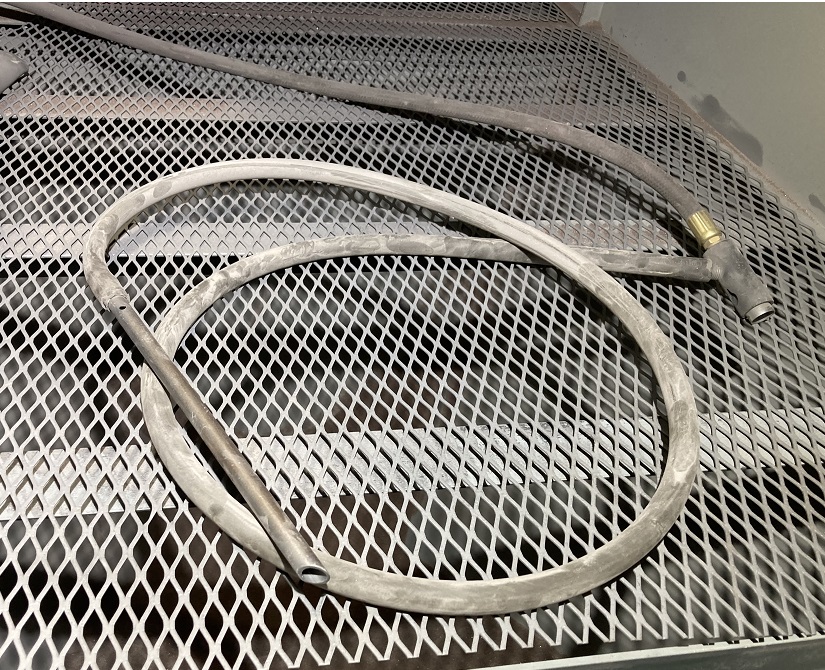
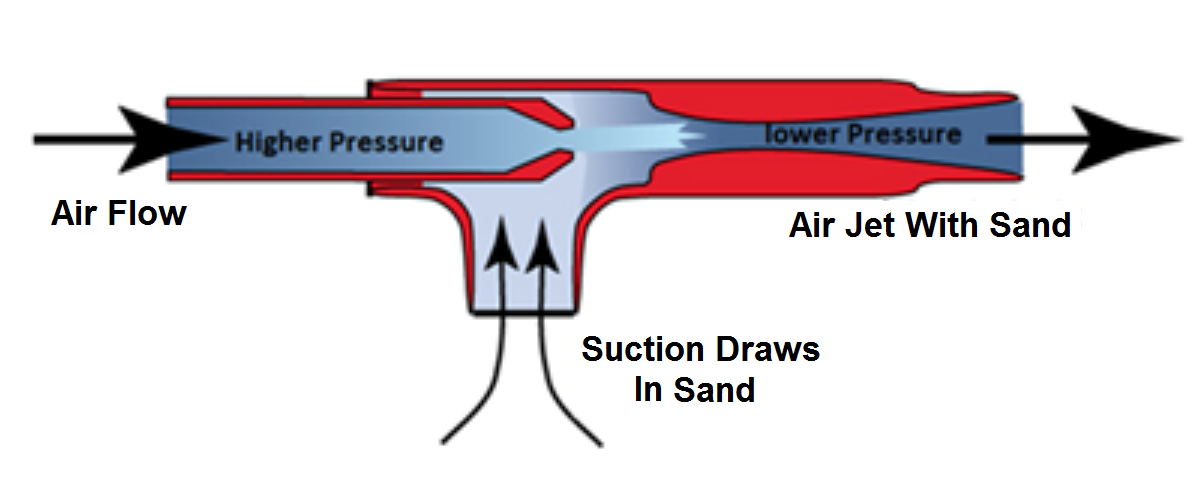
The sandblasting gun is a pneumatic device called a Venturi. Compressed air is fed into the end of the gun and issues through the nozzle. Inside the gun the air jet traverses a side entry that is connected to a dip tube that reaches into the pile of media in the hopper.
The jet of air from the high pressure side entrains slower-moving air in the side entry, causing it to be drawn up through the dip tube. Feeding 100 psi air from the air supply results in 2-5 psi of suction at the dip tube.
| |
|---|---|
| The blast gun with hose connections. Top: High pressure air feed; Middle Right: Blast Gun; Left: Suction hose with dip tube. |
| |
|---|---|
| A schematic view of the blast gun. |
The suction in the dip tube collects media from the hopper and feeds it into the air jet. Aluminum oxide has a density almost double that of glass. Excessive media in the hopper will cause it to compress in the lower portions and make it unflowable.
The correct amount of media for reliable operation is about 1 gallon, roughly 20 lbs.
If there is too much media in the hopper it is necessary to agitate the dip tube to keep the media flowing up to the gun. This can make the process seem like a three-handed job at times if you need to use a hand to steady the workpiece.
Draining Media from the Hopper
| |
|---|---|
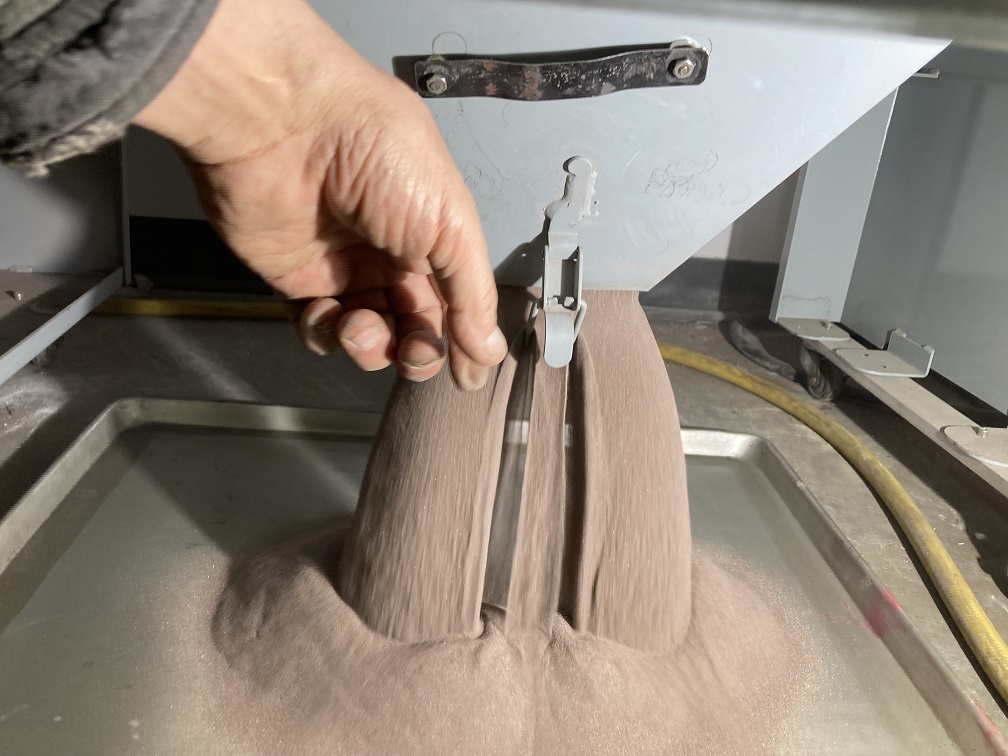
| Open the hatch. |
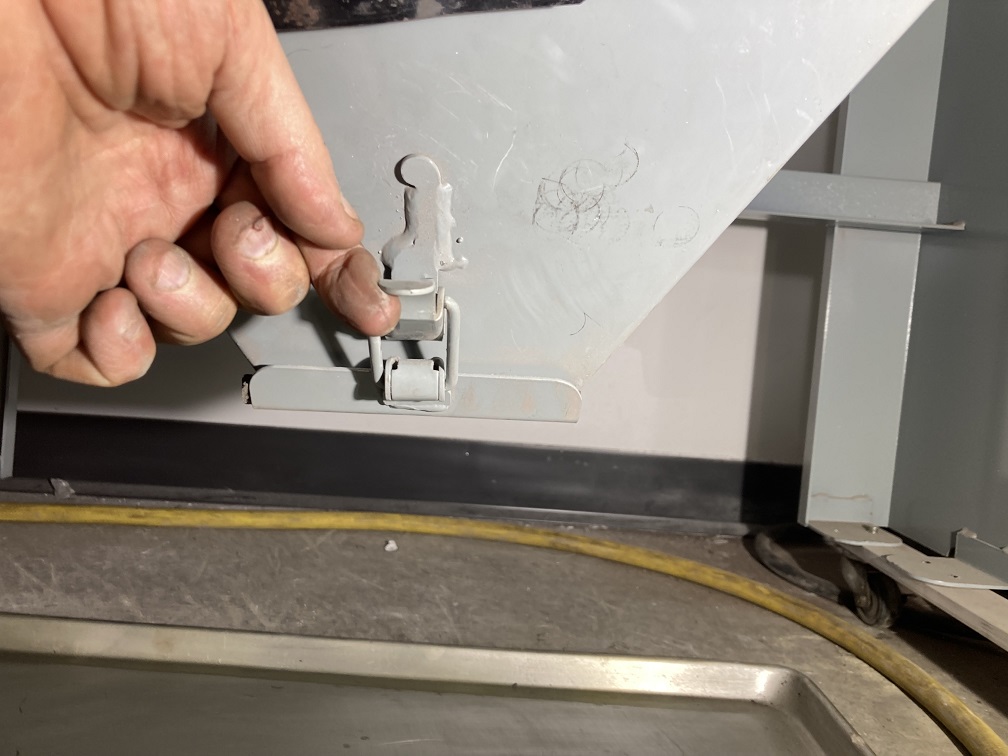
| |
|---|---|
| Grasp the latch. |
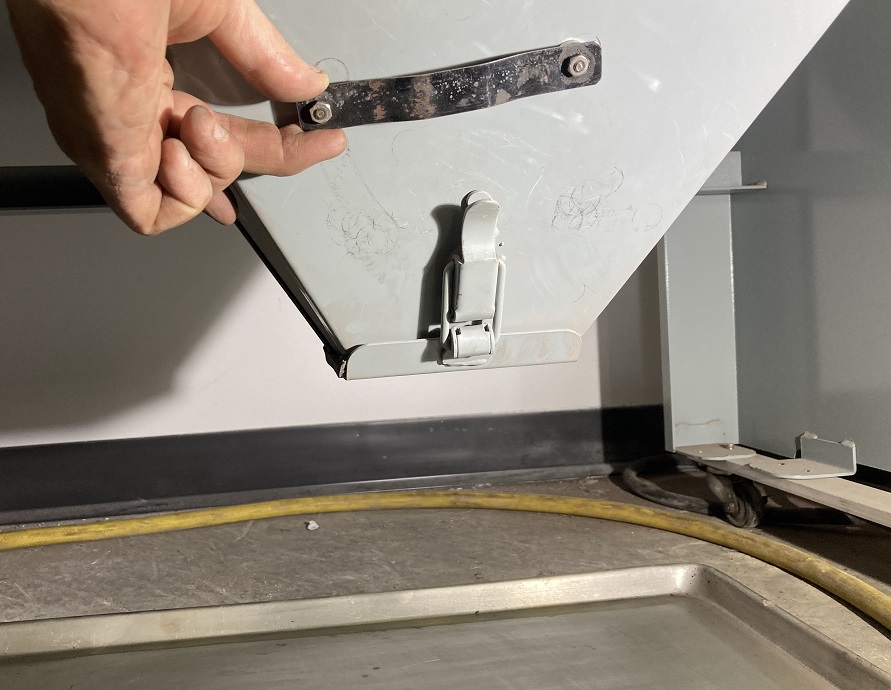
| |
|---|---|
| Move the magnetic brace. |
Some people believe if some is good, more is better. This is not the case with blast media.
If you need to remove blast media, there is a drain hatch at the bottom of the hopper.
The latch holding the hatch closed is weak, so there is a magnetic brace helping hold it closed.
Use a tray to collect the media. Otherwise it drains onto the floor.
Adding Media to the Hopper
Open the hatch on the side of the blast cabinet and pour the media into the hopper.
