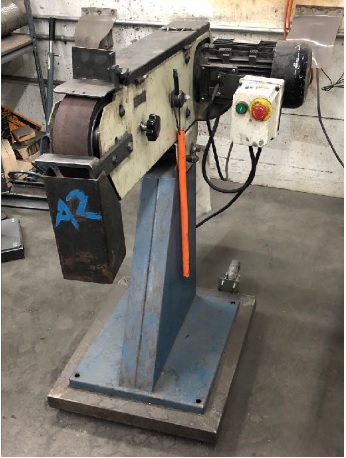
Belt Sander
Link to: Metal Shop main page
Link to: Metal Shop tool list
| Belt Sander | |
|---|---|
| General Info | |
| Make | Baileigh |
| Model | BG-379 |
| Serial | Unknown |
| Specs | n/a |
| Manual | N/A |
| Asylum Info | |
| Location | Metal Shop |
| Rubric | n/a |
| Training | Tool classes |
| Testing | Tool testing, or come to the shop on Tool Testing Night |
| Restrictions | red |
Materials
Use for:
- Deburring, beveling, chamfering
- Mild steel
- Stainless steel
- Aluminum
- Copper
- Brass
- Bronze
Do not use for:
- Small work pieces. (Can catch and get thrown)
- Hardened Steel - it can be done, but the heat will ruin the temper.
- Titanium
Safety Hazards
| Eye protection required! | ||
|---|---|---|
- Tool is very loud. Hearing protection required.
- Spark spray
- Drawn-in injuries - do not wear loose clothing, gloves, or rings
- Small work can be caught between belt and rests, causing injury to hands
- Cuts / scrapes from sharp cut edges of work
- Fire hazard from sparks
- Burns from hot work
- Breathing particulates thrown into the air. Respiratory protection recommended.
Operation Notes
- Tool is very LOUD. Protect your ears, especially during prolonged use.
- Do not wear gloves or loose clothing.
- Long range sparks can reach the middle of the shop when using top of the belt.
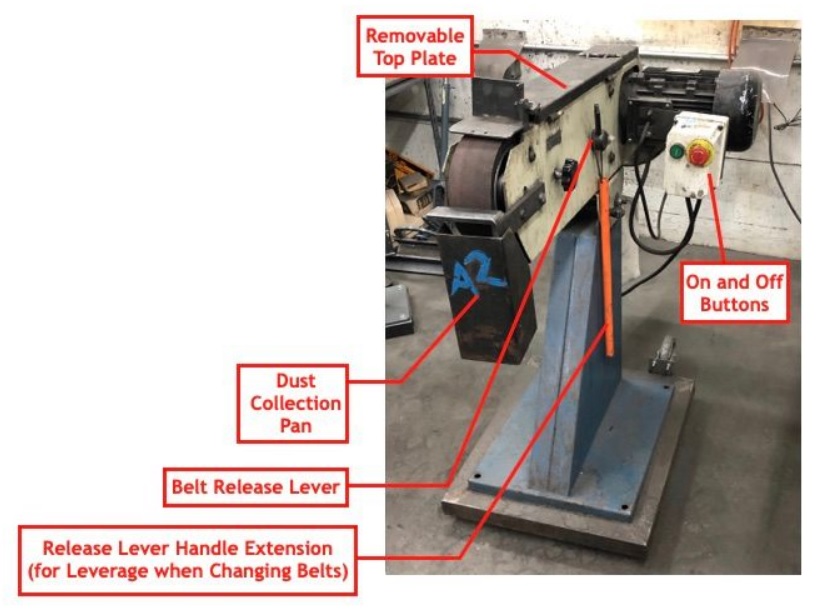
- Be aware of the safety stop, the mushroom button. The tool has no other brake.
- The dust extraction motor in the rear can become clogged. Keep an eye out.
- Be aware that the tracking adjustment on this tool wanders and the removable top plate is worn.
Basic Operation Instructions
1. Perform a safety check prior to use.
Is the sanding belt in good condition? Are the fences secure?
Note that the top plate can be removed to use the top (and flat) section of the sanding belt.
Be aware of the machine’s “danger zone.” If debris and loose particles are ejected, they will shoot out in line with the belt’s rotation.
2. Turn the machine on, then perform your grinding / sanding operation
Stand slightly to the side during startup. Keep your standing position in mind while working.
Press the green “on” button.
Belt travels toward you. Hold your workpiece accordingly and watch your hands.
Brace work against the tool rests whenever possible.
3. Press the red mushroom button ot stop the machine when done.

