Saw Stop Table Saw
Link to: Wood Shop main page
| Saw Stop 10-inch Table Saw | |
|---|---|
| General Info | |
| Make | Saw Stop |
| Model | ICS53230 |
| Serial | |
| Specs | |
| Manual | Manual |
| Asylum Info | |
| Location | Wood Shop |
| Rubric | |
| Training | |
| Testing | |
| Restrictions | red |
This is a red tool. Training and tool-testing are required.
Description
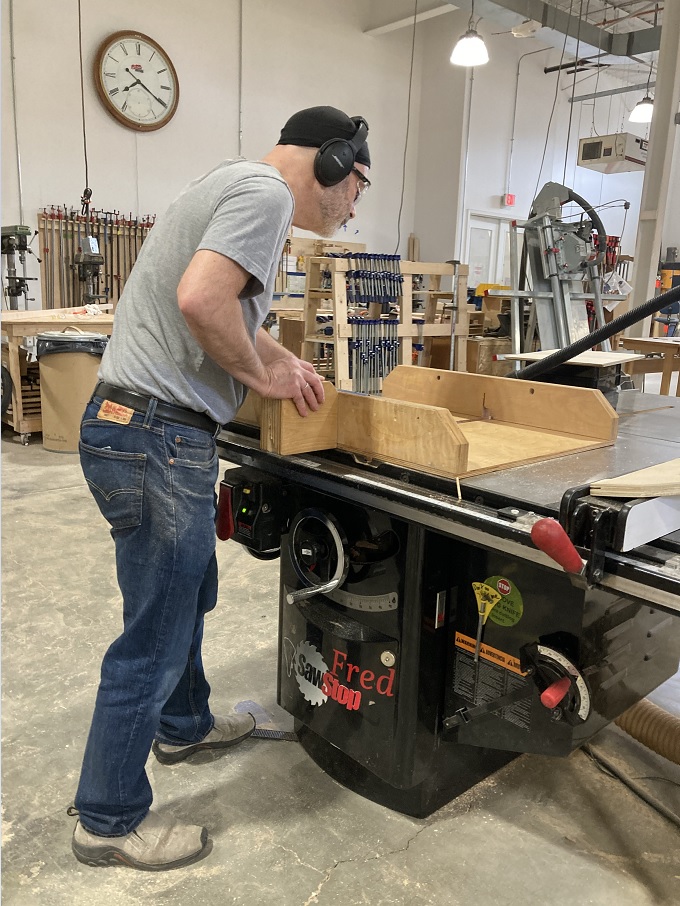
A table saw has a rotating circular saw blade that projects up through the surface of a horizontal table. Workpieces are fed by hand through the blade to make straight cuts. To steady the workpiece there are two choices: a linear fence, called a "rip" fence, and a bracket called a "miter gauge" that slides in a slot in the table. For proper use, please refer to the manual. NOTE: Never use the rip fence together with the miter gauge. Custom jigs are also possible, as shown to the right. The blade can be tilted with respect to the table top, and the miter gauge permits the workpiece to be rotated to any angle.
Use For
| |
|---|---|
- Dry, flat lumber
- Boards
- Plywood sheets
Do Not Use For
- Logs, carvings, or other irregular lumber
- Pressure-treated
- Wet lumber
- Plastic
- Metal or metal-coated
- Composites
- Carbon-filled materials
The Wood Shop Collection
The Wood Shop has two table saws located in opposite corners of the room:
| |
|---|---|
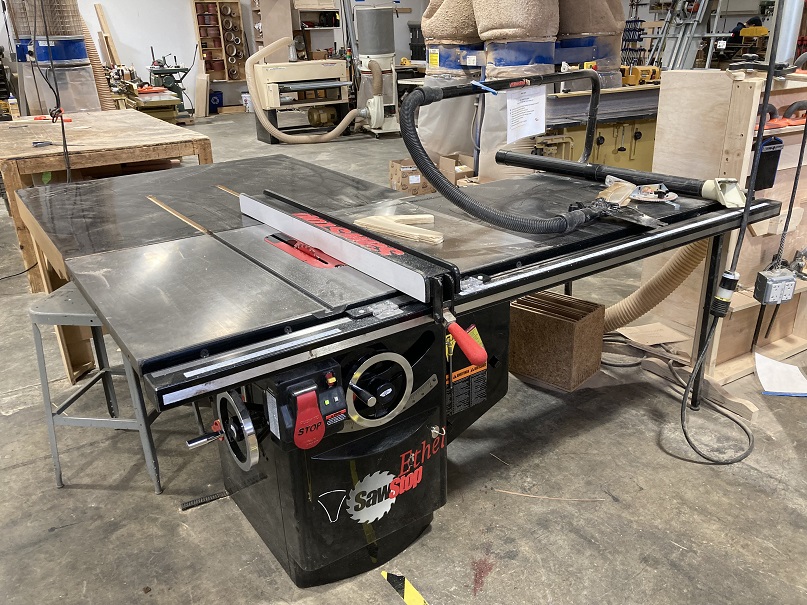
| Ethel relaxing |
| |
|---|---|
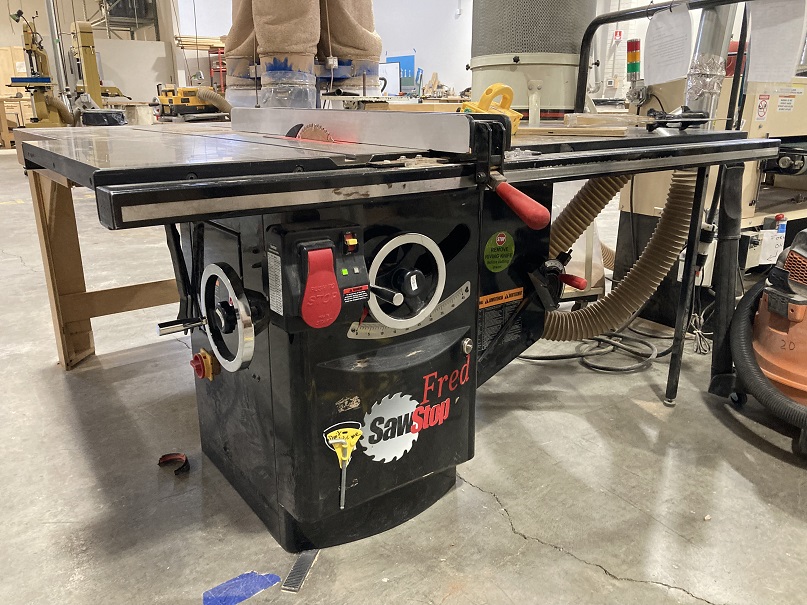
| Fred in repose |
- Fred is located close to the main door in the northeast corner of the room. It uses a ?-Hp 3-phase 240-volt motor. This saw is more powerful, but with a smaller table. It is better suited for cutting boards, but will cut both boards and sheets.
- Ethel is located opposite, in the southwest corner of the room. It uses a ?-Hp single-phase 240-volt motor. This saw has a very broad table, so it is better suited for cutting plywood sheets, but it will cut boards too.
Table Saw Safety Notes
| Eye protection required! | ||
|---|---|---|
- Saw stop technology detects blade contact with the skin and stops the blade within milliseconds. It doesn't prevent injury, but minimizes the severity when used correctly. Disabling the mechanism risks much worse injury.
- Dust: All forms of dust are hazardous, some particularly so. Always use the dust control system, and it is recommended that you also wear a dust mask.
- Keep the guards in place.
- Remove wrenches and adjusting keys before switching on the saw.
- Remove clutter from the top of the saw.
- Keep hands out of the line of the saw blade.
| |
|---|---|
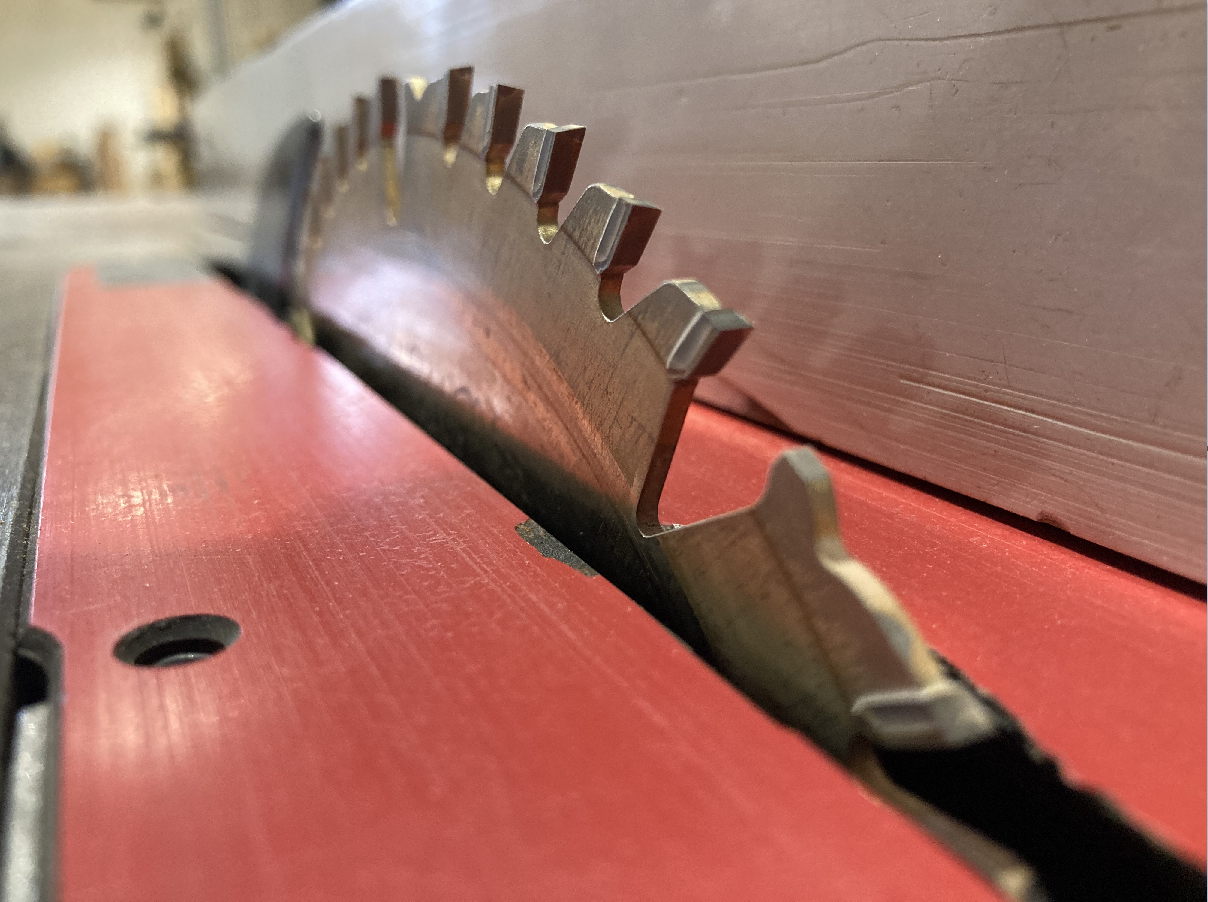
| Table saw blades rotate at about 4000 RPM, with a surface speed of about 120 mph. |
- Use a push-stick when required
- Use the blade guard and spreader (or riving knife) for every operation where possible, including all through sawing.
- Never reach around or over the saw blade.
- Never try to test-fire the brake system.
- Unplug the saw before changing the blade or servicing.
- No loose clothing, neckties, rings, bracelets, or other jewelry. Non-slip footwear. Tie back or cover long hair.
- Keep proper footing and balance at all times
- Unplug the saw before servicing or changing blades.
- Never stand on the saw.
- Perform a safety check:
- Alignment of moving parts
- No binding or rubbing
- Make sure accessories are mounted properly
- Repair or replace damaged guards or other parts
- Feed the work against the direction of rotation of the blade.
- Never leave the saw running unattended.
- Always maintain firm control over the material being cut. Never cut freehand.
- Never operate with the access doors open.
The SawStop Safety System
The device doesn't prevent injury. In fact, injury must occur before the system can react. How severe an injury depends on how fast the person is moving. This machine includes an electronic detection system and a fast-acting brake to reduce the potential for serious injury during accidental contact with the blade.
| |
|---|---|
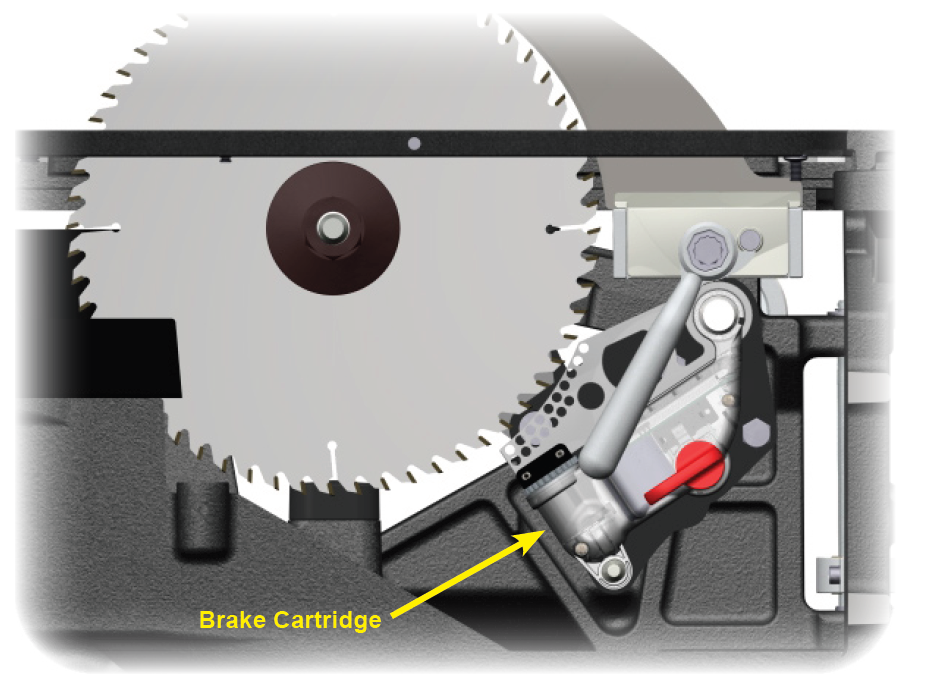
| Inside view of the saw showing the SawStop brake cartridge |
The mechanism is contained in a cartridge underneath the cutting table that is activated by contact with human skin. When this happens, a strong spring forces an aluminum brake shoe into contact with the blade, retracting and stopping it within a few milliseconds.
Practically, if the user's hand moves at about 1 foot per second, the blade will have stopped by the time the hand has moved about 1/20 of an inch, so the user will incur a scrape about that deep. Body parts that are thrown in faster will be cut deeper, even if the system works perfectly.
The cartridges can only be used once: Once triggered they must be replaced. This also destroys the blade.
The blade retracts into the table when the brake is activated. Reaching UNDER a spinning blade when the brake is activated may cause a serious injury.
For those electronics nerds among you, the system applies a high-frequency electrical signal to the blade that is tuned to the impedance of the human body. Touching the blade decreases the amplitude of the signal significantly, causing the control system to trip the spring on the brake shoe and stop the blade.
Wood doesn't trigger the mechanism.
Electrically conductive materials such as metal, carbon-filled, or metal-coated sheet materials WILL trigger the brake, as will wet pressure-treated lumber, so they should NOT be cut using this machine unless necessary precautions are taken. Refer to Page 33 of the manual.
Blades that don't have the specified diameter for the SawStop system won't benefit from it. There is a special cartridge for 8-inch dado blades up to 13/16" thick, but cutters known as "molding heads" won't benefit from the system. Just to be clear, we mean: "Molding head" and not "Head molding"
| |
|---|---|
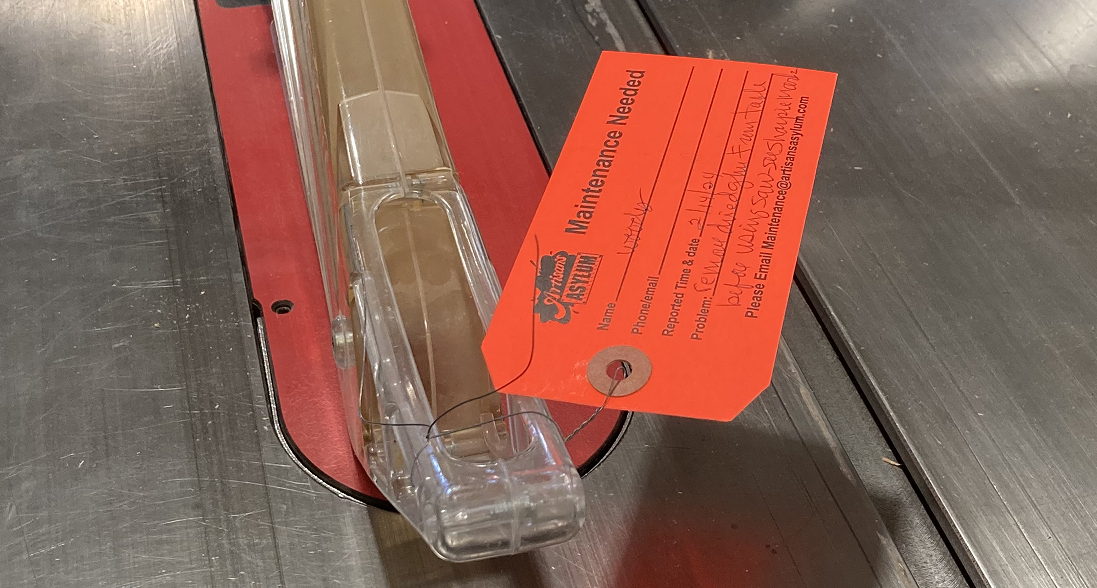
| A red maintenance tag. |
What To Do if the SawStop Brake is Triggered
- Put a red tag on the machine explaining what happened.
- Call or email the shop lead.
- Do not attempt to repair.
Starting and Stopping the Saw
| |
|---|---|
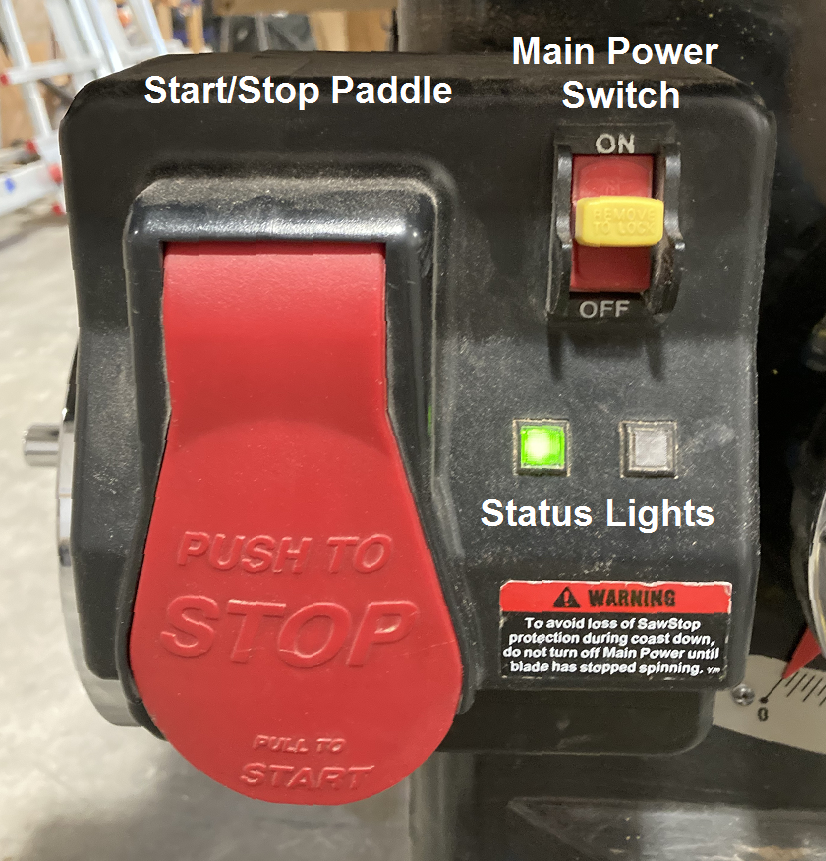
| The SawStop switch box with main power switch, start/stop paddle, and status indicator lights. Green light indicates the saw is ready to start. |
To START the table saw:
1. Switch on the dust collector. Both machines use the Coral AF/4C central dust collector.
2. Make sure the Start/Stop paddle is pushed in before switching on the main power.
3. Switch the Main power to ON. The machine will go through a self-check sequence that takes 5-10 seconds.
4. If all is well, the GREEN indicator light will be on without blinking.
- Any other combination of lights indicates an error. See error codes below.
5. To start the motor for the saw, pull the Start/Stop paddle out.
To STOP the table saw
1. Push the Start/Stop paddle in.
2. While the blade is coasting down, the GREEN indicator will blink. DO NOT TOUCH THE BLADE UNTIL IT IS STOPPED! You can set off the SawStop brake.
3. When finished with the saw, turn the Main power OFF.
- The paddle is placed so that the operator can turn the machine off with their knee in an emergency if their hands are occupied.
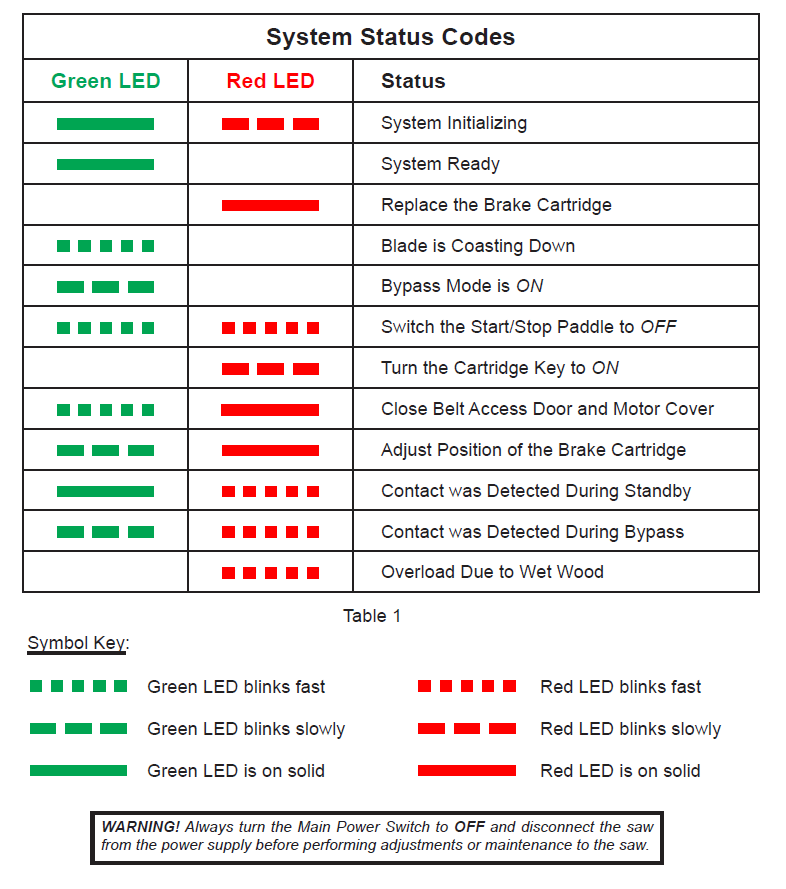
| |
|---|---|
| Status codes on the switch box indicator. See pp. 31-32 of the manual for detailed descriptions of these codes. |
