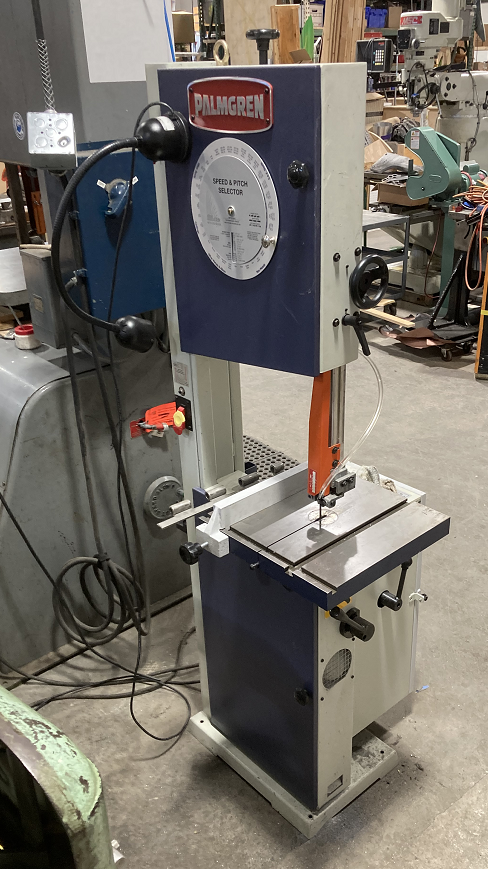
Palmgren 15-inch Vertical Bandsaw: Difference between revisions
No edit summary Tag: Manual revert |
|||
| (6 intermediate revisions by the same user not shown) | |||
| Line 40: | Line 40: | ||
Push it in to stop. | Push it in to stop. | ||
''A paddle switch is useful if the operator's hands are occupied. The machine can be stopped with an elbow of a shoulder if necessary.'' | |||
==Setting the Speed== | |||
'''Always unplug the saw before changing the speed''' | |||
The Palmgren has a simple belt drive with multiple pulleys, similar to those found in drill presses. | |||
Although a detailed rotary reference table is mounted on the side panel similar to the Do-All, the choices for speeds are limited to certain select values. The Palmgren user manual gives a short table with recommended speeds for metals. | |||
{| class="infobox" cellspacing="5" style="width: 12em; text-align: left; font-size: 100%; line-height: 1.5em;" | |||
! colspan="2" class="infobox-image" | [[File:Band_Saw_Palmgren_speed_range_chart.png|250px| Palmgren metal speeds ]] | |||
|- | |||
| colspan="2" | Speed ranges for various metals. | |||
|- | |||
|} | |||
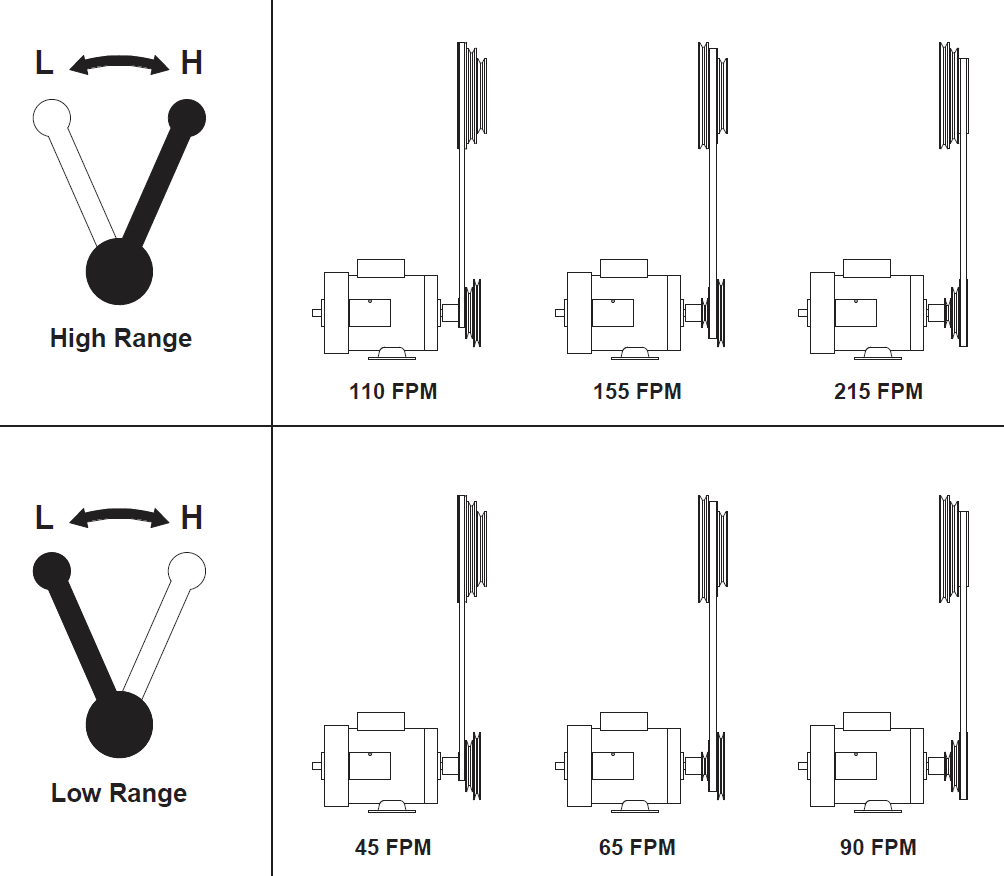
To set the saw to the desired speed, refer to the diagram given. | |||
Set the speed-range handle to the correct side. DO NOT leave the handle in-between settings. It must be placed on one side or the other. If there is difficulty setting it in place, rotate the pulley manually until the gears mesh. | |||
{| class="infobox" cellspacing="5" style="width: 12em; text-align: left; font-size: 100%; line-height: 1.5em;" | |||
! colspan="2" class="infobox-image" | [[File:Band_Saw_Palmgren_transmission.png|250px| Palmgren transmission ]] | |||
|- | |||
| colspan="2" | Speed-range handle (left) and belts on the Palmgren. | |||
|- | |||
|} | |||
Move the drive belt from one set of grooves on the pulley to another. | |||
Because of the tensioning mechanism, this is a little bit difficult at first, but with a little bit of practice it is not hard to do. | |||
{| class="infobox" cellspacing="5" style="width: 12em; text-align: left; font-size: 100%; line-height: 1.5em;" | |||
! colspan="2" class="infobox-image" | [[File:Band_Saw_Palmgren_speed_range_diagram.png|250px| Palmgren speed range diag ]] | |||
|- | |||
| colspan="2" | Diagram showing belt configurations for the Palmgren speed settings | |||
|- | |||
|} | |||
Latest revision as of 16:25, 17 March 2024
Link to: Machine Shop Main Page
| Eye protection required! | ||
|---|---|---|
| Palmgren Vertical Band Saw | |
|---|---|
| General Info | |
| Make | Palmgren |
| Model | 15-inch, 7 speed |
| Serial | |
| Specs | |
| Manual | User Manual |
| Asylum Info | |
| Location | Machine Shop |
| Rubric | N/A |
| Training | |
| Testing | Tool testing |
| Restrictions | red |
See the Vertical Band Saws category for notes on using saws of this kind.
Safety
Link to: Safety notes on the Metal-Cutting Vertical Band Saws category page
Operation
| |
|---|---|
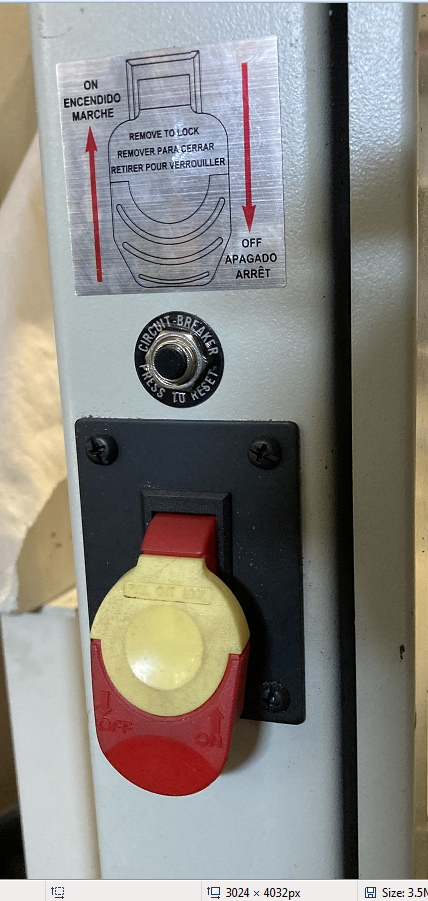
| The power switch on the column adjacent to the table. |
This machine has a paddle-type power switch that resembles the switch on the table saws in the Wood Shop.
Pull the paddle out to start.
Push it in to stop.
A paddle switch is useful if the operator's hands are occupied. The machine can be stopped with an elbow of a shoulder if necessary.
Setting the Speed
Always unplug the saw before changing the speed
The Palmgren has a simple belt drive with multiple pulleys, similar to those found in drill presses.
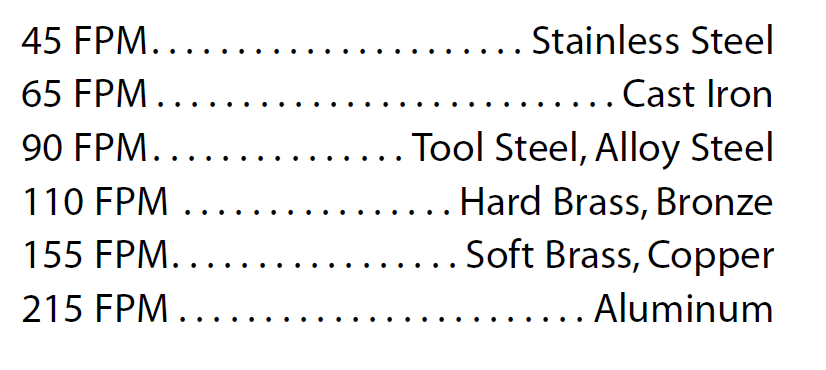
Although a detailed rotary reference table is mounted on the side panel similar to the Do-All, the choices for speeds are limited to certain select values. The Palmgren user manual gives a short table with recommended speeds for metals.
| |
|---|---|
| Speed ranges for various metals. |
To set the saw to the desired speed, refer to the diagram given.
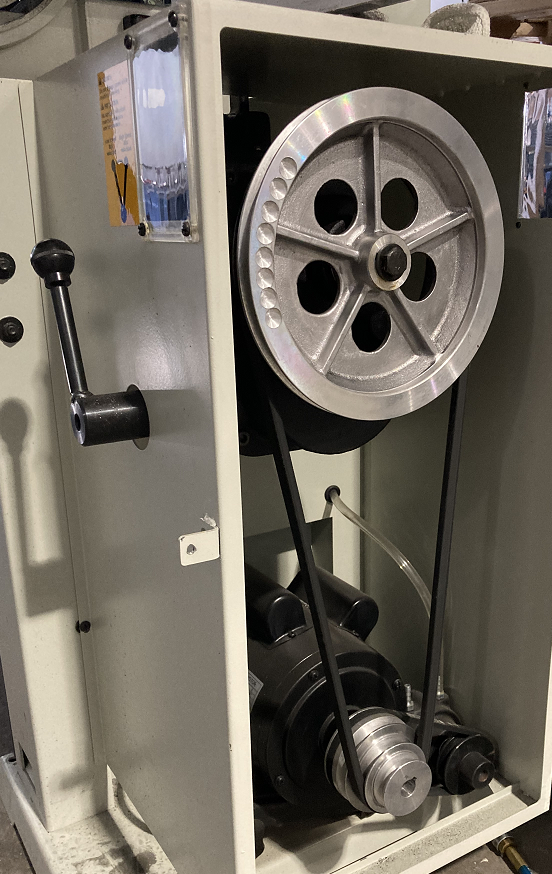
Set the speed-range handle to the correct side. DO NOT leave the handle in-between settings. It must be placed on one side or the other. If there is difficulty setting it in place, rotate the pulley manually until the gears mesh.
| |
|---|---|
| Speed-range handle (left) and belts on the Palmgren. |
Move the drive belt from one set of grooves on the pulley to another.
Because of the tensioning mechanism, this is a little bit difficult at first, but with a little bit of practice it is not hard to do.
| |
|---|---|
| Diagram showing belt configurations for the Palmgren speed settings |
