Open Face Paint Booth: Difference between revisions
Acharlwood (talk | contribs) No edit summary |
Acharlwood (talk | contribs) m (Categorizing content) |
||
| (4 intermediate revisions by the same user not shown) | |||
| Line 8: | Line 8: | ||
|serial = Unknown | |serial = Unknown | ||
|manufacturer_specs = [https://globalfinishing.com/product/open-face-paint-booth From manufacturer] | |manufacturer_specs = [https://globalfinishing.com/product/open-face-paint-booth From manufacturer] | ||
|manual = [ | |manual = [[File:Mitsubishi-a800-manual.pdf]] | ||
|location = Finishing | |location = Finishing Shop | ||
|tool_categories = [[Category:Finishing]] | |tool_categories = [[Category:Finishing Shop]] | ||
|rubric = | |rubric = [[Finishing Shop Training Rubric]] | ||
|training = [https://www.artisansasylum.com/tool-testing Sign up here] | |training = [https://www.artisansasylum.com/tool-testing Sign up here] | ||
|testing = [https://www.artisansasylum.com/tool-testing Sign up here] | |testing = [https://www.artisansasylum.com/tool-testing Sign up here] | ||
|restrictions = red | |||
}} | }} | ||
| Line 79: | Line 80: | ||
Display the set frequency on the controller, then hold the "Set" button for one second. This will set the default power on display to display the frequency. | Display the set frequency on the controller, then hold the "Set" button for one second. This will set the default power on display to display the frequency. | ||
[[Category:Task]] | |||
[[Category:Reference]] | |||
Latest revision as of 12:12, 24 May 2025
| Open Face Paint Booth | |
|---|---|
| General Info | |
| Make | Global Finishing Solutions |
| Model | DFOCG-100606-HSB-2L |
| Serial | Unknown |
| Specs | From manufacturer |
| Manual | File:Mitsubishi-a800-manual.pdf |
| Asylum Info | |
| Location | Finishing Shop |
| Rubric | Finishing Shop Training Rubric |
| Training | Sign up here |
| Testing | Sign up here |
| Restrictions | red |
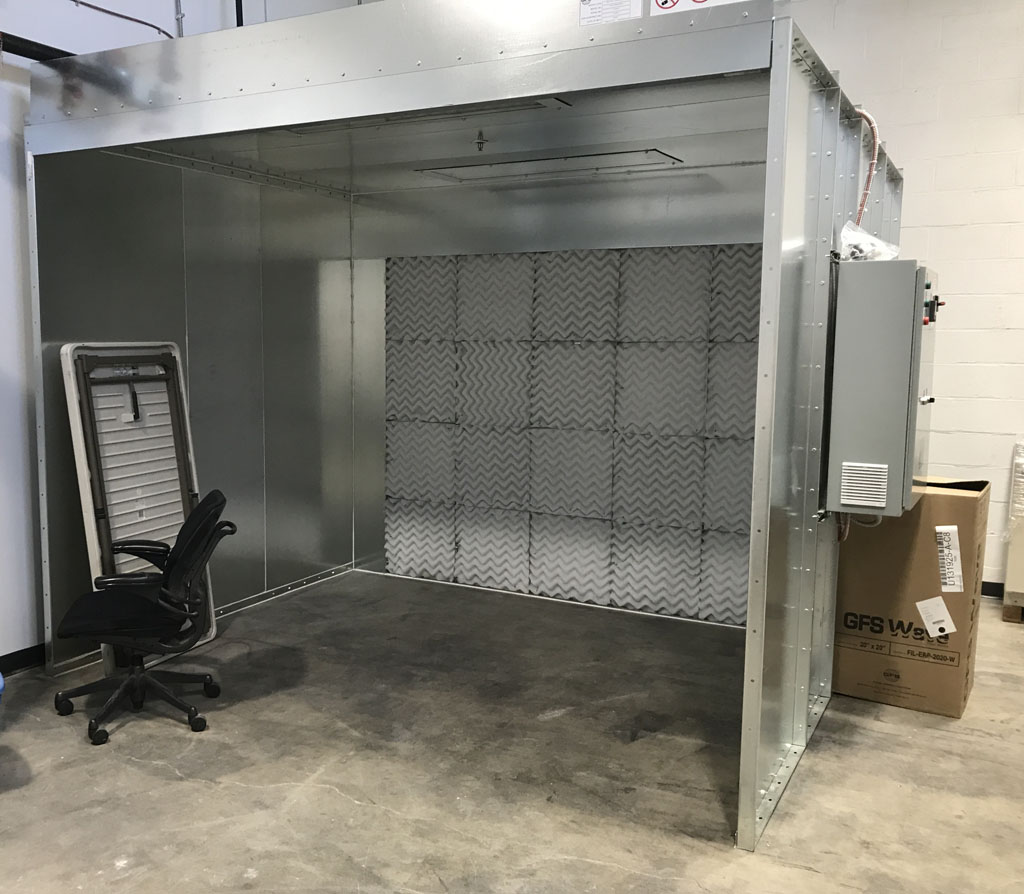
The Open Face Paint Booth, often called a spray booth, is a 10'-4" x 8'-10" x 9'-2" (W x H x D) booth with a powerful fan that ventilates to the outside. It is the heart of the finishing room.
Usage
Training and testing is required before using this tool and the Finishing Shop.
The control panel is on the side of the booth past the opening as you walk into the shop. All operating instructions are on signs posted to the right of the control panel.
How to apply finish in the booth
- Hang your work from the rolling hanger, place it on the rolling table, or put it on the floor of the booth as appropriate.
- Make sure that there is a drop cloth underneath your work.
- Start the booth.
- Put on PPE (gloves, safety glasses, respirator, coveralls) as appropriate.
- Apply your finish:
- If painting, wiping, or pouring, make sure there's a drop cloth underneath your work.
- If spraying, spray INTO the pads, not at the wall, ceiling, or floor. Rotate or reposition your work as necessary.
- Leave your work in the booth until it can be safely moved. Leave the fan running at the lowest speed while your work is still in the booth to remove any offgassing finish.
- Move your work to the drying tables as quickly as possible.
How to start the booth
- Turn the booth power from Off to On.
- Turn the booth lights from Off to On.
- Press the green START button.
- Wait for the SYSTEM ENERGIZED and EXHAUST UNIT ON lights to light up.
- Turn the dial on the speed controller to your desired speed, and then press Set. Suggested settings:
- 30: Most low VOC painting and spraying
- 40-50: Moderate VOC painting and spraying
- 60: High VOC painting and spraying
| Do not press any other button besides Set on the controller, otherwise you might accidentally change system settings. | |
|---|---|
How to shut down the booth
- Press the red STOP button.
- Wait for the SYSTEM ENERGIZED and EXHAUST UNIT ON lights to turn off.
- Turn the booth lights from On to Off.
- Turn the booth power from On to Off.
Maintenance
Typical maintenance procedures include changing the paper drop cloth on the floor of the booth, swapping out the pads, and checking the booth airflow. The shop lead will perform all maintenance -- please don't do any of this work yourself.
Email the shop lead if anything needs maintenance.
For reference, is the complete service and maintenance manual.
Common problems
Overspray
Clean up all overspray promptly with a solvent compatible with your finish. Overspray can build up and create layers of uncured finish, which becomes a fire hazard.
Leaks
Clean up all leaks promptly. If you're pouring epoxy and the leaks have already set and there's no dropcloth underneath, notify the shop lead, let the epoxy cure completely, and then chip or grind any epoxy that's bonded to the concrete.
The controller doesn't display the set frequency (Hz) on startup
Notify the shop lead when this happens -- don't attempt this procedure yourself. If you make a mistake, you can set controller parameters that cause the fan to malfunction.
Display the set frequency on the controller, then hold the "Set" button for one second. This will set the default power on display to display the frequency.
