BlackCat Laser Operator's Manual: Difference between revisions
From Artisans Asylum Wiki
Acharlwood (talk | contribs) mNo edit summary |
Acharlwood (talk | contribs) mNo edit summary |
||
| Line 195: | Line 195: | ||
[[Category:Laser_Cutters]] | [[Category:Laser_Cutters]] | ||
[[Category:Task]] | |||
Revision as of 13:47, 9 February 2024
Use the Laser Operation Checklist every time you use this tool.
Safety
Fire Safety
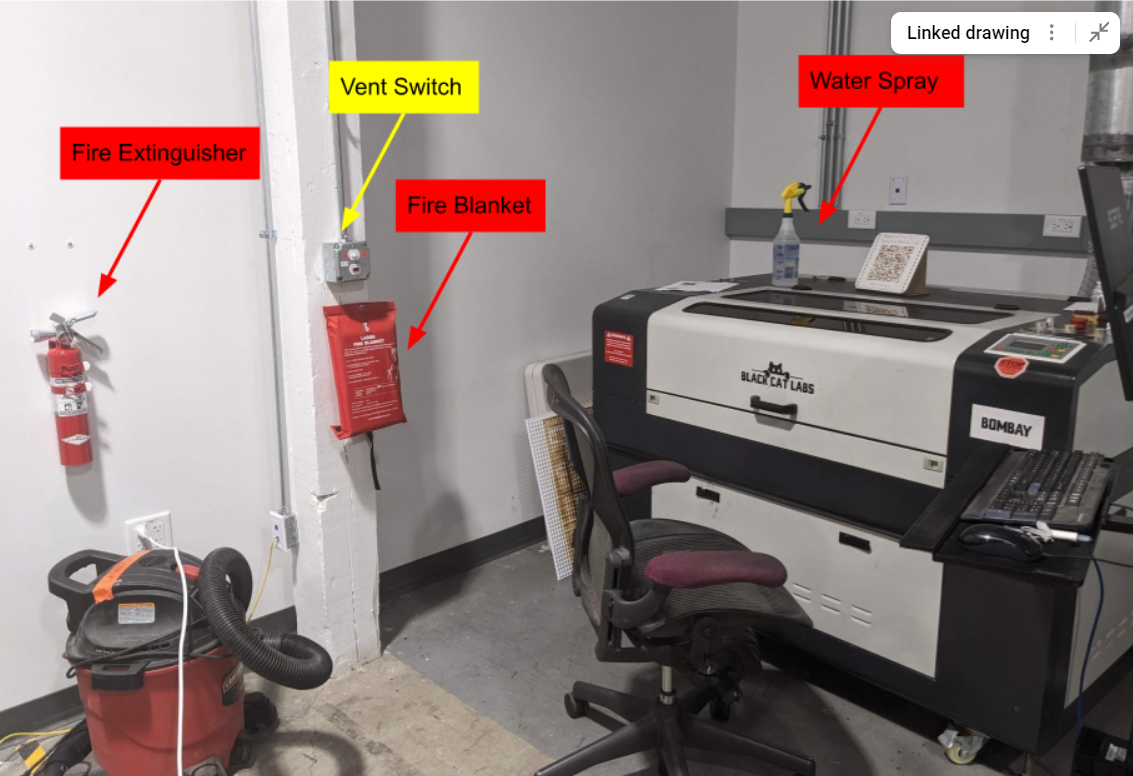
- Flame right where the laser is cutting is ok.
- Flame anywhere else is a problem.
- Hit Pause.
- Move the laser head away from the flame.
- Open the machine.
- Spray the flame with water.
- If needed, use the fire blanket.
- If needed, use the fire extinguisher.
- The small one by the lasers is electronics safe. Use the whole thing at once; don’t be shy!
- The second fire extinguisher is by the door.
- Report any and all fires to staff and digifabshop@artisansasylum.com.
Materials Safety
All materials listed in the Lightburn Materials Library file are approved to cut. These are suggested starting points, not known good settings! Do test cuts and tweak from there.
- Do not cut anything that would produce toxins, carcinogens, or poisonous gasses.
- No PVC.
- Don’t cut anything that will make a mess of the machine -- food, for example.
Want to cut a material that’s not in the lightburn Materials Library? Email the MSDS to the shop
Materials List as of Oct 2023
- Acrylic
- Anodized Aluminum
- Brick
- Cardboard - Corrugated
- Cardboard Mat Board
- Ceramark
- Ceramic
- Chip Board
- Cloth
- Cork
- Delrin
- EPDM Rubber
- Glass
- Hardwood
- Leather
- MDF
- Magnetic Sheet
- Marble/Granite
- Mylar
- Open Celled Foam
- PETG
- Painted Metal
- Painted Wood
- Paper
- Pine
- Plywood - Baltic Birch
- Powder Coated Aluminum
- Rubber Stamp
- Sign Foam
- Silicone
- Stone
- Styrene
Startup Checklist
- Is the bed clean of debris?
- Use the shop vac to clean it, if necessary.
- Check that these items are where they're supposed to be:
- Water spray
- Fire blanket
- Fire extinguisher
- Turn the vent in.
- The vent switch is on the wall.
- Turn on the machine.
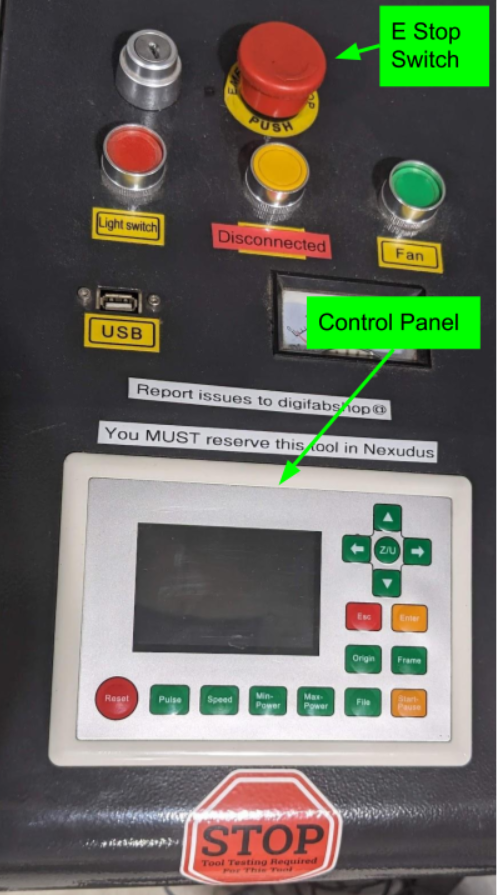
- Twist the E-stop button to power on.
- Is the chiller on?
- Check for the green light on the chiller.
- Is the air compressor on?
- Check for vibration from the air compressor.
- Are the mirrors clean?
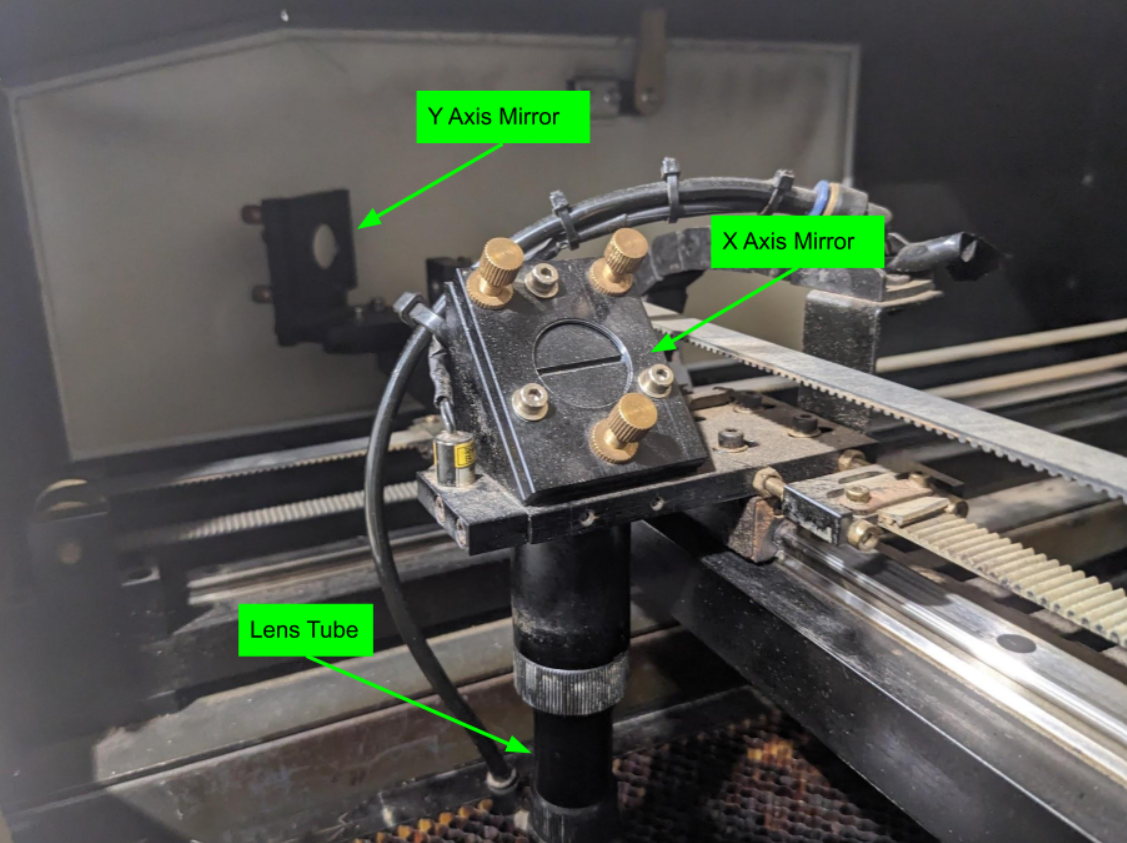
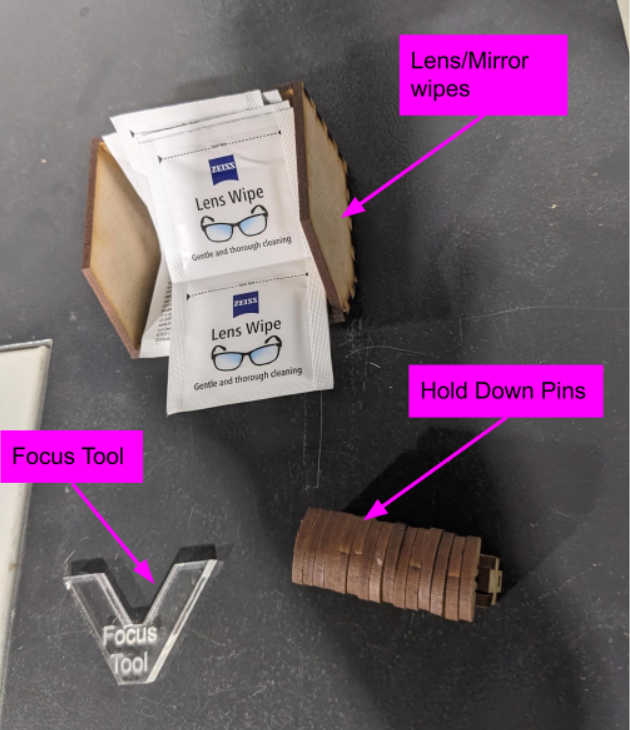
- Visually inspect the X and Y axis mirrors. Clean with lens wipes if dusty or dirty.
- Is the lens clean?
- Look through the X Axis mirror to view the amber lens. If it looks dirty, clean the lens.
- Add materials and hold down (if needed).
- Focus the laser.
- Set origin.
- Send a job to the laser from Lightburn.
- Frame
- Start
Shutdown Checklist
- Remove materials.
- Clean the bed.
- Shutdown the machine.
- Turn off the vent, as long as no other machines are in use.
- Clean up the shop.
Lightburn Software
Review tutorials #2 and #3 to get started.
Control Panel Operation
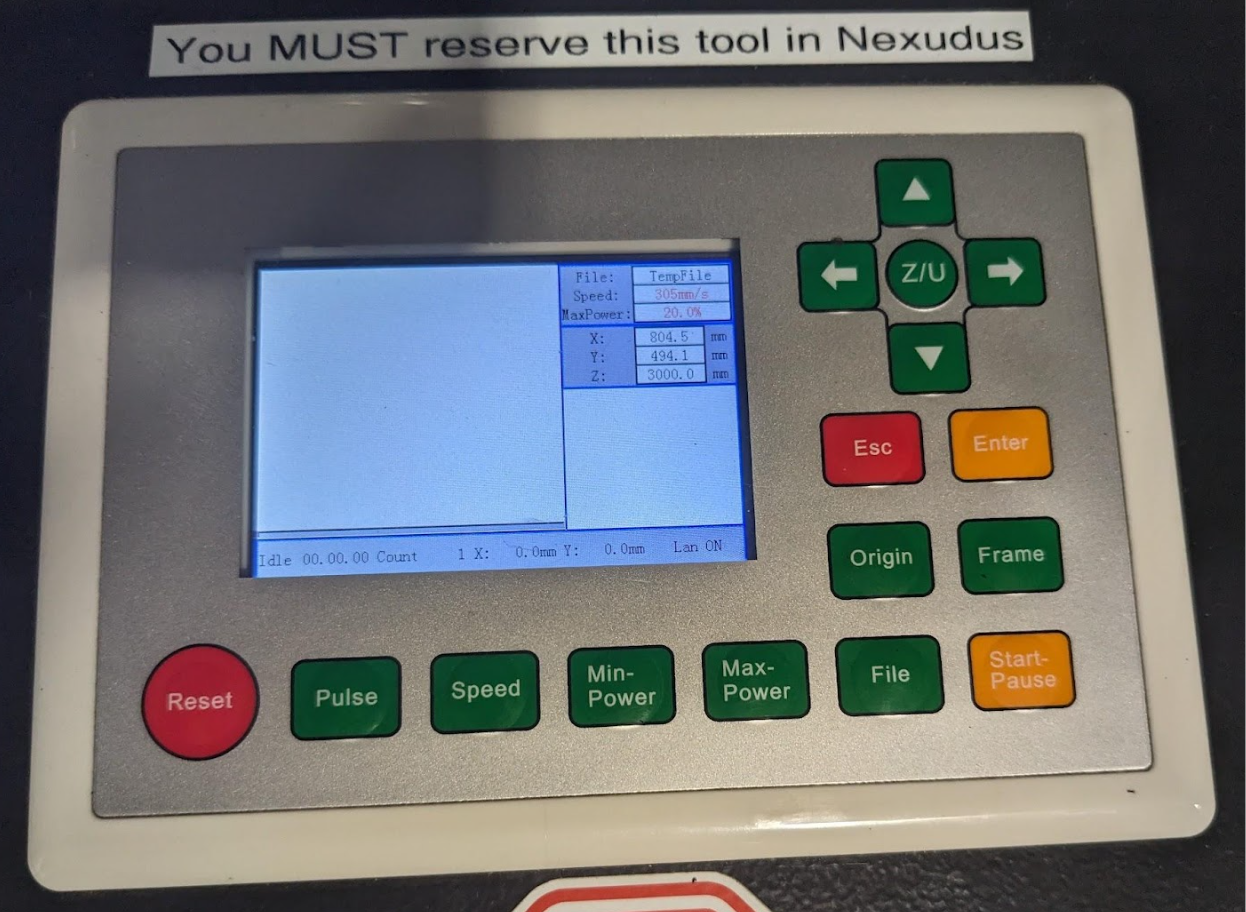
| Button | Description |
|---|---|
| Navigation | Use the arrow keys to jog the laser head at whatever speed is set in the speed menu. |
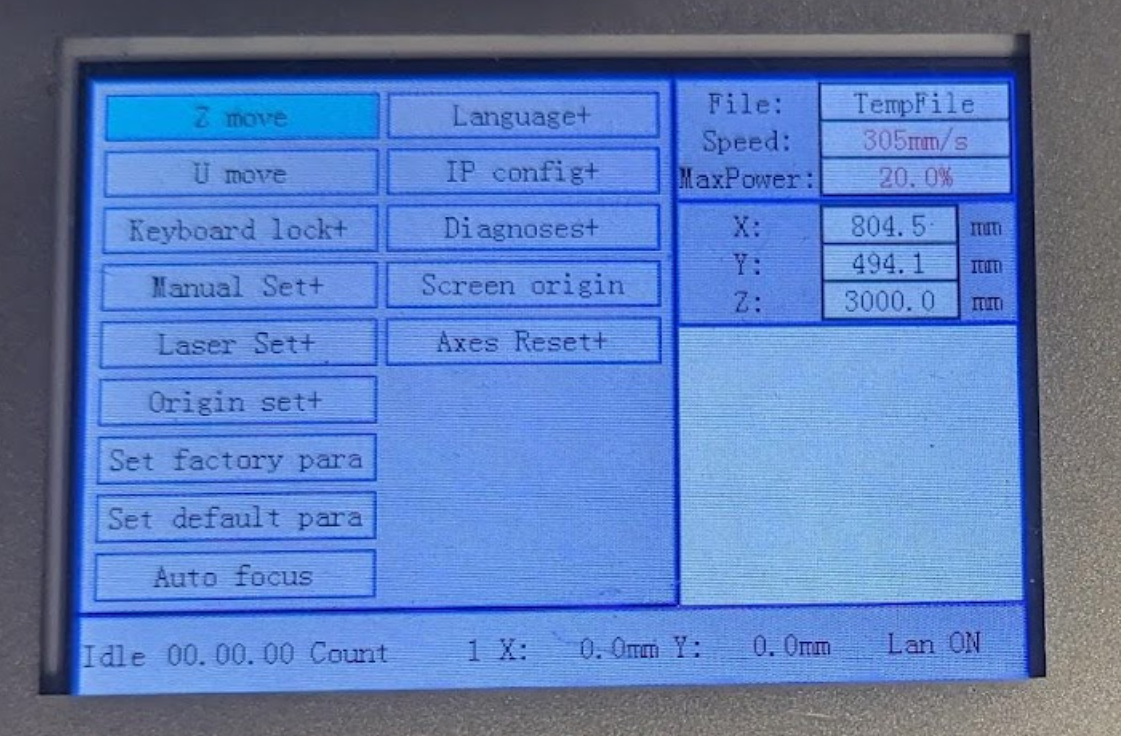
| Menu | The Z/U button will enter the menu.
Up and down arrows will select different menu options. Enter will activate sub menus. Esc will exit. |
| Z Move | This is the first option in the menu, and the only one you need in regular operation.
With Z Move selected, the left and right arrows will move the machine bed up and down. Use this to set the focus. |
| Esc | Escape the current menu without saving changes, or, if you're at the main screen, return the laser head to the Origin location.
If a cut is in progress and paused, the Esc key will quit the current operation. |
| Enter | Confirm the current option. |
| Origin | Set the Origin to the current position of the laser. |
| Frame | Move the laser head in a bounding box around the current file. |
| Start/Pause | Start the current file, pause the operation in progress, or restart a paused operation. |
| File | Enter the file menu. This will allow you to select the active file or delete old files in the laser memory. |
| Max Power | Set the maximum power of the test pulse or live adjust Max Power of a cut in progress (not recommended). |
| Min Power | Set the minimum power of the test pulse or live adjust Min Power of a cut in progress (not recommended). |
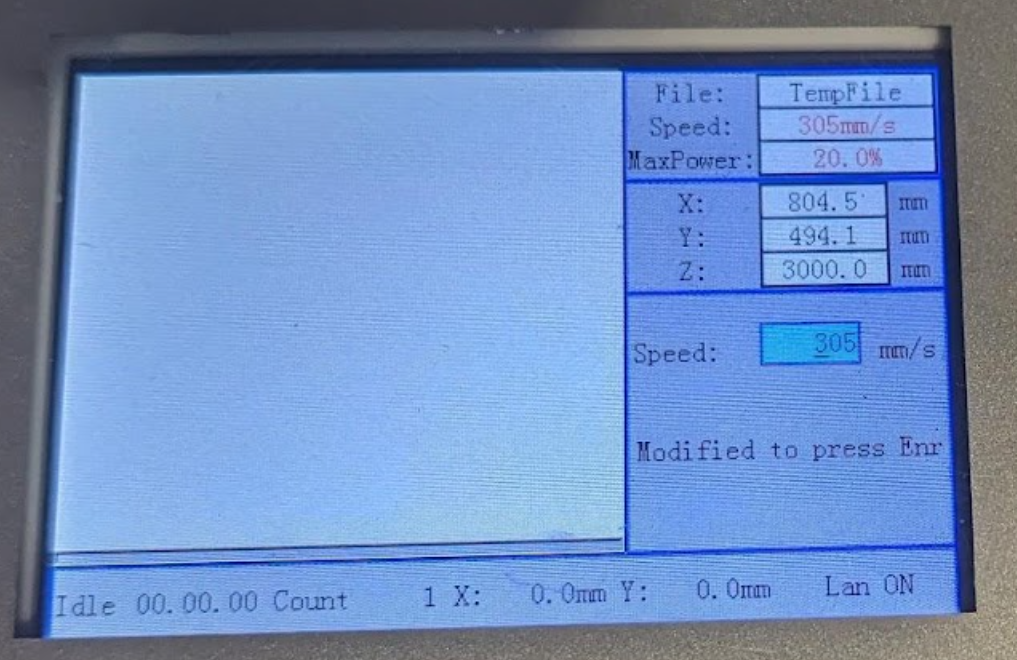
| Speed | Adjust the jog and frame speed:
|
| Pulse | Fire a test pulse. Uses max power setting to determine power. and fires at the current position. This won’t work if the door is open! |
| Reset | Reset the controller (you shouldn’t need to do this ever). |
Focusing
- Press Z/U to enter the menu.
- Z Move is the first option.
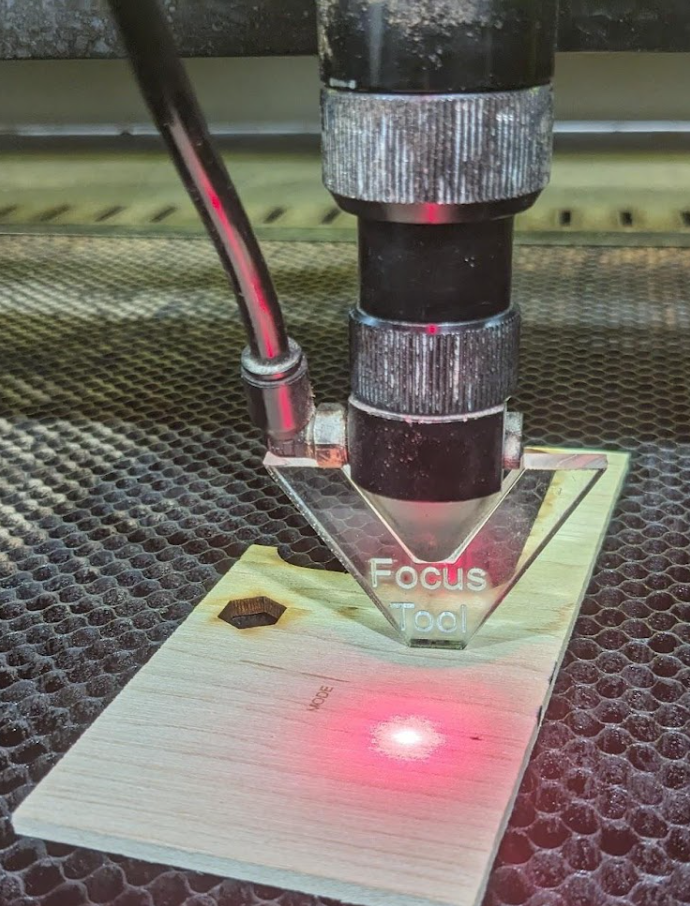
- Raise or lower the bed as needed until the focus tool fits precisely between the air nozzle and the material surface.
- The tool should be able to slide easily in and out of the gab, but when it is directly below the nozzle there should be no up and down movement.
Cleaning the lens
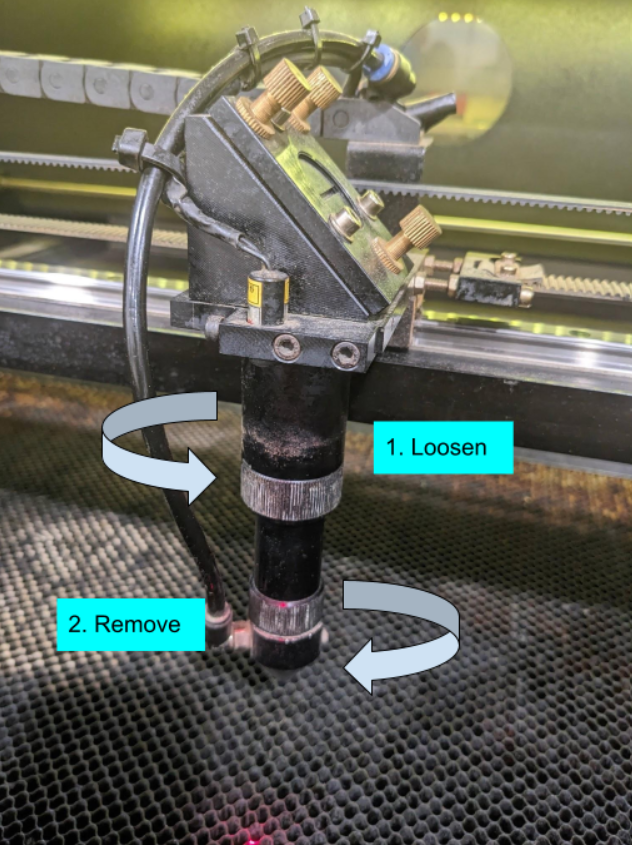
- Loosen the top knurled ring so the lens tube can spin freely.
- Unscrew the air nozzle from the lens tube by holding the air nozzle in place and spinning the lens tube.
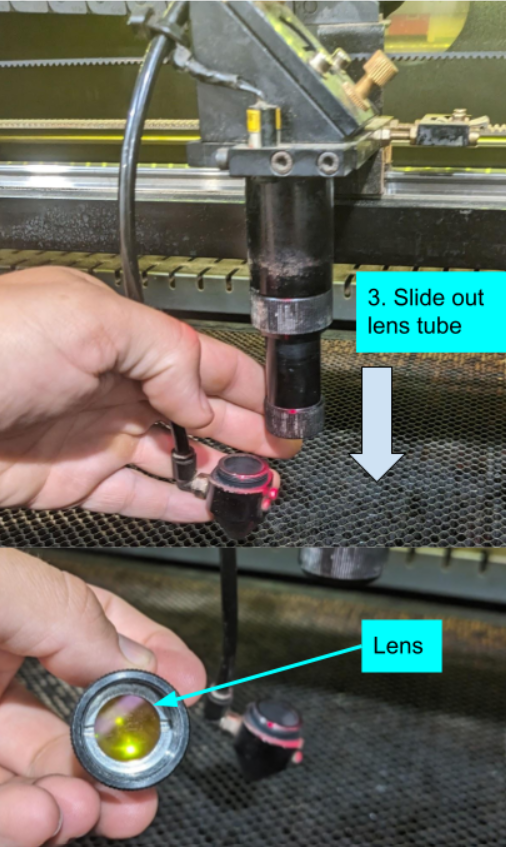
- Slide the lens tube down to remove it from the laser head.
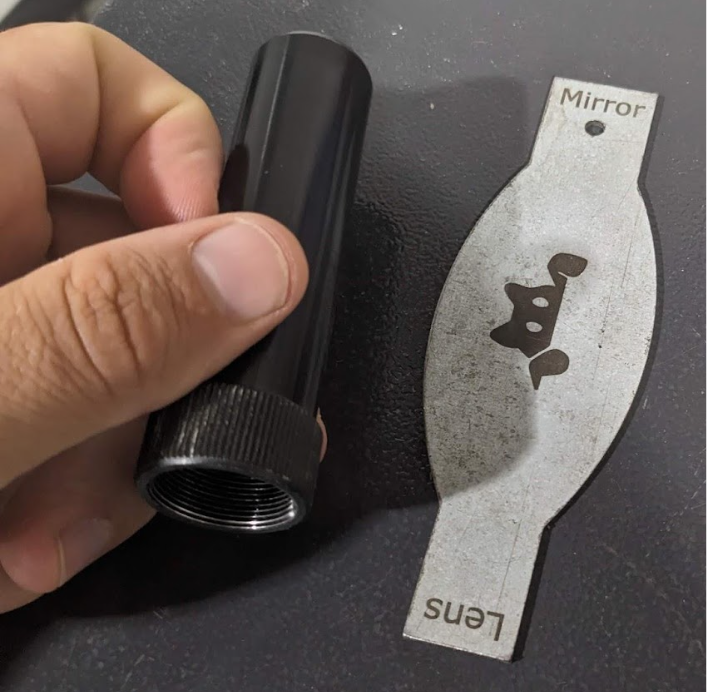
- Use the lens removal tool to unscrew the retaining ring.
- Open a cleaning cloth over the lens tube and flip the lens out into the cloth.
- Do not touch the lens with your bare hands.
- Clean the lens by gently wiping away any debris.
- Reverse this procedure to reinstall the lens.
- When placing the lens back into the tube note that one side is flat and the other is convex (slightly domed). The flat side goes against the retaining ring and the convex side goes down the tube.
- Make sure that no more than 1 inch of the lens tube is sticking down from the upper knurled ring to prevent the air nozzle from crashing into the back of the machine on startup.
